If you want to master how to slick back hair, this guide covers everything you need to know. Last updated: February 2026 by Marcus Chen-Williams, Founder & Editor-in-Chief
The slick back is one of those hairstyles that has survived every decade for a reason. It looks sharp in a boardroom, it works at a bar, and it translates across practically every hair type if you know what you are doing. The problem is that most guides treat it as a one-product, one-technique move: apply pomade, comb back, done. That works if you have medium-density straight hair. It fails everyone else. Here is how to slick back hair properly, with product and technique adjustments for thick hair, fine hair, wavy hair, curly hair, and everything in between.
I have tested this style across my own mixed-texture hair (3A curls on top, straighter on the sides) and across our editorial team with hair types ranging from 1A to 4A. The fundamentals stay the same. The product and prep change. This guide covers both.
If you only read one section, jump to the step-by-step technique. If you want to match the right variation and product to your hair type, read the full guide.
How Long Does Your Hair Need to Be?
The slick back requires length on top. There is no workaround for this. The hair on top needs to be long enough to comb from the front hairline past the crown and lay flat (or textured) in the opposite direction of how it naturally falls.

| Hair Length (Top) | Slick Back Viability | Notes |
|---|---|---|
| Under 3 inches | Not enough length | Front hair will not reach past the crown |
| 3-4 inches | Short slick back possible | Needs very strong hold product; textured slick back works best |
| 4-6 inches | Ideal range | Enough length for all variations; the sweet spot for most men |
| 6-8 inches | Full slick back with volume | Great for classic and voluminous styles; heavier product may be needed |
| 8+ inches | Long slick back | Requires stronger hold; weight of hair can pull the style down |
The sides can be any length. A slick back works with a high fade, a low fade, a taper, an undercut, or sides left at medium length and combed back along with the top. The top is the non-negotiable: four to six inches minimum for a clean result.
If you are growing your hair out and not quite at four inches yet, be patient. Trying to force a slick back with insufficient length results in hair that pops up at the front or refuses to stay behind the crown. Give it another month.
What You Need
The slick back is a low-tool hairstyle. You need four things.
| Tool / Product | Purpose | What to Look For |
|---|---|---|
| Fine-tooth comb or barber comb | Directing hair backward in even strokes | Sturdy teeth that do not flex; carbon or acetate preferred |
| Blow dryer with concentrator nozzle | Setting direction and building volume | At least 1875 watts; the concentrator nozzle is essential |
| Primary styling product | Hold and finish (see Section 6 for product by hair type) | Matched to your hair texture and desired finish |
| Finishing product (optional) | Extra hold or shine after blow dry | Light pomade, hairspray, or shine spray |
A round brush is helpful for adding volume during the blow dry step, especially for men with fine or flat hair. But it is not required. Your comb handles the directional work. The round brush is for lift.
How to Slick Back Hair: Step by Step
This is the core technique. I will note where to adjust based on hair type, but the sequence is the same for everyone.
Step 1: Start With Towel-Dried Hair
Wash your hair or wet it thoroughly in the shower. Towel dry until your hair is damp but not dripping. You want about 70% dry. Hair that is too wet dilutes the product and makes it slide off. Hair that is fully dry does not distribute product evenly and resists being reshaped.
The towel-dry step matters more than people think. Squeeze the water out with the towel rather than rubbing aggressively. Rubbing creates frizz, especially on wavy and curly hair types. Squeeze, press, and pat.
Step 2: Apply Your Primary Product
Scoop or squeeze your product into your palms. The amount varies by product type and hair density:
| Hair Density | Product Amount | Application Note |
|---|---|---|
| Fine / thin hair | Dime-sized amount | Too much product weighs fine hair down and kills volume |
| Medium density | Nickel-sized amount | Standard starting point; add more if needed after blow dry |
| Thick / coarse hair | Quarter-sized amount | Thick hair absorbs product; you may need a second application |
| Curly / textured hair | Quarter to half-dollar sized | Curls need more product to overcome curl memory |
Rub the product between your palms until it is evenly distributed and slightly warm. Then work it through your hair starting at the back of the head, moving to the sides, and finishing at the front. Starting at the back ensures even distribution; starting at the front overloads the most visible section.
Run your fingers through your hair from front to back in the direction you want the hair to lay. This is not the final combing. This is just getting the product distributed and giving the hair its initial backward direction.

Step 3: Comb Back
Take your fine-tooth comb and start at the front hairline. Place the teeth at the root and comb straight back toward the crown in smooth, even strokes. Work in sections: center first, then left side, then right side.
For the sides, comb backward and slightly upward toward the crown. The sides should blend into the top, not separate from it. If the sides are faded or undercut, skip them and focus only on the top section.
At this point, your hair should be combed back and flat against your head with visible comb lines. It will look wet and flat. That is fine. The next step adds the dimension.
Step 4: Blow Dry for Volume and Hold
This is the step that separates a good slick back from a great one. The blow dryer does two things that product alone cannot: it sets the direction into the hair shaft, and it creates volume at the root.
- Attach the concentrator nozzle. This focuses the airflow into a narrow stream rather than blasting in all directions. Precision matters here.
- Set the dryer to medium heat, high speed. High heat can damage hair over time. Medium heat with strong airflow gives you the same directional hold with less risk.
- Start at the front. Place the nozzle about four inches from your scalp, pointing backward. Direct the airflow from the front hairline toward the crown. Simultaneously comb or brush the hair in the same direction. The heat, airflow, and combing all work together to train the hair backward.
- For volume: Lift the hair at the roots with your comb or a round brush while directing the dryer upward and backward. This creates lift at the front and crown, giving the slick back that structured, voluminous shape rather than a flat, greasy look.
- Work section by section. Front, then left, then right, then crown. Spend about 30 seconds per section.
- Finish with a blast of cool air. Switch the dryer to the cool setting and run it over the styled hair for 10 to 15 seconds. Cool air closes the hair cuticle and locks in the shape you just created with the heat.
The entire blow dry takes two to three minutes. You are not drying your hair from soaking wet; you started with towel-dried hair. This is a styling step, not a drying step.
Step 5: Apply Finishing Product
After the blow dry, your hair should hold its slicked-back shape on its own, with some volume at the front and crown. Now add a finishing product to lock it in and set the final look.
Use a small amount, roughly half of what you used in Step 2. Warm it between your palms and smooth it over the surface of your hair, following the direction of the style. Do not dig into the roots again or you will disturb the volume you just built.
For a high-shine finish: Use a water-based pomade. Suavecito Pomade Original Hold gives a classic wet look that washes out easily.
For a natural or matte finish: Use a clay or matte paste. Baxter of California Clay Pomade gives hold without shine, which reads as more modern and casual. Mastering how to slick back hair takes practice but delivers great results.
For extra hold on thick hair: Use a small amount of firm-hold gel as a finisher over the pomade base. Got2b Ultra Glued Invincible Styling Gel is strong enough to keep thick, coarse hair in place all day. Mastering how to slick back hair takes practice but delivers great results.
Step 6: Final Comb and Tidy
Run your comb through one final time to smooth everything into place. Clean up the sides and the hairline. If you see any flyaways at the crown, press them down with your palm or a dab of product on your fingertips.
Total time from towel dry to finished style: five to eight minutes. With practice, you can cut this to under five.
Slick Back Variations
The basic technique stays the same across all variations. What changes is the cut, the product, and how much texture or shine you introduce. Here are the five main variations, with guidance on who each one works best for.
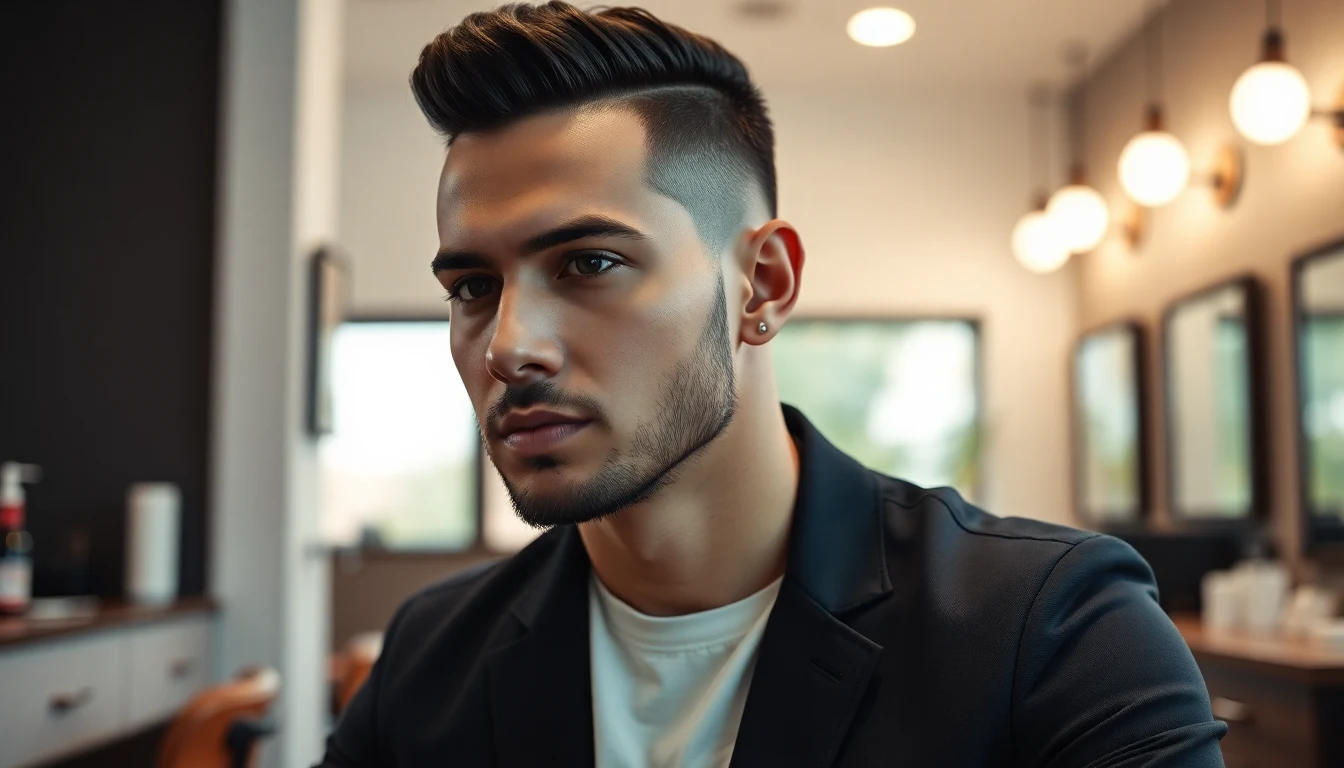
1. Classic Slick Back
Hair combed straight back from the forehead with a smooth, shiny finish. Medium to high shine. Clean lines. This is the Don Draper, the Gordon Gekko, the “I have a meeting in 20 minutes” slick back.
Best for: Straight to slightly wavy hair (Type 1A to 2A). Oval, square, or diamond face shapes. Professional environments where polished appearance matters.
Product: Water-based pomade with medium to high shine. Layrite Super Hold Pomade is a solid choice: strong hold, good shine, washes out clean.
Doesn’t work as well for: Very fine hair (the shine emphasizes thinness) or very thick curly hair (too much product needed to flatten it, resulting in a heavy look). For more guidance, American Academy of Dermatology provides expert resources on skin and hair care.

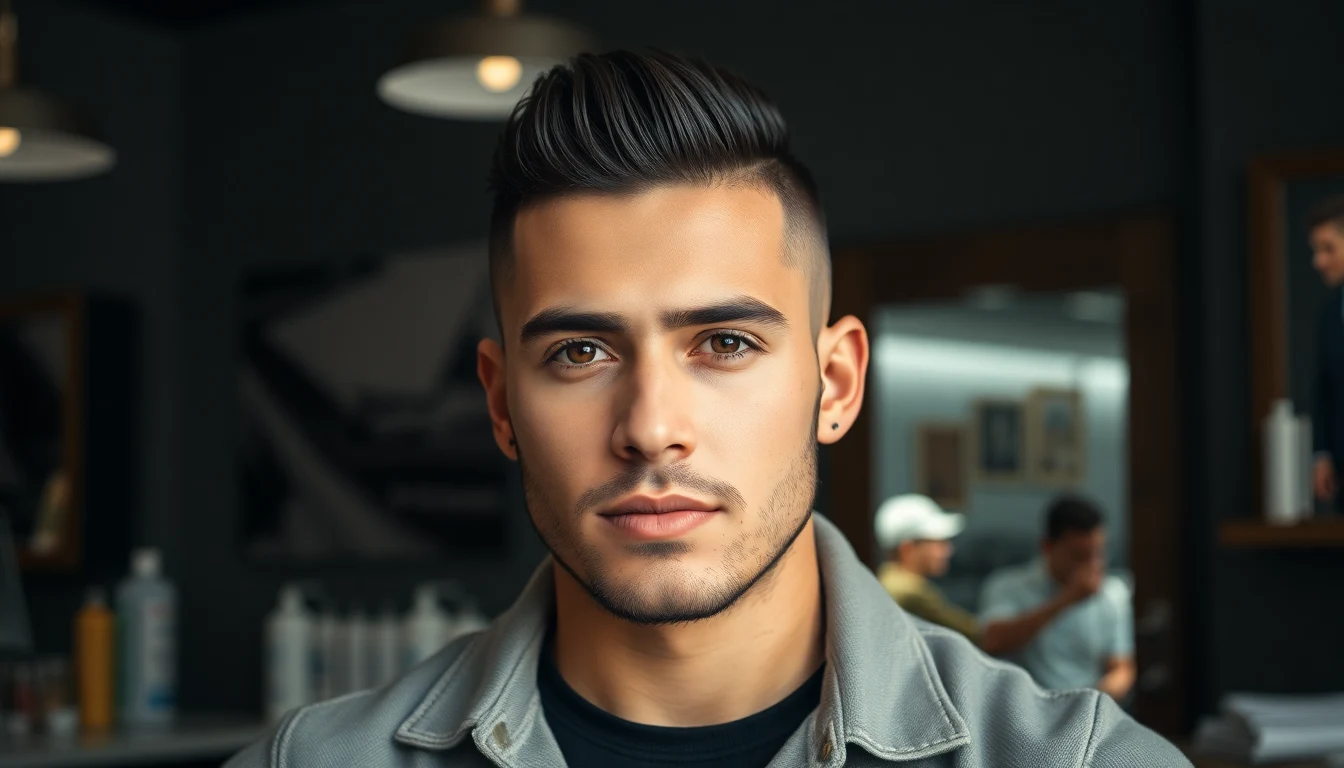
2. Slick Back Undercut
The top is slicked back while the sides are buzzed short (usually a #1 or #2 guard), creating a hard disconnect between the styled top and the cropped sides. No fade, no blend. Just a sharp line.
Best for: Men who want a modern, edgy look with maximum contrast. Works across hair types because the sides are removed from the equation. Particularly popular in Korean men’s hairstyles and Asian hair styling where the thick, straight top hair creates a dramatic shape against the buzzed sides.
Product: Strong hold pomade or clay. The product needs to hold the top hair’s weight without the side hair blending into it. Hanz de Fuko Claymation gives extreme hold with a matte finish that pairs well with the clean lines of an undercut.
What to tell your barber: “I want a disconnected undercut. Number [1 or 2] on the sides with no blend into the top. Leave the top at [your preferred length].” The disconnect is the defining feature. If they blend the sides into the top, it becomes a fade, not an undercut.
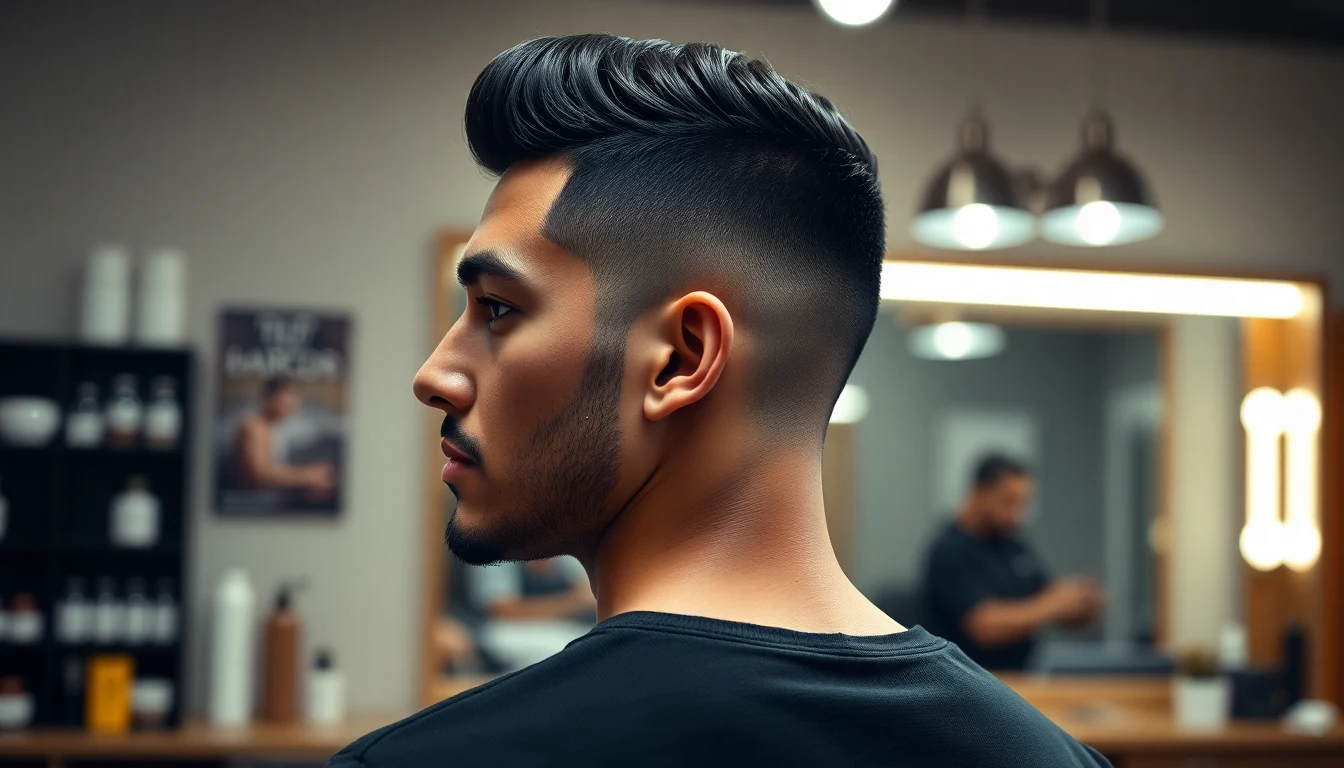
3. Slick Back Fade
The top is slicked back while the sides are faded, blending gradually from skin or very short at the bottom to the natural length at the top. Unlike the undercut, there is no hard line. The transition is smooth.
Best for: Almost everyone. The fade is the most universally flattering side treatment, and it pairs naturally with a slicked-back top. This is the variation I recommend to anyone trying a slick back for the first time. It works with straight, wavy, and even curly hair on top. It works across face shapes. And the fade itself can be a low fade for subtle elegance, a high fade for boldness, or a taper for the most conservative version.
Product: Depends on hair type (see Section 6). Any pomade, clay, or gel works. The fade handles the sides; your product handles the top.
For men with thicker, more textured hair, the slick back fade is often the best entry point. Our Latino men’s haircuts guide covers additional fade-based styles that complement this look if you want to explore further.
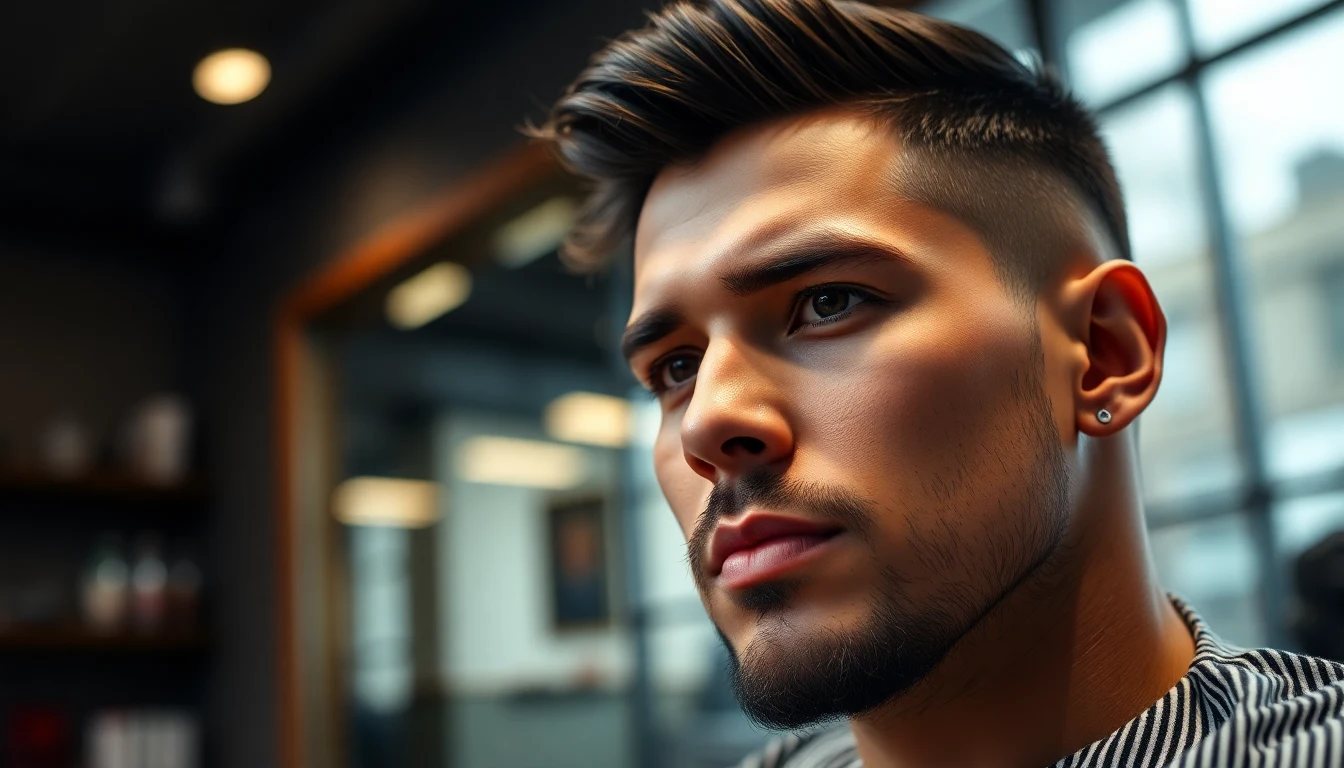
4. Textured Slick Back
The hair is directed backward but not smoothed flat. Instead, you leave natural texture visible: finger grooves, wave patterns, or slight separation between sections. The finish is matte or low-shine, not glossy.
Best for: Wavy hair (Type 2A to 2C), thick hair that resists being flattened, or anyone who wants a more relaxed, modern interpretation of the slick back. This variation is more casual and works just as well with jeans and a T-shirt as it does with a suit.
Product: Matte clay or texturizing paste. BluMaan Original Styling Meraki gives medium hold with zero shine, perfect for the “I did this on purpose but I’m not trying too hard” aesthetic.
Technique adjustment: Skip the fine-tooth comb in Step 3. Instead, use your fingers to push the hair back. This preserves the natural texture. Blow dry as usual, but use your fingers or a wide-tooth comb instead of a fine-tooth one.
5. Messy Slick Back
The most casual version. Hair is pushed back loosely with visible strand separation, some pieces falling forward, and an intentionally imperfect shape. Think “I ran my hands through my hair once and it landed like this.” The reality is it takes just as much product as the classic version. It just looks effortless.
Best for: Longer hair (six inches or more), wavy or curly hair, creative or casual environments. Not ideal for very formal settings.
Product: Light hold cream or sea salt spray as a base, followed by a small amount of matte paste. Gatsby Moving Rubber Grunge Mat is designed for this exact purpose: movement, texture, and a lived-in finish.
Technique adjustment: Apply product to damp hair, push back loosely with your hands, blow dry on low heat, and do not touch it again. The less you comb and fuss, the better this variation looks.
How It Works Across Hair Textures
Here is the thing nobody tells you about the slick back: every tutorial assumes you have medium-thickness straight European hair. If you have thick East Asian hair, fine Scandinavian hair, wavy South Asian hair, or loose curls, the standard advice leaves you with a style that falls apart by lunch. This section fixes that. Understanding how to slick back hair is key to a great grooming routine. Understanding how to slick back hair is key to a great grooming routine.
Straight, Thick Hair (Type 1A-1B, High Density)
Common in East Asian, South Asian, and some Mediterranean hair types. The challenge: thick straight hair has a mind of its own. It wants to stand up, not lay back. Individual strands are strong and resist being redirected.

Product: Strong hold pomade. Layrite Super Hold or Uppercut Deluxe Pomade. You need the hold to overpower the hair’s natural direction.
Technique adjustment: Blow dry is critical. The heat relaxes the hair shaft and trains it backward. Without blow drying, thick straight hair springs back to its natural fall within an hour. Use a round brush during the blow dry to direct the hair. Expect to use more product than the recommended nickel-sized amount; start with a quarter-sized scoop and add more if needed.
If you have thick, coarse Asian hair specifically, the Asian men’s hairstyles guide covers additional styling strategies for thick straight textures, including how to prep the hair the night before for easier styling in the morning.
Straight, Fine Hair (Type 1A-1B, Low Density)
The challenge: fine hair lays flat too easily, showing scalp and looking thin when slicked back with heavy product. The style can look greasy instead of polished.
Product: Lightweight gel or mousse. American Crew Firm Hold Styling Gel gives strong hold without the weight of a pomade. Avoid heavy oil-based pomades. They will make fine hair look stringy and clumped together.
Technique adjustment: Volume is your priority. During the blow dry step, spend extra time lifting at the roots with a round brush. Direct the dryer upward at the root before pushing back. This creates the appearance of fullness. Use a volumizing spray or powder at the roots before applying product if your hair is very fine. The goal is a slick back that looks full, not flat.
Wavy Hair (Type 2A-2C)
Wavy hair is actually ideal for the slick back because the natural wave adds body and movement that straight hair lacks. The challenge is controlling frizz and maintaining a defined direction.
Product: Medium hold pomade or cream. Suavecito Pomade Original Hold is a strong option. It tames the wave without flattening it completely, giving you that textured slick back look naturally.
Technique adjustment: Embrace the wave. Do not try to comb it perfectly smooth unless you want the classic variation. The textured slick back (see Section 4.4) is built for wavy hair. Comb back while damp, blow dry to set the direction, and let the wave do the rest. A small amount of anti-frizz serum before the pomade helps in humid climates.
Men with wavy hair across South Asian and Middle Eastern backgrounds will find the slick back particularly easy to execute. The natural body in the hair provides structure that straight hair needs product to create. For more wavy and textured style ideas, see our Indian men’s hairstyles guide.
Curly Hair (Type 3A-3C)
The slick back absolutely works with curly hair. It just looks different. You have two approaches: straighten first and comb back for a smooth finish, or keep the curl and direct it backward for a curly slick back.
Option A: Blow-out first. Use a blow dryer and round brush to stretch the curls straight before applying product and combing back. This gives you a classic smooth slick back, but it requires more time (10 to 15 minutes of blow drying) and the style may revert in humidity or rain.
Option B: Curly slick back. Apply a strong hold gel to wet hair, comb or finger-direct the curls backward, and let them set in that direction. Got2b Ultra Glued Invincible Styling Gel has the hold strength to keep curls directed backward all day. The result is a slick back with visible curl texture, which frankly looks great and reads as more modern than the flat version.
For curly-haired men exploring styles that blend the slick back with other cuts, our best curly hair products for men roundup covers the best gels, creams, and pomades across curl types.
Tightly Coiled Hair (Type 4A and Above)
Tightly coiled textures require a blow-out before a traditional slick back is possible. The curl pattern is too tight to simply comb back with product. However, a blow-out followed by a strong hold pomade or gel can produce a clean slicked-back look with unique texture that straight-haired men cannot replicate.
Product: Strong hold gel or pomade applied after blow-out. A leave-in conditioner or heat protectant before blow drying is non-negotiable to prevent heat damage.
Technique: Blow dry on medium heat using a comb attachment (also called a pik or pick attachment) or a paddle brush. Stretch each section from root to end. Once the hair is stretched and mostly straight, apply pomade and comb back. The natural volume at the root will give you a slick back with height that thinner-haired men would envy.

Important note: Regular heat styling on Type 4 hair requires heat protection and conditioning. If you plan to wear a blow-out slick back frequently, invest in a quality heat protectant and deep condition weekly to prevent dryness and breakage.
Products for the Slick Back, by Hair Type
After testing dozens of products across our team, here are the specific recommendations organized by what your hair actually needs.
| Hair Type | Best Product Type | Recommended Product | Hold | Finish | Est. Price |
|---|---|---|---|---|---|
| Thick straight | Strong hold pomade | Layrite Super Hold Pomade | Strong | Medium shine | $18-22 |
| Fine straight | Firm hold gel | American Crew Firm Hold Gel | Firm | Low shine | $12-16 |
| Wavy (2A-2C) | Medium pomade | Suavecito Pomade Original | Medium | High shine | $12-15 |
| Curly (3A-3C) | Strong gel or heavy pomade | Got2b Ultra Glued Gel | Strong | High shine | $6-9 |
| Coily (4A+) | Strong pomade over blow-out | Uppercut Deluxe Pomade | Strong | Medium shine | $22-26 |
| Textured look (any type) | Matte clay | Baxter of California Clay Pomade | Medium | Matte | $20-24 |
| Messy look (any type) | Matte wax/rubber | Gatsby Moving Rubber Grunge Mat | Medium | Matte | $8-12 |
| Strong matte hold | High-performance clay | Hanz de Fuko Claymation | Strong | Matte | $22-26 |
| All-rounder | Hybrid clay-pomade | BluMaan Original Styling Meraki | Medium-Strong | Low shine | $20-24 |
A note on product types:
- Pomade (water-based): Provides hold and shine. Washes out easily. Best for classic, shiny slick backs. Does not survive heavy rain or extreme humidity.
- Pomade (oil-based): Stronger hold, more shine, but harder to wash out. Builds up over time. Better for men who restyle throughout the day.
- Gel: Strongest hold, highest shine, dries stiff. Best for fine hair that needs maximum control. Can flake if applied to dry hair.
- Clay: Medium to strong hold, matte finish, adds texture. Best for the textured slick back. Does not provide shine.
- Cream: Light hold, natural finish, flexible. Best for the messy slick back or as a blow dry prep product.
Professional vs. Casual Slick Back
The slick back scales across formality levels. Here is how to adjust.
Professional / Formal
- Finish: Medium to high shine, smooth surface
- Sides: Taper fade or neat sides combed back
- Product: Water-based pomade (Layrite, Suavecito)
- Technique: Fine-tooth comb, no visible finger texturing, clean hairline
- Vibe: Controlled, polished, intentional
Casual / Everyday
- Finish: Matte to low shine, some texture visible
- Sides: Fade, undercut, or natural length
- Product: Clay, cream, or matte paste
- Technique: Fingers over comb, slight imperfection is fine, a few strands can fall forward
- Vibe: Effortless, relaxed, modern
Night Out / Event
- Finish: High shine with volume
- Sides: Fresh fade, clean lineup
- Product: Pomade base + hairspray finish for all-night hold
- Technique: Maximum blow dry volume, double product application, hairline groomed precisely
- Vibe: Sharp, high-effort, camera-ready
The ability to shift the same fundamental hairstyle across these contexts is what makes the slick back so enduring. A guy with a textured slick back on Monday can polish it into a classic slick back for a Friday event without visiting the barber. The cut does not change. The product and technique do.
Common Mistakes (and How to Fix Them)
These are the issues I see most often when men try the slick back for the first time. When it comes to how to slick back hair, technique matters most.
1. Skipping the Blow Dry
Product alone gives you maybe 60% of the hold and 30% of the volume that a blow dry delivers. The heat shapes the hair. It is not optional for an all-day hold. If you are in a rush, even 60 seconds of blow drying makes a meaningful difference. When it comes to how to slick back hair, technique matters most.
2. Using the Wrong Product for Your Hair Type
Heavy pomade on fine hair looks greasy and flat. Lightweight gel on thick coarse hair fails by midday. Match the product to the hair. See the table in Section 6. This is the single most common reason slick backs “don’t work” for someone.
3. Applying Product to Dry Hair
Product distributes unevenly on dry hair, creating patches of hold and patches of nothing. Always apply to towel-dried, damp hair. The moisture helps the product spread and activate.
4. Over-Applying Product
More product does not mean more hold. It means heavier, greasier, and more likely to look dirty by the end of the day. Start with less than you think you need. You can always add more after the blow dry, but you cannot remove excess without re-washing.
5. Fighting Your Natural Texture
Wavy and curly-haired men sometimes try to force a perfectly smooth classic slick back by over-combing and over-straightening. The result is a stiff, unnatural look that fights itself all day. If you have texture, use it. The textured and curly slick back variations exist for a reason.
6. Ignoring the Hairline
A slick back exposes your entire forehead and hairline. If your hairline is uneven or your edges are not clean, the style amplifies that. Get a lineup or edge-up from your barber before debuting a slick back. The framing matters.
7. Not Adjusting for Humidity
Water-based pomades and gels can reactivate in humid conditions, causing the slick back to lose its shape or look wet. In high-humidity environments, use an oil-based pomade or finish with a light hairspray to create a humidity barrier.
What to Tell Your Barber
Getting the right cut is half the battle. Here is a communication script for the three most common slick back haircuts.
For a Classic Slick Back With Fade
“I want the top left at [your preferred length, minimum four inches]. I want a [low/mid/high] fade on the sides, blending into the top length. I am styling it slicked back, so I need enough weight on top for the product to hold.”
For a Slick Back Undercut
“I want a disconnected undercut. [Number 1 or 2] on the sides and back, no blending into the top. Leave the top at [preferred length]. I want a hard line where the top meets the sides.”
For a Textured Slick Back With Taper
“I want a taper on the sides, nothing too short, maybe a [3 or 4 guard] at the bottom blending to natural at the top. Leave the top long enough to push back with my fingers, at least [five to six] inches. I want texture, not a smooth look.”
Bring a reference photo. Two reference photos from different angles is even better. Barbers work visually, and “slick back” means different things to different people. A photo eliminates ambiguity.
Maintaining the Slick Back Between Cuts
The slick back is a daily-styling hairstyle. Unlike a fade that looks good on its own, the slick back requires you to style it every time you want it to look right. Here is the maintenance schedule.
Daily
- Style in the morning using the step-by-step technique
- If your product allows restyling (water-based pomade), you can reactivate it by running wet hands through your hair and re-combing
- A pocket comb for touch-ups during the day is not overkill. Carry one.
Every 2-3 Weeks
- Get a cleanup cut. The sides grow out and the shape deteriorates. A barber visit every two to three weeks keeps the proportions right.
- If you have a fade or undercut, the grow-out is more visible and may need attention every two weeks.
Weekly
- Clarifying wash. If you use pomade or gel daily, product builds up on your hair and scalp. Once a week, use a clarifying shampoo to strip the buildup, then condition and start fresh. This keeps the hair responsive to product application and prevents that heavy, waxy feeling.
Product Rotation
Some men find that their hair “gets used to” a product after weeks of daily use and it seems to lose effectiveness. This is usually buildup, not adaptation. A clarifying wash fixes it. But if you want, rotating between two products (e.g., a pomade on workdays and a clay on weekends) keeps things fresh and gives your hair different textures to work with.
Frequently Asked Questions
How long does your hair need to be for a slick back?
You need at least four to six inches of hair on top to achieve a proper slick back. Six inches is the sweet spot for most men because it gives you enough length to comb back completely and have the hair reach past the crown. If your hair is between three and four inches, you can achieve a shorter, more textured slick back, but the hair at the front may not stay in place without very strong hold product. Anything under three inches is too short for a traditional slick back.
What is the best product for slicking back hair?
It depends entirely on your hair type and the finish you want. For thick, coarse hair, use a strong hold pomade like Layrite Super Hold or Suavecito Firme Hold. For fine or thin hair, use a lightweight gel or mousse that adds volume without weighing hair down. For a matte, textured look, use a clay like Baxter of California Clay Pomade. For a classic high-shine finish, use a water-based pomade. The universal rule is: thicker hair needs stronger hold, and the product should match the finish you want (shine vs. matte).
How do you keep slicked back hair in place all day?
The combination of blow drying and product is what creates all-day hold. Towel dry your hair first, apply your primary product, blow dry backward to set the direction into the hair, then apply a small amount of finishing product for extra hold or shine. The blow dryer step is the key that most people skip. Heat trains the hair to lay in the direction you want, and product alone cannot replicate that training. A light hairspray at the end adds another layer of hold without stiffness if you use a flexible-hold formula.
Does slicking back your hair cause hair loss?
Slicking hair back with product does not cause hair loss. The style itself puts no significant tension on the follicles. However, pulling hair back extremely tightly with a wet gel every day, especially if you are creating a very tight, slick ponytail or bun, can contribute to traction alopecia over time. The key distinction is between a relaxed, product-assisted slick back (safe) and a tension-heavy pulled-back style (potentially damaging if done daily for years). Using a comb and product to direct hair backward is not the same as pulling it back with force.
Can you slick back curly or wavy hair?
Yes, and it often looks better than on straight hair because the natural texture adds volume and visual interest. For wavy hair (Type 2A to 2C), use a medium hold pomade and comb back while damp. The waves will add movement and body. For curly hair (Type 3A to 3C), use a strong hold gel or pomade and blow dry straight before combing back, or embrace the texture and go for a curly slick back where the curls are directed backward but not flattened. For tighter curls (Type 4), the slick back works best with a blow-out first to stretch the curl pattern, followed by pomade and combing.
What is the difference between a slick back and a comb over?
A slick back directs all of the hair straight backward from the forehead toward the crown and nape. A comb over directs the hair to one side, usually with a defined part. Both use similar products and techniques, but the direction is different. A slick back has a more symmetrical, centered look while a comb over is asymmetric with a side part. Many men switch between the two depending on the occasion; the product and technique are almost identical, just the combing direction changes.
Final Thoughts
The slick back has outlasted every grooming trend of the last century for one reason: it is clean, adaptable, and works across a wider range of hair types than almost any other men’s hairstyle. The technique is five steps and five minutes. The difference between a slick back that looks intentional and one that looks like you forgot your hat comes down to three things: the right product for your hair type, the blow dryer, and a willingness to adjust the variation to your natural texture instead of fighting it.
Here is the recap:
- You need four to six inches on top. Less than that and the style will not hold its shape.
- Towel dry, apply product, comb back, blow dry, finish. That is the sequence. Do not skip the blow dry.
- Match your product to your hair type. Thick hair needs strong hold pomade. Fine hair needs lightweight gel. Curly hair needs strong gel or a blow-out first. See the product table.
- Choose the right variation. Classic for formal. Textured for casual. Undercut for modern edge. Fade for universal flattery.
- Your natural texture is an asset, not an obstacle. Wavy and curly slick backs have more visual depth than straight ones. Work with what you have.
If you are new to the slick back, start with a taper fade on the sides and a medium hold pomade on top. It is the most forgiving combination and gives you room to experiment with shine levels and texture as you get comfortable with the style. From there, the types of fades guide can help you dial in the exact side treatment that fits your look.
Further reading: For research-backed grooming advice, see Healthline Men’s Health.
Explore more tips at CulturedGrooming.com.
Further reading: For research-backed grooming advice, see Healthline Men’s Health.