If you want to master how to cut your own, this guide covers everything you need to know.
If you want to master how to cut your own, this guide covers everything you need to know. Last updated: February 2026 by Marcus Chen-Williams, Founder & Editor-in-Chief
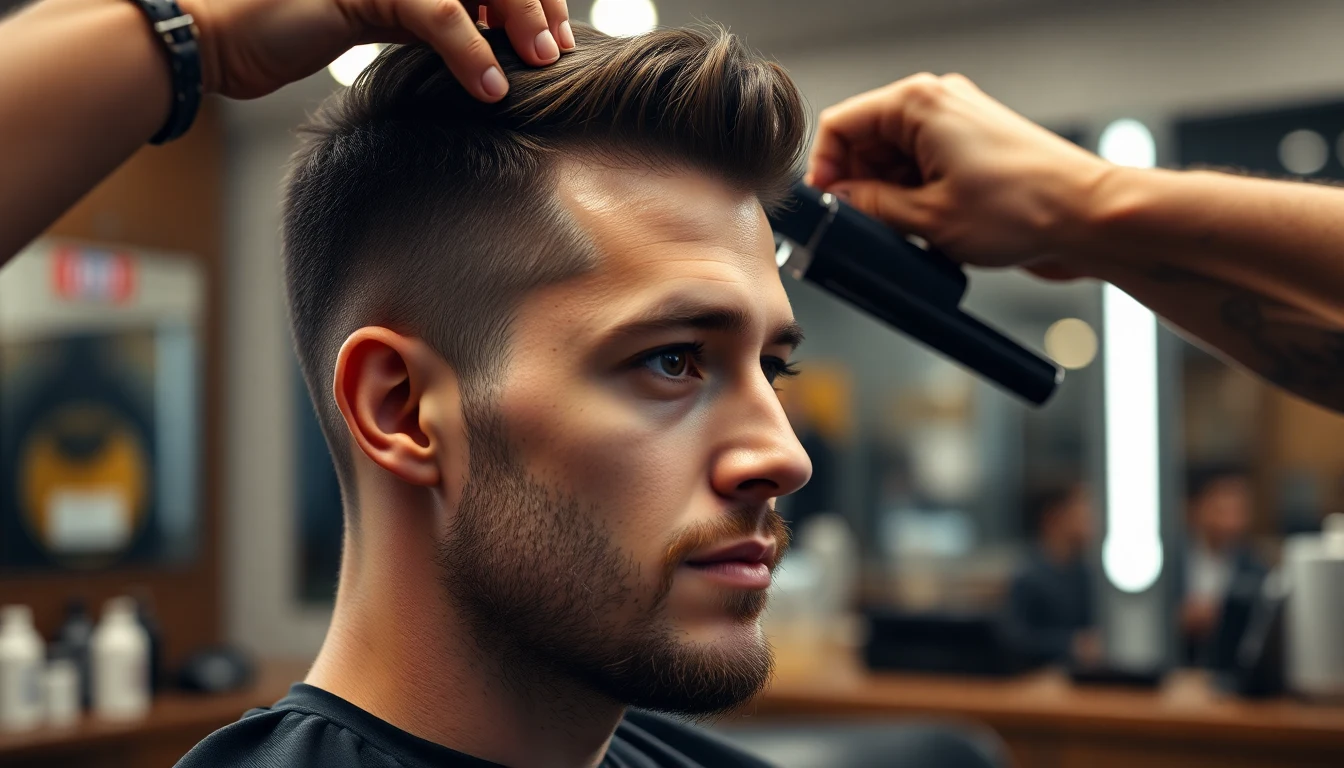
Cutting your own hair at home is one of those skills that sounds simple and gets complicated the moment you pick up a clipper. I know because I have been doing it myself, off and on, for over a decade. Some of those early cuts were fine. Some were disasters that sent me straight to a barber for damage control. The difference between a decent home cut and a bad one comes down to three things: the right tools, a realistic plan, and the discipline to stop before you overdo it.
This guide covers everything you need to know about how to cut your own hair men can actually follow, from tool selection to step-by-step techniques for the most common home styles. Whether you want a clean buzz cut, a simple clipper cut with a longer top, or just need to clean up your neckline between barber visits, this is the honest playbook. I will also tell you what NOT to try at home, because knowing your limits saves you from a lot of regret.
If you only read one section: jump to the Step-by-Step Home Haircut Techniques for the actual cutting instructions, or start with Tools You Need if you have not bought your equipment yet.
Why Cut Your Own Hair?: How To Cut Your Own
Let’s start with the practical case. A standard men’s haircut runs $25 to $50 depending on your city, your barber, and how much work is involved. If you get a cut every three weeks, that is $430 to $870 per year. A solid pair of clippers costs $30 to $130 and lasts for years. The math is straightforward.


But cost is not the only reason men cut their own hair. Convenience matters. Not everyone lives near a good barber. Not everyone has the schedule flexibility to book appointments during business hours. And for men who wear simple, shorter styles, the idea of sitting in a barber chair for 30 minutes to get a uniform buzz cut feels like overkill.
There is also the maintenance angle. Even if you visit a barber for your main cut, the neckline and sideburns start looking rough within a week. Learning to do cleanup work at home means you look sharp for longer between appointments. That alone is worth the investment in tools and practice.
Here is what I tell everyone who asks: cutting your own hair is a skill, not a talent. You will not be great at it the first time. But with the right approach and realistic expectations, you can handle basic styles at home and save yourself real money over time.
The Honest Reality Check
Before we go any further, let me be direct. There are things you can do well at home and things you should leave to a professional. Here is the breakdown:
| Style | Home Difficulty | Can You Do It Yourself? |
|---|---|---|
| Uniform buzz cut (one length all over) | Easy | Yes. This is where everyone should start. |
| Clipper cut with longer top, shorter sides | Moderate | Yes, with practice. The transition zone takes skill. |
| Neckline and sideburn cleanup | Easy to moderate | Yes. Essential skill even if you go to a barber. |
| Basic two-length blend | Moderate | Yes, but results will be rougher than a barber’s work. |
| True fade (skin fade, low fade, taper) | Very hard | Not recommended. Fades require professional skill. |
| Scissor-over-comb texturing | Very hard | Not recommended without training. |
| Lineup or edge-up | Hard | Possible, but one wrong move is very visible. |
If your goal is a clean buzz cut or a simple short-sides-longer-top look, this guide will get you there. If you want a sharp skin fade or a detailed taper fade, find a good barber. Those styles require angles, blending techniques, and professional training that a mirror setup cannot replicate.
Tools You Need Before You Start
You do not need a barbershop’s worth of equipment, but you do need more than just a clipper. Here is the complete list, organized by priority.
Essential Tools (Non-Negotiable)
| Tool | What It Does | Budget Pick | Upgrade Pick | Price Range |
|---|---|---|---|---|
| Hair clippers with guard set | The main cutting tool. Guards control length. | Wahl Color Pro Cordless | Wahl Cordless Magic Clip | $30-$130 |
| Handheld mirror | Lets you see the back and sides of your head. | Any large handheld mirror (8″+) | Fog-free shower mirror with handle | $8-$20 |
| Barber cape or old towel | Catches hair clippings. Saves you 30 minutes of cleanup. | Old bedsheet draped over shoulders | Snap-closure barber cape | $0-$15 |
| Fine-tooth comb | Sections hair, lifts hair for even cutting, checks for missed spots. | Basic barber comb | Carbon fiber barber comb (anti-static) | $2-$10 |
| Hair scissors (optional but recommended) | For blending, texturizing, and trimming stray hairs clippers miss. | Any sharp hair shear (5.5″ to 6″) | Japanese steel shear | $15-$50 |
Nice to Have (Makes the Job Easier)
- Precision trimmer or liner. A separate trimmer with a narrow blade makes neckline and sideburn work much cleaner. The Andis Slimline Pro Li or Wahl Peanut are solid choices. If you already own a quality beard trimmer, that works too.
- Spray bottle with water. Helps manage flyaways and section longer hair on top.
- Neck brush or duster. Sweeps loose clippings off your neck and ears during the cut.
- Clipper oil. Two to three drops on the blade before every cut. Reduces heat, extends blade life, and gives a smoother cut. Every clipper should come with a small bottle.
- Drop cloth or newspaper. Lay it on the floor under your cutting station. Makes cleanup take two minutes instead of twenty.
For a full breakdown of clippers and what to look for by budget, see our guide to the best cordless hair clippers. If you want to understand what each guard number means before you start cutting, check out our clipper guard sizes chart.

Setting Up Your Home Cutting Station
Where and how you set up makes a bigger difference than most people expect. A good workspace means better visibility, less mess, and fewer mistakes.
Location
Your bathroom is the most practical spot. You already have a large mirror, good lighting (or at least decent lighting), and a floor that is easy to sweep. If your bathroom lighting is dim, add a clip-on LED light or a portable ring light positioned at head height. You need to see detail clearly, especially around the neckline and above the ears.
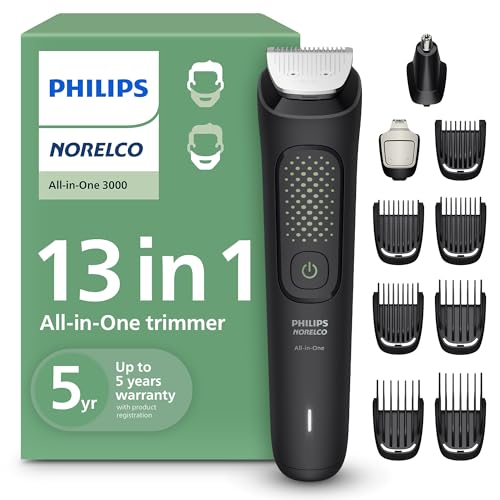
Some men prefer to cut hair outside or in the garage to skip the cleanup entirely. That works fine as long as you have a mirror and enough light. A full-length mirror propped against a wall plus a handheld mirror gives you the same setup as a bathroom. (We recommend this Philips Norelco All-in-One 3000 Series 13.)
The Two-Mirror Technique
This is the single most important skill for cutting your own hair. Without a way to see the back of your head, you are cutting blind, and that is where most home haircut mistakes happen.
Setup:
- Wall mirror: Your bathroom mirror serves as the primary mirror. Stand facing it for the front and sides.
- Handheld mirror: Turn around so your back faces the wall mirror. Hold the handheld mirror in front of you at chest height and tilt it upward until you can see the back of your head reflected in the wall mirror behind you.
- Adjust the angle: Tilt the handheld mirror slowly until you get a clear view of your neckline and the back of your crown. This takes some practice. The image is reversed, which means your right hand appears on the left side of the reflection.
Pro tips for the mirror setup:
- Use a large handheld mirror (at least 8 inches across). Small mirrors force you to move them constantly and you lose your frame of reference.
- If you need both hands free for the back, mount a second mirror on the opposite wall using suction cups, or prop it on a shelf at the right height.
- Some men use a phone or tablet propped behind them with the front camera on. This gives you a live, non-reversed view on screen, which some people find easier to work with than a double mirror reflection.
- Practice the mirror technique BEFORE you turn on the clippers. Get comfortable finding the back of your head and navigating the reversed image. Five minutes of practice saves you from an uneven neckline.
Pre-Cut Checklist
Before you pick up the clippers, run through this list every time: Mastering how to cut your own takes practice but delivers great results.
- Hair is clean and completely dry. Wash your hair, let it air dry or blow dry. Do not cut wet hair with clippers.
- Clippers are charged and oiled. Two to three drops of clipper oil on the blade, run the clipper for 10 seconds to distribute.
- Guards are organized. Lay them out in order by number so you can grab the right one without guessing.
- Cape or towel is on. Drape it over your shoulders and secure it. Loose hair on bare skin itches for hours.
- Floor is covered. Newspaper, a drop cloth, or even a trash bag laid flat. Trust me on this one.
- You know the plan. Decide on lengths BEFORE you start. “I will figure it out as I go” is how mistakes happen.

Step-by-Step Home Haircut Techniques
Here are the four most practical home cuts, ranked from easiest to hardest. Start with the buzz cut. Once you are comfortable with clippers and the mirror setup, move to the clipper cut with a longer top. Do not skip levels.
Technique 1: The Uniform Buzz Cut
Difficulty: Easy
Time: 15 to 20 minutes
Tools: Clippers with one guard, hand mirror
Best for: First-timers, low-maintenance styles, hot weather, thinning hair Mastering how to cut your own takes practice but delivers great results.
The buzz cut is the most forgiving home cut because you are using one guard length over the entire head. There is no blending, no transition zones, and minimal room for error. If you have never cut your own hair before, this is where you start. For style inspiration, see our buzz cut styles guide.
Step by step:
- Choose your guard. A #3 guard (3/8 inch, about 10mm) is the safest starting point for your first buzz cut. It is short enough to look intentional but long enough to forgive small inconsistencies. If you want shorter, you can always go down to a #2 or #1 on a second pass. You cannot go back up.
- Start at the front. Place the clipper flat against your forehead hairline with the guard flush against your scalp. Move the clipper straight back over the top of your head in slow, steady strokes. Do not rush. Let the clipper do the work.
- Overlap your passes. Each stroke should overlap the previous one by about half the blade width. This prevents the “lawn mower stripe” effect where you miss a thin strip between passes.
- Work the sides. Move to one side and cut upward from the sideburn area toward the crown. Go against the grain of hair growth for a cleaner cut. On the sides, that usually means cutting upward.
- Do the back. This is where the two-mirror technique comes in. Turn around, set up your handheld mirror, and work from the neckline upward in slow passes. Take your time here. The back is where most uneven spots hide.
- Check your work. Run your hand over your entire head, feeling for any longer patches. Look at every angle in the mirror. Pay special attention to the area behind your ears and the crown, which are the two spots most commonly missed.
- Clean up the neckline. Remove the guard and carefully define your neckline. More on this in the neckline section below.
Common mistakes with the buzz cut:
- Going too fast. Rushing creates uneven patches because the clipper does not have time to cut every hair in its path.
- Using a guard that is too short on the first attempt. Start with a #3 or #4. You can always go shorter.
- Forgetting the crown. The hair on top of your head grows in different directions at the crown. Run the clipper over this area from multiple angles to catch everything.
Technique 2: Clipper Cut with Longer Top, Shorter Sides
Difficulty: Moderate
Time: 30 to 45 minutes
Tools: Clippers with multiple guards, hand mirror, comb, scissors (optional)
Best for: Men who want more shape than a buzz cut but are not attempting a fade
This is the workhorse home haircut. Shorter sides (typically a #2 or #3 guard) with a longer top (a #5 to #8 guard, or scissor-trimmed). The key challenge is the transition zone between the short sides and the longer top. You are not doing a proper fade here. You are creating a basic two-length look with a blended transition.
Step by step:
- Decide your lengths. A good starting combination: #3 guard on the sides and back, #6 or #7 on top. Write it down. Do not decide mid-cut.
- Cut the sides first. Attach the shorter guard (#3). Starting at the sideburn, move the clipper upward and out. Stop about two finger-widths above the top of your ear. This is your transition line. Do not go higher.
- Do the back. Same guard, same technique. Work from the neckline up to the same height as the sides. Use your mirrors to keep the line consistent.
- Switch to the longer guard and do the top. Attach your top-length guard (#6 or #7). Run it from front to back across the entire top of your head. Use the comb to lift the hair as you go, checking that the length is even.
- Blend the transition. This is the hardest part. Attach a guard size that falls between your two lengths (#4 or #5). Work this guard along the transition zone, the strip where the short sides meet the longer top. Use short, flickering motions. Place the clipper at the bottom of the transition and flick upward and outward, blending the two lengths together. Think of it as feathering, not cutting.
- Check for lines. After blending, look for any visible line where the two lengths meet. If you see one, use your blending guard and gently pass over the line with the same flicking motion until it disappears. This may take several passes.
- Refine with scissors (optional). If the top looks uneven, use scissors to point-cut (snip vertically into the tips of the hair rather than cutting straight across). This adds texture and forgives small length differences.
- Clean up the neckline and sideburns.
Why this is harder than a buzz cut: The transition zone is where most home haircuts fall apart. If the line between the sides and top is visible and harsh, the cut looks amateur. Professional barbers spend years perfecting their blending technique. You will not match that on your first try. What you CAN achieve is a clean, presentable look that gets better with each attempt. For more guidance, Consumer Reports provides expert resources on product testing.


Technique 3: The Basic Two-Length Blend (Simplified Home Fade)
Difficulty: Moderate to hard
Time: 45 to 60 minutes
Tools: Clippers with full guard set, trimmer, hand mirror, comb
Best for: Men with some home cutting experience who want a bit more shape
Let me be clear: this is NOT a true fade. A real fade haircut requires precise gradient blending from skin or near-skin length upward through multiple steps. That requires a barber’s skill, training, and the ability to see all angles simultaneously. What you can do at home is a two-length or three-length stepped blend that approximates the look of a fade from a conversational distance.
Step by step:
- Plan your zones. Divide the sides and back into two zones. Zone 1 (lowest): from the hairline up to just above the ear. Zone 2 (middle): from the top of the ear to where the top begins. The top is zone 3.
- Cut zone 1. Use a #1 guard. Start at the hairline and cut upward, stopping about one inch above the ear. This is your shortest length.
- Cut zone 2. Switch to a #2 or #3 guard. Start where zone 1 ends and cut upward to the transition point where the top begins.
- Cut the top. Use your chosen top guard (#5 to #8, depending on your desired length).
- Blend zone 1 into zone 2. Use a #1.5 guard (half-size guard) if you have one. Place the clipper at the top of zone 1 and use short, upward flicking motions to soften the line where the two zones meet.
- Blend zone 2 into the top. Use an in-between guard size and repeat the same flicking technique at the transition between zone 2 and the top.
- Repeat and refine. Blending is iterative. You will need to go over the transition areas multiple times, gradually softening the lines. Be patient. Aggressive passes here cause more problems than they solve.
Critical warning: If at any point the blend is not working and you keep taking more off to fix it, STOP. It is very easy to chase a mistake with more cutting and end up with sides that are far shorter than you intended. Step back, look at the overall shape, and decide if the result is acceptable. It does not need to be perfect.
Technique 4: Neckline and Sideburn Cleanup
Difficulty: Easy to moderate
Time: 10 to 15 minutes
Tools: Trimmer (or clippers with no guard), hand mirror
Best for: Everyone. This is the one skill every man should learn.
Even if you never cut the rest of your hair yourself, learning to clean up your neckline between barber visits makes a significant difference. A clean neckline is the single fastest way to make a haircut look fresh. A messy neckline is the single fastest way to make a good haircut look two weeks old.
Step by step:
- Set up your mirrors. You need to see the back of your neck clearly. Use the two-mirror technique.
- Find your natural neckline. Tilt your head forward slightly. See where your hair growth ends and your neck begins. This is your natural neckline. For most men, this forms a slightly rounded or slightly squared line.
- Choose your shape. There are three standard neckline shapes:
- Rounded: Follows the natural curve. Most forgiving and natural-looking.
- Squared: Straight across with defined corners. Clean but requires precision.
- Tapered: Gradually fades into the skin. Looks the most professional but is harder to do yourself.
For home maintenance, the rounded neckline is the safest choice.
- Trim below the line. Using your trimmer or clippers with no guard, carefully remove all hair BELOW your chosen neckline. Start at the center and work outward in small strokes. Do not go above the line.
- Clean the sides. Trim the sideburns to even length (usually even with the middle of your ear or the top of the ear, depending on your style). Make sure both sideburns are the same length. Check by looking straight at the mirror and comparing.
- Clean behind the ears. Use the trimmer to clean up the area directly behind each ear, where hair tends to grow in random directions.
The biggest neckline mistake: Going too high. Men who are new to neckline cleanup tend to take the line higher than it should be, which creates an unnatural look and takes weeks to grow back to a normal position. When in doubt, go lower. A slightly messy natural neckline looks better than one that is too high and too clean.
Hair Type Considerations
Your hair type affects how clippers behave, what guard sizes produce which results, and where mistakes are most likely. Here is what matters for home cutting across different textures.
Straight, Fine Hair (Types 1A to 1C)
Straight hair is generally the easiest to cut at home with clippers because it lies flat, feeds evenly through guard combs, and shows inconsistencies less than other types. The main risk is that straight hair shows clipper tracks (visible lines from pass overlaps) more obviously, so overlap your passes generously. Guard sizes produce predictable, consistent results on straight hair. (We recommend this Wahl Color Pro Cordless Rechargeable Hair.)
Wavy Hair (Types 2A to 2C)
Wavy hair adds some unpredictability. The wave pattern means that hair does not lie perfectly flat under a guard, which can lead to slightly uneven lengths. Comb the hair flat before each pass. If you are leaving the top longer, the wave gives natural texture and volume, which is actually an advantage because it hides minor cutting imperfections.
Curly Hair (Types 3A to 3C)
Curly hair shrinks significantly when it dries. A curl that stretches to three inches may look like one inch when it springs back. This means clipper guard lengths produce much shorter-looking results on curly hair than on straight hair. Start with a guard one to two sizes longer than you think you need. Also, curly hair tangles in clipper teeth more easily. Use shorter, more deliberate strokes and clean the blade frequently.
Coily and Tightly Coiled Hair (Types 3C to 4C)
Tightly coiled hair requires the most attention with home clipping. The coil pattern means hair does not feed smoothly through standard guards, and the density can overwhelm budget clippers. Use a clipper with a strong motor; the Andis Master Cordless or Wahl Cordless Magic Clip handle textured hair well. Work in small sections, go slowly, and expect each pass to take off less than it would on straight hair. For men with 4C hair, see our guide to the best clippers for Black men for tool recommendations designed for your hair type.
Thick, Dense Hair (Any Curl Pattern)
Density is different from curl pattern. You can have straight, thick hair or curly, fine hair. Thick, dense hair of any texture means more resistance on the blade. This causes the clipper to heat up faster and can lead to pulling if the blade is dull or unlubricated. Oil your clippers more frequently (every 5 to 10 minutes of continuous cutting), use shorter strokes, and consider making two passes instead of one, going over the same area to catch hairs the first pass missed. Understanding how to cut your own is key to a great grooming routine. (We recommend this TCMKY Hair Clippers for Men Professional.) Understanding how to cut your own is key to a great grooming routine.

Common Mistakes and How to Avoid Them
I have made most of these mistakes myself. Learning from someone else’s bad haircut is always better than learning from your own.
Mistake 1: Starting Too Short
This is the number one mistake. You start with a guard that is shorter than you thought, realize the cut is not what you wanted, and now you cannot go back. The rule is simple: start two guard sizes longer than you think you want. You can always do another pass with a shorter guard. You cannot add hair back.
Mistake 2: Inconsistent Pressure
Pressing the clipper harder against your head does not cut more hair. It just pushes the guard teeth into the scalp unevenly, which creates inconsistent lengths. Use light, consistent pressure. Let the guard sit naturally against your head and move the clipper at a steady pace. The blade does the cutting, not the pressure.
Mistake 3: Moving Too Fast
Speed causes the clipper to skip over hairs, leaving longer patches mixed in with shorter ones. This is especially true on thick or curly hair. If you find yourself making more than two passes over the same area, you are going too fast on the first pass. Slow down. A good buzz cut takes 15 to 20 minutes, not five.
Mistake 4: Ignoring the Crown
The crown (the spiral whorl at the top-back of your head) is where hair grows in multiple directions. A single pass from front to back will miss hairs that grow sideways or forward at the crown. Attack the crown from at least three different angles: front to back, back to front, and side to side. Then run your hand over it to feel for any longer spots.

Mistake 5: Cutting Wet Hair with Clippers
Wet hair clumps together, appears longer than it actually is, and does not feed through guards cleanly. When it dries, you discover that you cut more than intended. Always cut dry hair with clippers. The only exception is scissor cutting, which professional barbers do on wet hair for certain techniques. (We recommend this Novah® Professional Hair Clippers for Men,.)
Mistake 6: Taking the Neckline Too High
When you are looking at the back of your neck in a mirror, there is a natural tendency to clean up “just a little more,” which gradually moves the neckline higher and higher. A neckline that is too high creates an unnatural look and can take weeks to grow back. Set your neckline, clean below it, and stop. Do not keep refining.
Mistake 7: Not Cleaning the Clippers During the Cut
As you cut, hair builds up between the blade teeth. This reduces cutting efficiency, causes pulling, generates more heat, and leads to uneven results. Every few minutes, turn off the clipper, brush out the hair with the cleaning brush that came with your clippers, and continue. If you are cutting thick or dense hair, do this after every section.
Mistake 8: Chasing a Mistake
You see an uneven spot. You try to fix it. Now the fix is uneven. You try to fix the fix. Before you know it, you have gone three guard sizes shorter than planned because you kept trying to “even it out.” If a blend or transition is not working after three attempts, stop. Accept the current result and learn from it for next time. A slightly imperfect haircut looks far better than one where you kept chasing mistakes until the sides were down to a #0.

Tool Recommendations by Budget
Here is what I recommend based on how often you plan to cut your own hair and what styles you are attempting.
Budget Tier (Under $50): Occasional Home Cuts
If you are cutting your hair once a month or less and sticking to simple buzz cuts or uniform clipper cuts, you do not need to spend a lot.
- Clipper: Wahl Color Pro Cordless ($30 to $40). Comes with a full set of color-coded guards (easy to grab the right one without squinting at numbers), 60 minutes of battery life, and a reliable enough motor for home use. It will not handle very thick or coiled hair with the same power as a professional model, but for straight to wavy hair and simple cuts, it is the best value on the market.
- Trimmer: A basic plug-in trimmer or your existing beard trimmer for neckline work.
- Mirror: Any large handheld mirror, $8 to $12.
- Total investment: $40 to $60.
Mid-Range Tier ($80 to $150): Regular Home Cuts
If you are cutting your hair every two to three weeks and want cleaner results with more versatility, invest in better tools.
- Clipper: Philips Norelco Series 7000 ($70 to $90) for an all-in-one home solution, or the Wahl Cordless Magic Clip ($100 to $130) if you want barbershop-grade performance at home. The Magic Clip has a stagger-tooth blade that excels at blending and handles all hair types well. Full review in our best cordless hair clippers guide.
- Trimmer: Andis Slimline Pro Li ($45 to $55). Precision T-blade for clean necklines and detail work.
- Accessories: Barber cape, carbon-fiber comb, spray bottle, neck duster.
- Total investment: $120 to $200.
Premium Tier ($200+): The Home Barbershop
If you are serious about cutting your own hair long-term and want the full setup, these are professional-grade tools that barbers use. (We recommend this YOGINGO Professional Hair Trimmer for Men,.)
- Clipper: Wahl Cordless Magic Clip or Andis Master Cordless ($120 to $160). The Andis Master has a more powerful motor for thick, coarse hair.
- Trimmer: BaBylissPRO GoldFX Trimmer ($70 to $100). The gold standard for precision detail work.
- Scissors: A quality 6-inch hair shear for texturizing and refining the top ($30 to $50).
- Mirror setup: Wall-mounted adjustable mirror for the back, LED-lit magnifying mirror for detail work.
- Total investment: $250 to $350.
The premium tier sounds like a lot, but consider: at $35 per haircut every three weeks, you spend $600 or more per year at a barbershop. The entire premium home setup pays for itself in six months.

When to NOT Cut Your Own Hair
There is no shame in knowing when a job is beyond your skill level. Here are the situations where you should skip the home cut and visit a professional.
You Want a Real Fade
I cannot stress this enough. A proper fade, whether it is a skin fade, low fade, mid fade, or high fade, requires blending skill that takes barbers years to develop. The gradient from skin to length needs to be seamless from every angle. You cannot achieve this on yourself because you cannot see every angle simultaneously, and the reversed mirror image makes precision work extremely difficult. Save fades for the barbershop.

You Have a Special Event Coming Up
Job interview, wedding, important date, family photos. If there is a specific event where you need to look your best, this is not the time to experiment with a home cut. Book a barber. The $35 to $50 is worth the peace of mind.
You Are Trying a New Style for the First Time
If you have never worn a particular style before, see a barber first. Watch what they do. Ask them about the guard sizes they use and where they blend. Then, once you have the style established, you can maintain it at home between visits.
Your Hair Has Multiple Textures
Some men, especially those with mixed heritage (speaking from personal experience here), have noticeably different hair textures in different parts of the head. The sides might be straighter while the top is curlier, or the neckline might be a completely different texture than the crown. Cutting across multiple textures requires adjusting technique on the fly, which is tough to do when you are learning. A good barber handles this intuitively. At home, those transitions between textures are where mistakes pile up.
You Need a Lineup or Edge-Up
Sharp, straight lines along the hairline, temples, and forehead require a level of precision that is extremely hard to achieve on yourself. One tiny slip creates a notch that takes weeks to grow back. If clean lines are part of your style, leave them to the professionals. You can maintain the neckline at home but leave the front hairline alone.
Maintaining Your Cut Between Sessions
Whether you cut your own hair entirely or go to a barber for the main cut, these between-session maintenance habits keep you looking sharp longer. When it comes to how to cut your own, technique matters most.
Weekly Neckline Cleanup
About a week after any haircut, the neckline starts to look fuzzy. A quick five-minute cleanup with a trimmer restores the clean line. This one habit alone makes any haircut last an extra week before it looks grown out. When it comes to how to cut your own, technique matters most.
Sideburn Check
Sideburns grow at different rates and sometimes at different angles. Every few days, look at both sideburns in the mirror and make sure they are still even. A quick trim with the precision trimmer keeps them matching.
Clipper Maintenance
Your clippers are only as good as you maintain them. After every cut:

- Brush out all hair from the blade teeth.
- Apply two to three drops of clipper oil.
- Run the clipper for 10 seconds to distribute the oil.
- Wipe the excess oil off with a clean cloth.
- Store with the blade guard on to protect the teeth.
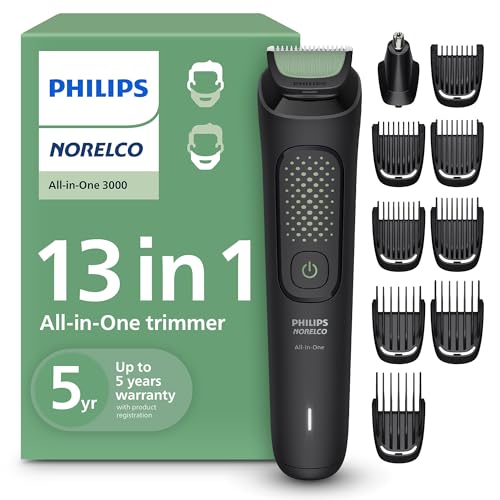
Every few months, remove the blade and clean underneath it. Hair, oil residue, and skin cells accumulate there and reduce cutting performance. Your clipper manual will show you how to remove and reattach the blade. (We recommend this Philips Norelco All-in-One 3000 Series 13.)
When to Replace Blades
If your clippers start pulling hair instead of cutting cleanly, the blade is dull. Some blades can be sharpened, but for most home users, replacement is simpler. Quality replacement blades run $15 to $30, and a fresh blade makes an immediate difference in cut quality. Most clippers need a blade replacement every 6 to 12 months with regular home use.
Setting Realistic Expectations
Here is what nobody tells you in those “cut your own hair in 5 minutes” YouTube videos: your first few home haircuts will not be great. They will be acceptable. Maybe good. Probably not what a barber would produce. And that is completely fine.
The Learning Curve
| Experience Level | What to Expect | Time per Cut |
|---|---|---|
| First attempt | Functional but imperfect. Some uneven spots. Neckline may be rough. | 45 to 60 minutes |
| Cuts 2 through 5 | Noticeably better. Mirror technique becomes natural. Fewer missed spots. | 30 to 45 minutes |
| Cuts 6 through 12 | Consistent, clean results on simple styles. Friends stop noticing it is a home cut. | 20 to 30 minutes |
| Cuts 13+ | Confident and efficient. You know your head, your cowlicks, your trouble spots. | 15 to 25 minutes |
The biggest leap in quality happens between your first and fifth cut. That is when you learn the angles of your head, figure out the mirror, and develop muscle memory for the clipper. After about a dozen cuts, you will be able to do a clean buzz cut or clipper cut in your sleep.
What “Good Enough” Looks Like
A good home haircut does not need to match barbershop quality. It needs to look intentional. If someone looks at your hair and thinks “that is a clean cut,” you have succeeded. Nobody is going to examine your blend with a magnifying glass. The standard is “looks good from conversation distance,” not “flawless under studio lighting.”
The men who get the best results at home are the ones who accept this standard and focus on clean execution of simple styles rather than trying to replicate complex barbershop work in a bathroom mirror.
Frequently Asked Questions
Can I give myself a fade at home?
You can attempt a basic fade at home, but achieving a barbershop-quality fade is extremely difficult without professional training. The blending between guard sizes requires a level of control and visual access to all angles of your head that is nearly impossible to replicate solo. If you want to try, start with a simple two-length blend rather than a multi-step gradient. Use the two-mirror technique, go very slowly, and accept that the result will be a simplified version of what a barber delivers. For reference on what different fades look like, see our guide to types of fades.
What clippers should I buy for cutting my own hair?
For most men cutting hair at home, the Wahl Color Pro Cordless is the best starting point. It comes with a full set of guards, has a reliable motor, and costs under $40. If you plan to cut regularly and want barbershop-quality performance, step up to the Wahl Cordless Magic Clip or the Philips Norelco Series 7000. See our full best cordless hair clippers guide for detailed comparisons.
How often should I cut my own hair?
For a buzz cut or short all-over clipper cut, every two to three weeks keeps the shape clean. For a longer top with shorter sides, you may be able to stretch it to three to four weeks between cuts, but the sides and neckline will need attention sooner. A good practice is to do a full cut every three weeks and a neckline cleanup in between.
What is the two-mirror technique?
The two-mirror technique uses your bathroom wall mirror and a handheld mirror simultaneously. Stand with your back to the wall mirror, hold the handheld mirror in front of you at chest height, and angle it until you can see the back of your head reflected in the wall mirror. It takes practice because the image is reversed. See the detailed setup instructions above.
How do I fix a mistake if I cut too much off?
You cannot add hair back. If you take off too much in one spot, you can either blend the surrounding area shorter to match, or leave it and wait one to three weeks for the area to grow in. This is why the golden rule is always start two guard sizes longer than you think you want. You can always go shorter.
Should I cut my hair wet or dry?
Always cut dry hair with clippers. Wet hair clumps together, appears longer than it is, and does not feed through guards cleanly. This leads to uneven cuts and more pulling. Wash your hair, let it dry completely, then comb it into its natural fall before you start cutting.
Is it worth buying professional-grade clippers for home use?
If you cut your own hair once a month or more, yes. A quality clipper like the Wahl Cordless Magic Clip costs $100 to $130 and lasts three to five years. At $25 to $50 saved per barbershop visit, the clipper pays for itself after five or six home cuts. Budget clippers work for occasional buzz cuts but tend to pull on thicker hair and dull quickly. (We recommend this Jack & Rose Clippers and Trimmers.)

The Bottom Line
Cutting your own hair is a learnable skill that saves real money and adds real convenience to your life. But it requires the right tools, a realistic plan, and the humility to start simple and build up.
Quick recap:
- Start with a uniform buzz cut to learn your clippers and the mirror technique before trying anything more complex.
- Always start with a longer guard than you think you need. You can go shorter; you cannot go back.
- The two-mirror technique is non-negotiable. Practice it before you cut.
- Leave fades, lineups, and complex styles to your barber. Master the basics at home first.
- Clean and oil your clippers after every use. Dull blades cause bad cuts.
What to do next: If you do not have clippers yet, start with our best cordless hair clippers guide to find the right pair for your budget and hair type. If you already have clippers but need to understand guard sizes, our clipper guard sizes chart has every measurement you need. And if you decide a home cut is not for you, there is no shame in that. Find a great barber and use the neckline cleanup technique to stretch each visit a little further.
Good luck with the first cut. Start long. Go slow. And remember: it grows back.
Further reading: For research-backed grooming advice, see Healthline Men’s Health.
Explore more tips at CulturedGrooming.com.
Further reading: For research-backed grooming advice, see Healthline Men’s Health.