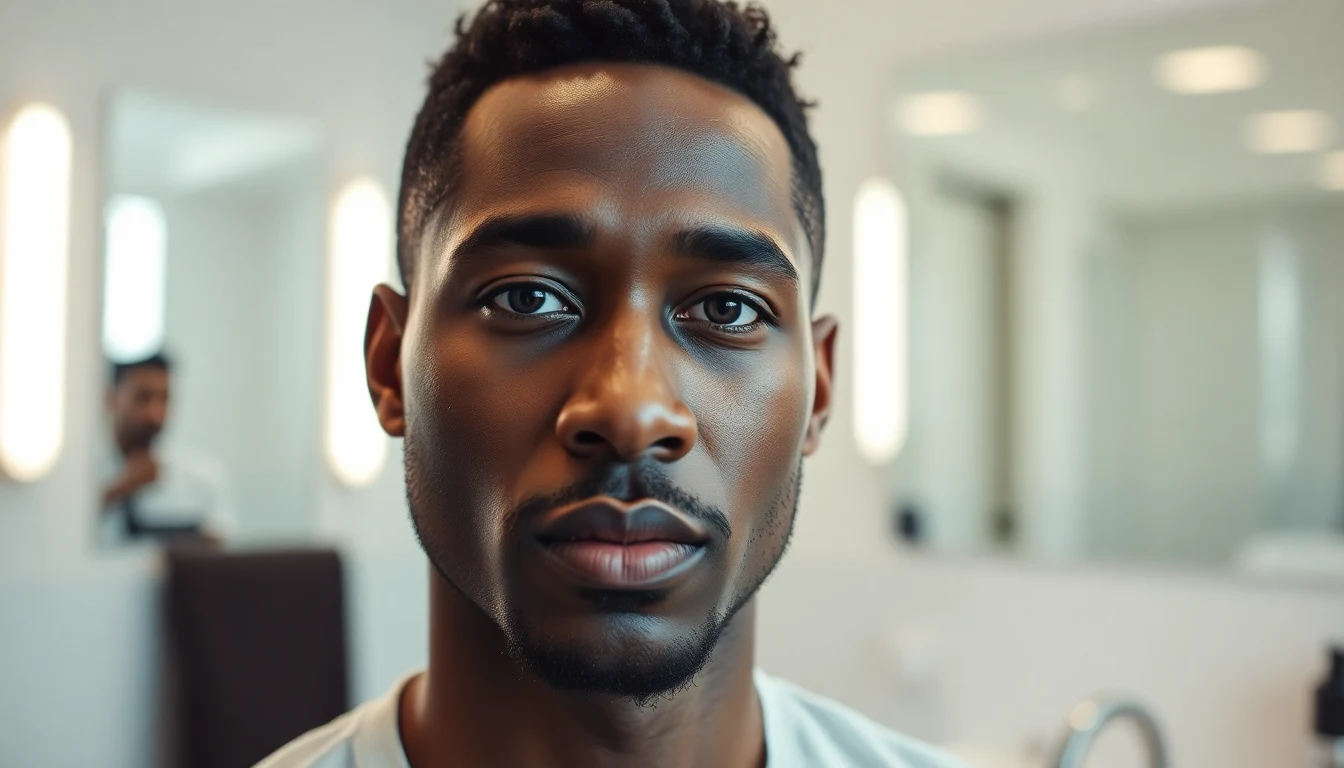
If you want to master how to get 180 waves, this guide covers everything you need to know. Last updated: February 2026 by Darius Washington, Black Men’s Grooming Editor
When I first started getting waves back in high school, everybody in the barbershop was talking about 360s. But my barber, a man named Jerome who had been cutting hair in Memphis for 30 years, pulled me aside and said, “Learn the front first. Get those 180s locked in. The rest follows.” That advice changed my wave game. How to get 180 waves is where every waver should start, and this guide gives you the complete system.
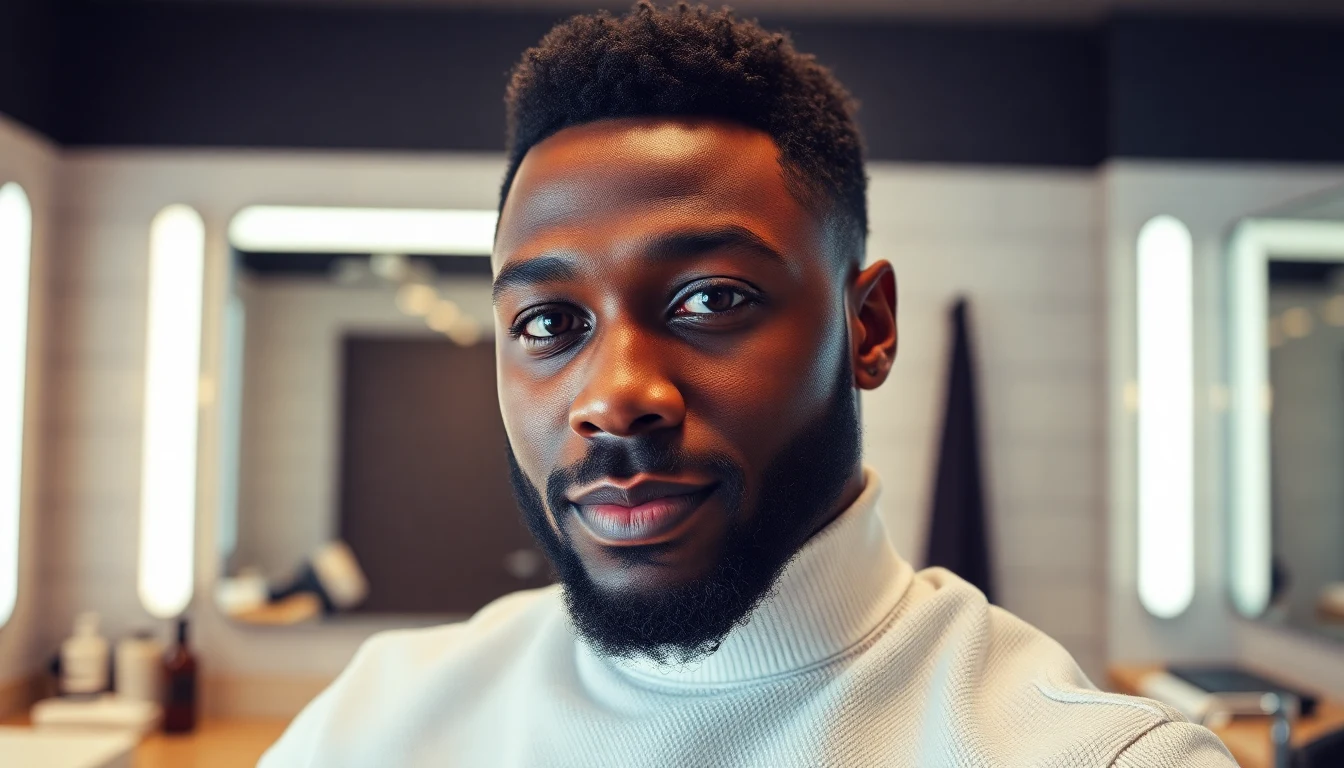
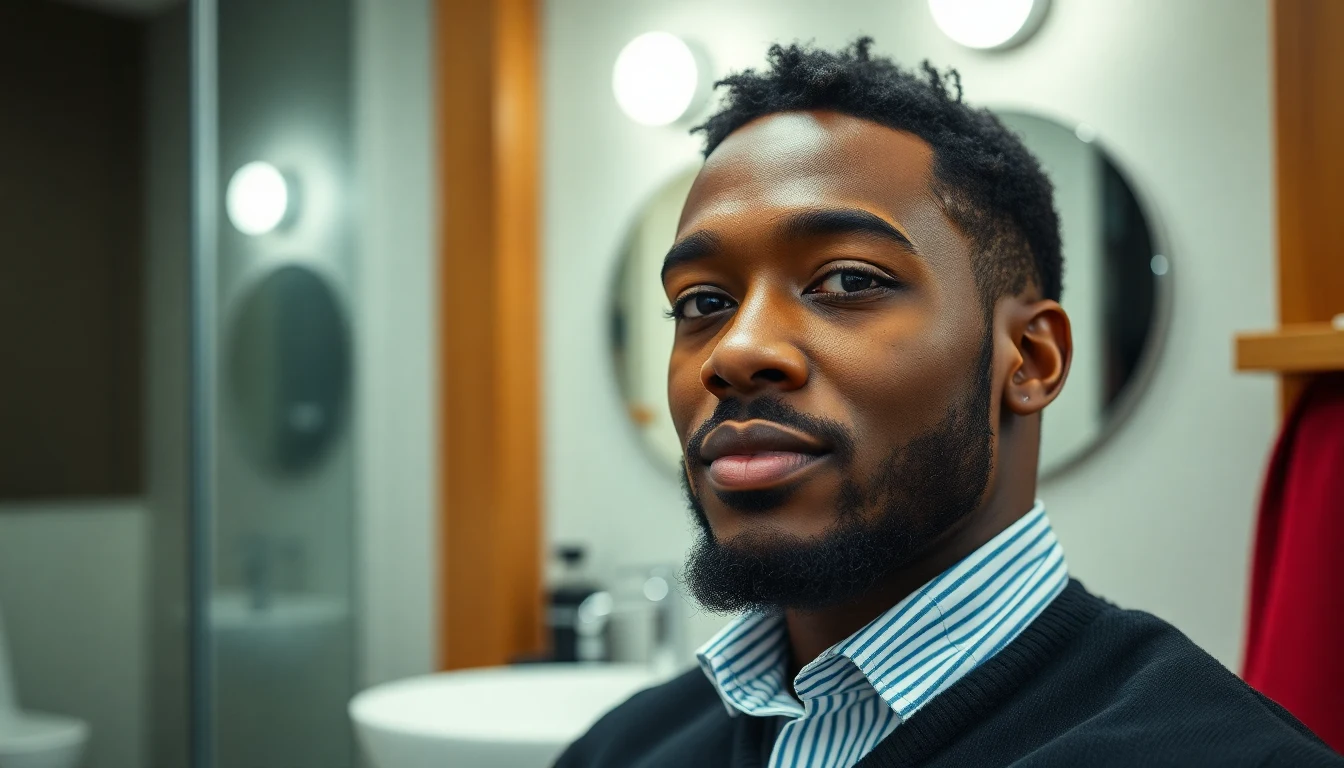
180 waves are the front-facing wave pattern that runs from your forehead straight back toward the crown. They are the first thing people see. They are the foundation of any wave pattern. And they are the most achievable wave style for someone who has never picked up a wave brush. If you follow the daily routine in this guide, you will see visible wave lines within three to five weeks.
Short on time? Jump to the daily routine or the week-by-week progress timeline.
What Are 180 Waves?: How To Get 180 Waves
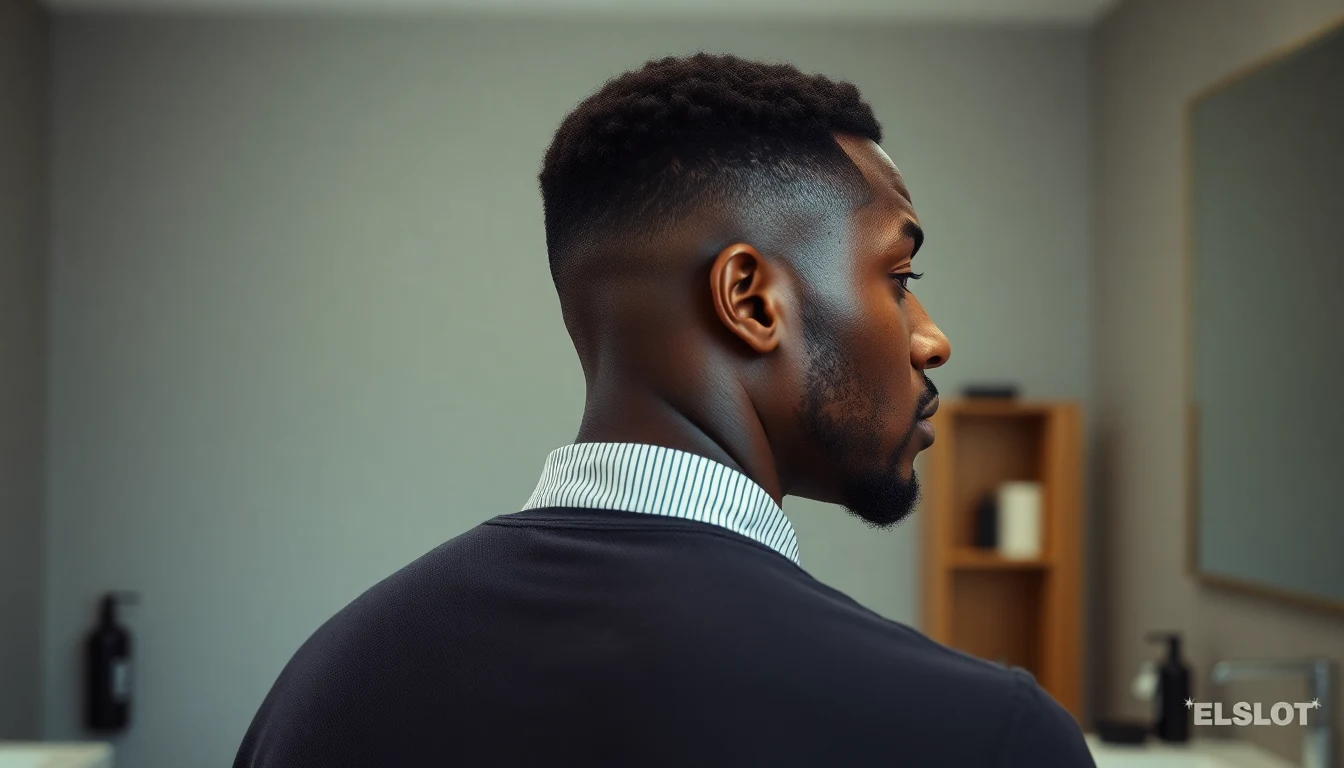
180 waves are a trained curl pattern where the waves flow in one direction across the top of your head, from the hairline straight back toward the crown. Unlike 360 waves, which radiate outward from the crown in every direction, 180 waves only cover the front and top. That “180” refers to the half-circle of wave coverage on top, as opposed to the full circle of a 360 pattern.
Think of it this way. If you stand in front of a mirror and look down at the top of your head, 180 waves give you clean, parallel lines running from your forehead to the back of your skull. The sides and back are typically faded, so the wave pattern sits on top like a defined, rippled surface.
The science is the same as any wave style. Your hair has a natural curl pattern (4A through 4C works best). You brush that curl in one consistent direction, apply a product for hold, then compress with a durag so the hair sets into the wave shape while you sleep, work, and go about your day. Over time, the curl “remembers” the direction you trained it in, and the wave becomes visible without brushing.
180 waves pair naturally with mid fades, low fades, and taper fades because the contrast between the waved top and the faded sides makes the pattern pop. When people compliment your waves, they are almost always looking at the front 180 section. That is why Jerome told me to start here.
180 Waves vs. 360 Waves: What is the Difference?
This is the first question every beginner asks, so let me clear it up with a direct comparison.
| Feature | 180 Waves | 360 Waves |
|---|---|---|
| Coverage | Top and front only | Entire head (top, sides, back) |
| Brush direction | Front to back (one direction) | Outward from crown (all directions) |
| Haircut pairing | Mid fade, low fade, taper | All-over length, no fade required |
| Difficulty | Beginner-friendly | Intermediate to advanced |
| Time to visible pattern | 3-5 weeks | 4-8 weeks |
| Brushing zones | One zone (top) | Four zones (crown, front, sides, back) |
| Maintenance | Moderate | High |
The fundamental difference is the brushing pattern. For 180 waves, every single stroke goes from your forehead toward the back of your head. That is it. One direction. For 360 waves, you start at the crown and brush outward toward the hairline in every direction, which means you are managing four separate zones and multiple brushing angles.
180 waves are easier because you are training less hair in fewer directions. The top of your head is the most cooperative section for wave training because the hair is longest there (with a faded cut) and the durag compresses the top most effectively. Side waves and back waves, which are the extra territory in a 360 pattern, take longer to develop and are harder to compress.
Here is something the wave community does not say enough: most clean 360 wave patterns started as 180s. Get the front locked in, then expand. That is not a shortcut. That is the progression.
What You Need to Start
You need four products and one tool to get 180 waves. That is the truth. The wave product market will try to sell you ten different creams and six different brushes. Ignore that noise. Here is what actually works.
1. A Quality Wave Brush (Medium Bristle)
Your brush does 80% of the work. For 180 waves, start with a medium bristle brush because your hair will be short when you begin and medium bristles grab the curl without tearing at your scalp. The Torino Pro #350 Wave Brush is the gold standard for beginners. Consistent bristle density, solid handle, and it holds up through months of daily use.

If you want options, the Crown Quality Products Wave Brush is another proven choice with slightly softer bristles. Check our complete best wave brush breakdown for a full comparison.
After four to five weeks of wolfing, switch to a hard bristle brush for your first session of the day. The extra length during wolfing needs harder bristles to penetrate and lay the curl flat. Keep the medium for your evening session. Using both is a technique called brush progression, and it accelerates pattern development significantly.
2. Wave Pomade
Pomade gives the hair hold and moisture so your brush strokes actually stick. I recommend WaveBuilder Natural Wave Pomade for 180 waves. It is water-based, which means it rinses clean without heavy buildup. Dime-sized amount before each brush session, rubbed between your palms until warm, then spread evenly across the top of your head.
Cold Label Wave Natural Pomade is another solid option with a lighter formula that works well in warmer climates where heavier products can melt and get greasy. Sportin’ Waves Pomade has been the barbershop budget pick for decades and still gets the job done. Check our best wave grease guide for the full breakdown on hold levels and ingredients.
Quick rule: more product is not better. A thin, even coat gives you the best brush glide. Too much clogs the wave pattern and makes your hair look greasy instead of waved.
3. A Silk or Velvet Durag
Compression is what turns brush sessions into actual waves. Without a durag, your hair springs back to its natural curl direction within an hour. The Slippery Customs Silk Durag is my recommendation for 180 waves specifically. Silk compresses well, retains moisture in the hair, and reduces friction, which matters because 180 waves only need moderate compression on the top section.
Velvet durags provide heavier compression and are better for wolfing phases or overnight wear. For the complete breakdown of materials and recommendations, see our best durag for waves guide.
4. Sulfate-Free Wave Shampoo
WaveBuilder Wave Shampoo is built specifically for wavers. It cleans out product buildup without stripping the natural oils that keep your curls pliable and hydrated. Regular shampoo with sulfates dries out your hair and makes the wave pattern look dull. Wash once a week maximum during your wave training.
Starter Kit Checklist
| Item | Recommended Product | Price Range | Purpose |
|---|---|---|---|
| Medium wave brush | Torino Pro #350 | $12-18 | Primary brushing tool |
| Wave pomade | WaveBuilder Natural Pomade | $5-9 | Hold and moisture |
| Silk durag | Slippery Customs Silk | $10-15 | Compression and pattern setting |
| Wave shampoo | WaveBuilder Wave Shampoo | $6-9 | Gentle weekly cleansing |
Total investment: $33 to $51. That is less than a single barbershop visit in most cities, and these products will last you six to eight weeks. Mastering how to get 180 waves takes practice but delivers great results. Mastering how to get 180 waves takes practice but delivers great results.
Getting the Right Haircut for 180 Waves
Your haircut sets the stage for your entire wave journey. Get this wrong and you are fighting uphill from day one.
Walk into the barbershop and ask for a 1.5 or 2 guard on top, cut with the grain, with a mid fade or low fade on the sides. The “with the grain” part is critical. Cutting with the grain (WTG) means the clippers move in the direction your hair naturally grows, preserving the curl direction you are going to train. Cutting against the grain disrupts that natural flow and makes your brush sessions work harder.
If your barber looks confused when you say “with the grain,” find a barber who understands waves. Not every barber does. The ones who get it will also know not to take the top too short, because you need enough curl length for the wave pattern to start forming. If you prefer doing your own maintenance cuts, check our best clippers for Black men guide.
The fade is important for 180 waves because it creates the visual contrast that makes your wave pattern stand out. A mid fade starting at the temple line is the most popular pairing. A taper fade works well if you want a more subtle transition. Check our types of fades guide for detailed comparisons.
The Daily 180 Wave Routine (Step by Step)
This is the system. It takes 20 to 25 minutes per session, twice a day. Some wavers add a third midday session, but two consistent sessions will get you there.
Step 1: Dampen Your Hair
Lightly mist the top of your head with water or use a damp washcloth. You want the hair slightly damp, not soaking. Damp hair is more pliable, which means the brush can lay the curl flatter with less resistance. This step takes 30 seconds and makes a measurable difference.

Step 2: Apply Pomade
Take a dime-sized amount of WaveBuilder Natural Wave Pomade (or your pomade of choice). Rub it between your palms until it warms up, then spread it evenly across the top of your head from the hairline to the crown. Even distribution matters. Thick spots create buildup zones where waves will not form cleanly.
Step 3: Brush (Front to Back Only)
This is where 180 waves differ from 360 waves. Every single brush stroke goes in one direction: from your forehead straight back toward the crown. There is no crown-outward pattern. There is no side brushing. One direction. Front to back.
Set a timer for 10 to 15 minutes. Start at the center of your hairline and brush straight back. Then move one inch to the left and brush straight back. Then one inch to the right and brush straight back. Work across the entire top section in overlapping rows, like you are mowing a lawn. Moderate, consistent pressure. You are training each curl to lay in the same direction, not scrubbing your scalp.
Each stroke should be smooth and deliberate. Pull the brush from the hairline all the way to the crown in one motion. Do not stop halfway. Do not lift and reset. One continuous stroke, front to back.
Step 4: Compress With Your Durag
Immediately after brushing, put on your Slippery Customs Silk Durag. Tie it snug enough that it holds the hair flat, but not so tight that you feel pressure on your temples. You should be able to slide one finger between the fabric and your forehead. Wear it for a minimum of 30 minutes after every session. Longer is better.
Step 5: Repeat (Evening Session)
Do the exact same routine before bed. Apply pomade, brush front to back for 10 to 15 minutes, then put on your durag for the entire night. The overnight session is the most productive one because you get eight uninterrupted hours of compression while the hair dries into the wave pattern.
Step 6: Weekly Wash and Style
Once a week, do a wash-and-style session:
- Wet your hair with warm water.
- Apply a quarter-sized amount of WaveBuilder Wave Shampoo.
- Work the shampoo in with front-to-back strokes. Do not scrub in circles. Your wash direction should match your brush direction.
- Rinse thoroughly with warm water.
- While your hair is still damp (not dripping), apply pomade and do a full front-to-back brush session.
- Put your durag on immediately and leave it for at least one hour.
The wash-and-style creates the deepest wave impressions you will get all week because damp hair is at its most pliable. My best wave progress always came the day after a solid wash-and-style night.
The 180 Wave Brushing Pattern (Detailed)
The beauty of 180 waves is the simplicity of the brushing pattern. You have one direction. One zone. One goal. But the details within that simplicity determine whether you get clean, defined waves or a messy, inconsistent texture.
Direction: Front to Back, Always
Every stroke starts at the hairline and ends at the crown. Never reverse direction. Never brush side to side on the top. Never start at the crown and push forward. Consistency in direction is what creates the parallel wave lines that define a good 180 pattern.
Coverage: Overlapping Rows
Divide the top of your head into imaginary rows, each about one inch wide, running from the center out to each side. Start at the center row (directly above your nose) and brush straight back. Then shift to the row immediately left and brush straight back. Then the next row left, until you reach the edge of your wave section (where the fade begins). Come back to center and repeat on the right side.
Each row should overlap slightly with the one next to it. This prevents gaps in the wave pattern. Gaps show up as uneven lines or patches where the wave breaks.
Pressure: Moderate and Consistent
Press the brush firmly enough that you feel the bristles reaching the scalp, but not so hard that your scalp turns red or feels raw afterward. The goal is to lay the curl flat in the direction of the stroke. Heavy pressure does not train waves faster. It irritates the scalp and can cause the hair to thin in brushed areas over time.
Speed: Slow and Deliberate
Fast brushing feels productive but is actually less effective. Slow strokes give the bristles time to engage with each curl and guide it into position. Count “one Mississippi” as you pull the brush from hairline to crown. That pace is about right.

Brushing Pattern Summary
| Element | 180 Wave Pattern | Common Mistake |
|---|---|---|
| Direction | Hairline straight back to crown | Brushing side to side or crown forward |
| Coverage | Overlapping rows across the top | Random brushing without a system |
| Pressure | Firm but not painful | Scrubbing hard enough to irritate scalp |
| Speed | One full stroke per second | Fast, choppy strokes that skip sections |
| Session length | 10-15 minutes | Two minutes and calling it done |
| Daily sessions | 2-3 per day | Brushing once and expecting results |
Wolfing for 180 Waves
Wolfing is the phase where you let your hair grow without getting a cut, while maintaining your daily brush-and-compress routine. This is where your wave pattern goes from faint pencil lines to deep, defined ridges. If you skip wolfing, you will never get past the “is that waves or just a texture?” stage.
Why Wolfing is Essential
When your hair is freshly cut at a 1.5 or 2 guard, the curls are very short. They can begin to lay in the direction you brush them, but they do not have enough length to fold into a visible wave. Wolfing gives the curl length to bend, and each brush session during the wolf pushes that longer curl deeper into the wave impression.
Think of it this way: a fresh cut is the rough sketch. Wolfing is where you trace those lines over and over until they become permanent grooves in the surface of your hair. Understanding how to get 180 waves is key to a great grooming routine.
180 Wave Wolfing Timeline
| Wolf Duration | Best For | What to Expect |
|---|---|---|
| 3 weeks | First wolf, beginners | Pattern starts to show on the front crown area |
| 4-5 weeks | Standard wolf for 180s | Clear wave lines across the entire top section |
| 6-8 weeks | Advanced, deep waves | Deep ridges, excellent definition after the cut |
For 180 waves specifically, a shorter wolf works because you are only training the top section. The hair on top grows faster and longer than the faded sides, which means your wave area gets more length to work with in less time. A four to five week wolf is the sweet spot for most 180 wavers. Understanding how to get 180 waves is key to a great grooming routine.
Wolfing Tips for 180s
Increase your brush sessions. During a wolf, the extra length can be stubborn. Bump from two sessions to three per day. The midday session does not need to be 15 minutes. Even five minutes of focused front-to-back brushing keeps the pattern trained.
Switch to a hard bristle brush for your first daily session. The longer hair during wolfing needs harder bristles to penetrate and lay flat. Use your medium brush for the evening session.
Wear your durag more. During wolfing, compression becomes even more critical because the longer hair has more spring-back force. Wear your durag at home whenever possible, not just during sleep.
Resist the urge to cut early. The wolf will feel uncomfortable around week three. Your hair will look rough, and you will think your waves are not progressing. They are. The cut reveal after a proper wolf is worth the discomfort. My barber Jerome used to say, “Ugly wolf, beautiful reveal. That is the deal.”
The Cut Reveal
After your wolf period, go back to your barber for a cleanup cut. Ask for the same guard (1.5 or 2, with the grain) on top, with your fade refreshed. When that extra length comes off and the wave pattern underneath is exposed, that is the moment every waver works for. The contrast between the deep-set waves and the fresh fade is striking.
After your first cut reveal, immediately start your next wolf. The cycle is: wolf for four to six weeks, cut reveal, wolf again. Each cycle makes the pattern deeper and more defined. By your third or fourth wolf cycle, the waves hold their pattern even right after a cut.
Week-by-Week Progress Timeline
This is what to expect if you follow the daily routine consistently. I am basing this on 4B/4C hair texture, which is the most common for wave training. Slightly looser textures (4A, 3C) may see results a few days earlier. Tighter textures may take slightly longer, but the waves will be deeper once they lock in.
Week 1: The Setup
You just got your wave cut. The hair is short and you probably do not see anything. That is normal. Your only job this week is building the habit. Two sessions per day, front-to-back brushing, durag every night. You are laying the invisible foundation.
What to watch for: slight texture change after removing the durag in the morning. The surface of your hair should start looking a bit more organized, like the curls are lining up instead of going random directions.
Week 2: Faint Lines
If you have been consistent, you will notice faint ripple lines when you look at your hair in good lighting. These are not waves yet. They are the curl pattern starting to align with your brush direction. Other people probably will not notice. You will, because you are looking for them.

Week 3: Visible Pattern Emerging
The wave lines become visible without needing perfect lighting. You can see front-to-back lines across the top of your head, especially right after a brush session and durag removal. This is the “almost there” phase. The temptation to skip sessions decreases because you can actually see progress.
Week 4: Connection
The individual wave lines start connecting into a continuous pattern across the top. This is where 180 waves start looking like actual waves instead of textured lines. The front waves, closest to your hairline, are usually the most defined because they get the most brush attention and the best durag compression.
Week 5-6: Definition (First Wolf Complete)
If you wolfed through weeks three to five, your cut reveal shows clear, defined 180 waves. The pattern has depth. The lines are consistent. Your barber will see it immediately. This is the first real payoff for your consistency.
Week 7-8: Depth and Hold
Into your second wolf cycle, the waves deepen. You notice that the pattern holds longer after removing the durag. Morning wave check shows the lines even before brushing. The curl is genuinely trained now, not just temporarily compressed.

Week 10-12: Locked In
By your third wolf cycle, the 180 pattern is locked. The waves hold through the day. They show through even when your hair is slightly damp. You can reduce maintenance brushing to once a day for upkeep, though two sessions keeps the definition at its sharpest.
Progress Timeline Summary
| Week | What You See | What is Happening |
|---|---|---|
| 1 | Nothing visible | Curl pattern starting to align |
| 2 | Faint lines in good lighting | Curls consistently laying in brush direction |
| 3 | Visible pattern after sessions | Wave impressions forming in the hair |
| 4 | Connected wave lines | Pattern becoming continuous across the top |
| 5-6 | Defined 180 waves (post-cut) | First wolf cycle complete, pattern has depth |
| 7-8 | Deeper definition, longer hold | Second wolf cycle deepening the grooves |
| 10-12 | Locked-in pattern | Hair naturally holds wave direction |
Common 180 Wave Mistakes to Avoid
I made most of these mistakes myself, and I have watched countless people in the wave community make them too. Save yourself the frustration.
1. Brushing in Multiple Directions
This is the number one mistake that kills 180 wave progress. If you brush front to back during one session and then accidentally brush side to side or crown to forehead during another, you are sending the curls conflicting instructions. The wave pattern breaks up and becomes inconsistent. 180 waves mean one direction. Always. No exceptions.
2. Skipping the Durag
Brushing without compression is like writing in sand at the beach. The pattern forms for a moment, then the curls spring back to their natural direction. You must compress after every brush session and sleep with your durag every single night. No durag, no waves. It is that simple.
3. Using Too Much Product
A thick layer of pomade does not create better waves. It clogs the pattern, attracts dust and lint, and makes your hair look greasy. A dime-sized amount for the entire top section is enough. Thin, even distribution is the goal.
4. Cutting Too Soon (Breaking the Wolf)
Getting a haircut before your wolf period is complete erases progress. Every time you cut, you remove the trained length that holds the wave pattern. If you wolf for two weeks and cut, you barely gained anything. Commit to the full four to six weeks.
5. Brushing Too Hard
Aggressive brushing does not speed up wave development. It irritates your scalp, can cause hair thinning, and leads to brushing fatigue where you quit because the sessions are painful. Moderate, consistent pressure is far more effective than short bursts of hard scrubbing.
6. Washing Too Often
Shampooing more than once a week strips natural oils and dries out the hair. Dry hair is stiffer, which means it resists the wave training. Stick to one wash-and-style per week. If your hair feels dry between washes, a light mist of water and a small amount of pomade is enough to rehydrate. When it comes to how to get 180 waves, technique matters most.
7. Expecting Results Overnight
Waves are a process, not an event. Some guys brush for three days, see nothing, and decide waves “do not work for their hair.” Give the system at least three weeks of consistent daily effort before you evaluate. Most hair textures between 3C and 4C can develop 180 waves with proper technique and patience. When it comes to how to get 180 waves, technique matters most.
180 Waves by Hair Type
Not all hair textures respond to wave training the same way. Here is what to adjust based on your curl pattern.

4C Hair (Tightest Coils)
4C hair has the tightest curl pattern and the most resistance to laying flat. The good news: once 4C waves lock in, they hold the deepest definition and last the longest. The trade-off is that it takes longer to see initial results, sometimes an extra week or two compared to looser textures.
Adjustments: Use a harder bristle brush earlier in your journey (week two instead of week four). Apply slightly more pomade for additional hold. Wolf for a full six weeks on your first cycle. Be patient.
4A/4B Hair (Medium Coils)
This is the sweet spot for 180 waves. The curl pattern has enough tightness to hold a wave but enough flexibility to lay flat relatively quickly. The standard routine in this guide is written primarily for 4A/4B textures.
No major adjustments needed. Follow the routine as described.
3C Hair (Loose Curls)
3C hair can achieve 180 waves, but the waves will appear wider and less defined than on 4A-4C hair because the natural curl is larger. You need a harder brush from the start, stronger hold pomade like Cold Label Wave Natural Pomade, and longer wolfing periods to compensate for the looser curl pattern.
Adjustments: Start with a hard bristle brush. Use maximum-hold pomade. Wolf for six to eight weeks. Double-rag overnight (silk under velvet) for extra compression.
3B and Straighter
Hair types 3B and straighter do not have enough natural curl to form traditional 180 waves. The curl pattern is too loose to be trained into a tight, visible wave. This is not a technique limitation. It is a texture limitation.
Transitioning from 180 Waves to 360 Waves
Once your 180 pattern is locked in (usually after two to three wolf cycles), you can expand into a full 360 wave pattern if you choose. Here is how.
Step 1: Stop Fading the Sides
Tell your barber to let the sides grow. Instead of a mid or low fade, ask for a 1.5 guard all around. You need the same length on the sides and back that you have on top.
Step 2: Add Side Brushing
Keep brushing the top front to back as you always have. Now add side brushing: from the top of your head downward toward your ear. Three minutes per side, after your front-to-back session. Work in overlapping rows from front to back of each side.
Step 3: Add Back Brushing
Brush from the crown straight down to the nape of your neck. Work from center outward. Two to three minutes total.
Step 4: Wolf and Compress
Wolf for six weeks minimum as the side and back waves develop. Your existing 180 pattern on top will hold while the new zones catch up. Wear your durag snug enough to compress the sides, or use a wave cap over your durag for full-head compression.
The transition takes four to eight weeks of dedicated side and back brushing. Your 180 pattern stays intact the entire time. You are just expanding the territory.
Best Products for 180 Waves
I have tested dozens of wave products over the years. These are the ones I recommend specifically for 180 wave training, organized by category.
Brushes
| Product | Bristle Type | Best For | Price |
|---|---|---|---|
| Torino Pro #350 | Medium | Daily brushing, beginners | $12-18 |
| Crown Quality Products | Medium-soft | Sensitive scalp, fresh cuts | $10-15 |
Pomades
| Product | Hold Level | Best For | Price |
|---|---|---|---|
| WaveBuilder Natural Pomade | Medium | Daily use, most hair types | $5-9 |
| Cold Label Natural Pomade | Medium-light | Warm climates, lighter hold | $8-12 |
| Sportin’ Waves Pomade | Medium | Budget-friendly classic | $3-5 |
Compression
| Product | Material | Best For | Price |
|---|---|---|---|
| Slippery Customs Silk | Silk | Daily wear, moisture retention | $10-15 |
Frequently Asked Questions
How long does it take to get 180 waves?
Most beginners see a visible 180 wave pattern within three to five weeks of consistent daily brushing and compression. The front waves tend to develop faster than what is needed for a full 360 pattern. With proper wolfing and a consistent routine, you should have defined waves in six to eight weeks. Hair texture, brushing frequency, and durag discipline all affect the timeline.

What is the difference between 180 waves and 360 waves?
180 waves cover the top and front of your head with waves flowing from the forehead straight back toward the crown. 360 waves radiate outward from the crown in every direction, including the sides and back. The brushing pattern is different: 180s are all front to back, 360s brush outward from the crown. 180 waves are easier for beginners because you focus on one direction and one zone.
Can you turn 180 waves into 360 waves?
Yes. Many wavers start with 180s and transition to 360s once the front pattern is locked in. Gradually extend your brushing to include the sides (top down to ear) and back (crown to nape) while maintaining the front pattern. The transition usually takes an additional four to six weeks. Your existing 180 waves stay while the rest develops.
Do I need different products for 180 waves versus 360 waves?
No. The same wave brush, pomade, durag, and shampoo work for both patterns. The only difference is brushing direction: 180 waves use front-to-back strokes while 360 waves use outward-from-crown strokes. Some wavers prefer silk durags for 180s because lighter compression works well when training just the top section.
How often should I brush for 180 waves?
Minimum two sessions per day, three if possible. Each session should last eight to 15 minutes with focused front-to-back strokes. The evening session before bed is the most important because overnight durag compression locks in the pattern from your brushwork.
What is the best haircut to start 180 waves?
Ask your barber for a 1.5 or 2 guard cut with the grain on top, paired with a mid or low fade on the sides. Cutting with the grain preserves the natural curl direction you are training. If your barber cuts against the grain, the curls get disrupted and your brush sessions have to work harder to correct the direction.
Further reading: For research-backed grooming advice, see Healthline Men’s Health.
Explore more tips at CulturedGrooming.com.
Further reading: For research-backed grooming advice, see Healthline Men’s Health.
Frequently Asked Questions
What’s the best brush to use when learning how to get 180 waves?
The Torino Pro #350 Wave Brush and Crown Quality Products Wave Brush are both excellent choices for beginners. These brushes have soft, dense bristles that effectively train your hair into wave patterns without causing damage or breakage.
Do I need to use a durag with 180 waves, and how often should I wear it?
Yes, wearing a durag is essential for maintaining and developing 180 waves. You should wear a silk durag like Slippery Customs after brushing sessions and overnight to compress your waves and keep them in place between grooming.
Is there a specific shampoo I should use to maintain my 180 wave pattern?
Using a wave-specific shampoo like WaveBuilder Wave Shampoo helps maintain your pattern by gently cleansing without stripping moisture from your hair. Avoid regular shampoos that can dry out your hair and disrupt the wave formation you’ve worked to build.
What pomade works best for defining and holding 180 waves?
Natural pomades like WaveBuilder Natural Wave Pomade, Cold Label Wave Natural Pomade, or Sportin’ Waves Pomade are ideal for holding your waves while keeping your hair healthy. These products provide the right balance of hold and moisture needed to maintain your wave pattern without flaking or buildup.