Last updated: February 2026 by Marcus Chen-Williams, Founder & Editor-in-Chief
The blowout haircut is one of the boldest styles in men’s grooming right now, and it is one of the most misunderstood. Walk into any barbershop and ask for a blowout, and you might get anything from a towering high-volume look to a subtle lift with tapered sides. The confusion exists because the blowout is not one haircut. It is a technique applied across a family of styles, and the result depends on your hair texture, your barber’s skill, and whether you know what to ask for.
I have watched this style move through barbershops across four cities over the past two years, and what makes it compelling is how well it crosses cultural and textural lines. Men with 4C coils, men with 2A waves, men with straight Asian hair. The blowout works for all of them, just differently. This guide covers every variation, how to talk to your barber, which face shapes work best, how to style it yourself at home, the products you need, and the maintenance schedule that keeps it looking sharp between cuts.
If you only read one section, go straight to “How to Ask Your Barber.” That single conversation determines 80% of your outcome.
What Is a Blowout Haircut?
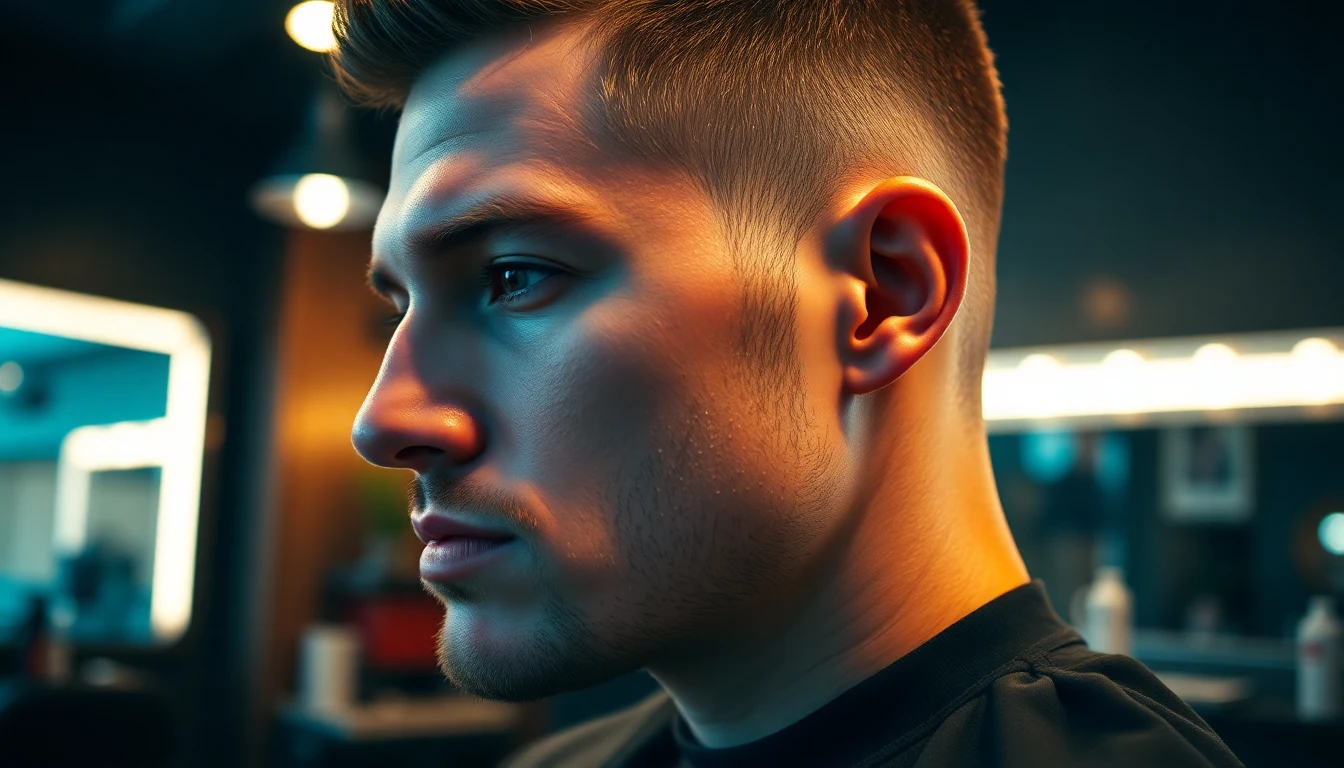
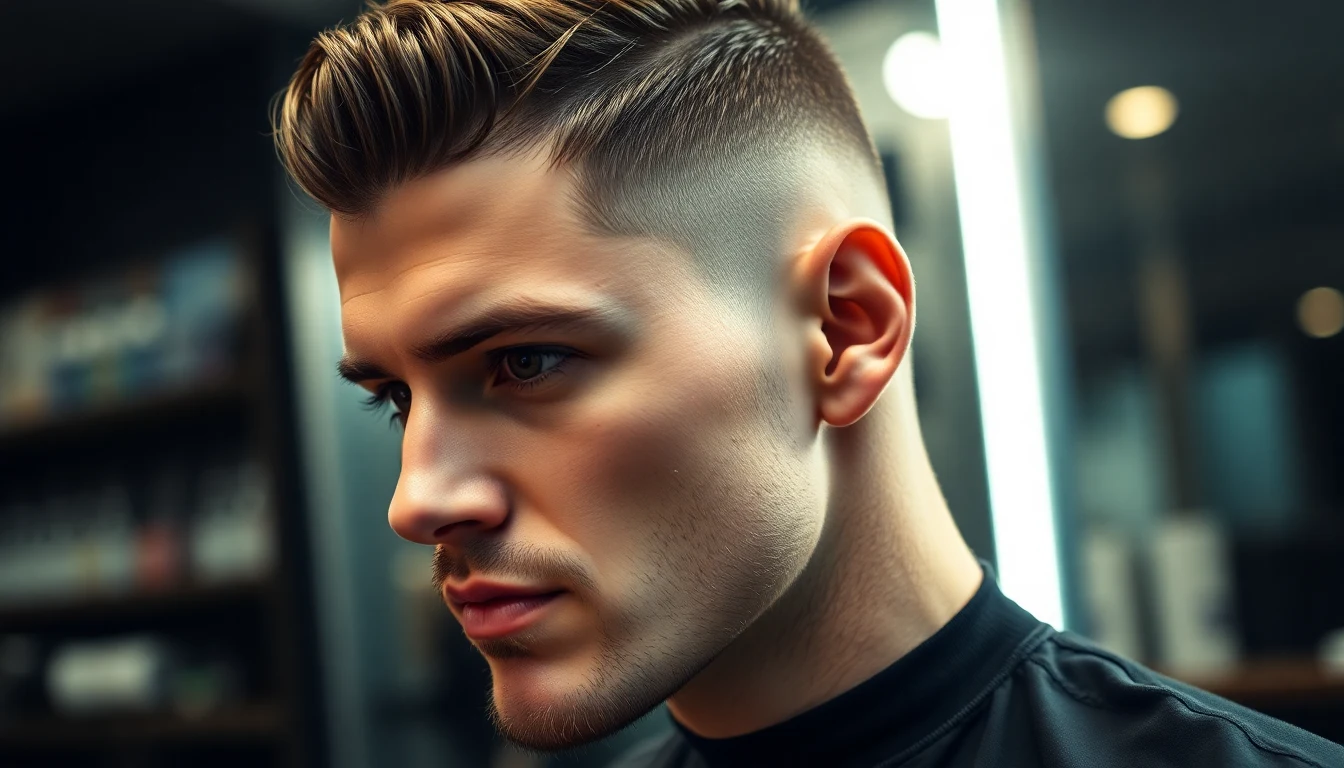
A blowout haircut is a style where the hair on top is cut to medium length (typically two to four inches) and then styled upward and outward using a blow dryer to create volume and height. The sides and back are faded or tapered short, creating a dramatic contrast between the full, voluminous top and the tight perimeter.

The name comes from the technique. The barber “blows out” the hair using a dryer and either a pick comb, a round brush, or their hands to lift the hair from the roots. The result is a full, elevated silhouette that adds visual height and width to the top of the head.
The blowout has roots in several grooming traditions. In Black barbershop culture, the blowout is closely related to the afro blowout of the 1970s, where a blow dryer and pick were used to stretch and volumize natural hair before shaping. In Italian-American and Latino barbershop culture, the blowout (sometimes called a “blow back” or “Brooklyn blowout”) describes a slicked-back, voluminous style with product-heavy hold. In contemporary barbering, the term has evolved to encompass any style where blow-drying is the primary styling technique for creating lift.
Here is the thing that makes this style stand out in 2026: it is one of the rare men’s haircuts where the styling technique matters as much as the cut itself. Your barber can give you the perfect foundation, but if you do not know how to blow-dry it at home, you will not be able to recreate the look between visits. That is why this guide spends as much time on styling as it does on the cut.
Blowout Variations: Every Style Explained
There are at least six distinct blowout variations you will encounter, and each creates a different silhouette. Understanding the differences before you sit in the chair saves both you and your barber time.
1. The Classic Blowout
The foundational style. Hair on top is three to four inches long, blow-dried straight up with maximum volume. Sides are faded from a 1 or 2 guard at the top of the fade down to skin at the temple and nape. The top has a rounded, full shape when viewed from the front.
Works best for: Curly and coiled hair types (3A to 4C). The natural curl pattern provides built-in volume when blow-dried, creating the fullest silhouette. Men with thick, dense hair also excel with this variation.
Less ideal for: Very fine, straight hair (Type 1A). Fine straight hair lacks the body to hold the classic blowout shape without heavy product. A different variation (like the textured blowout) works better.
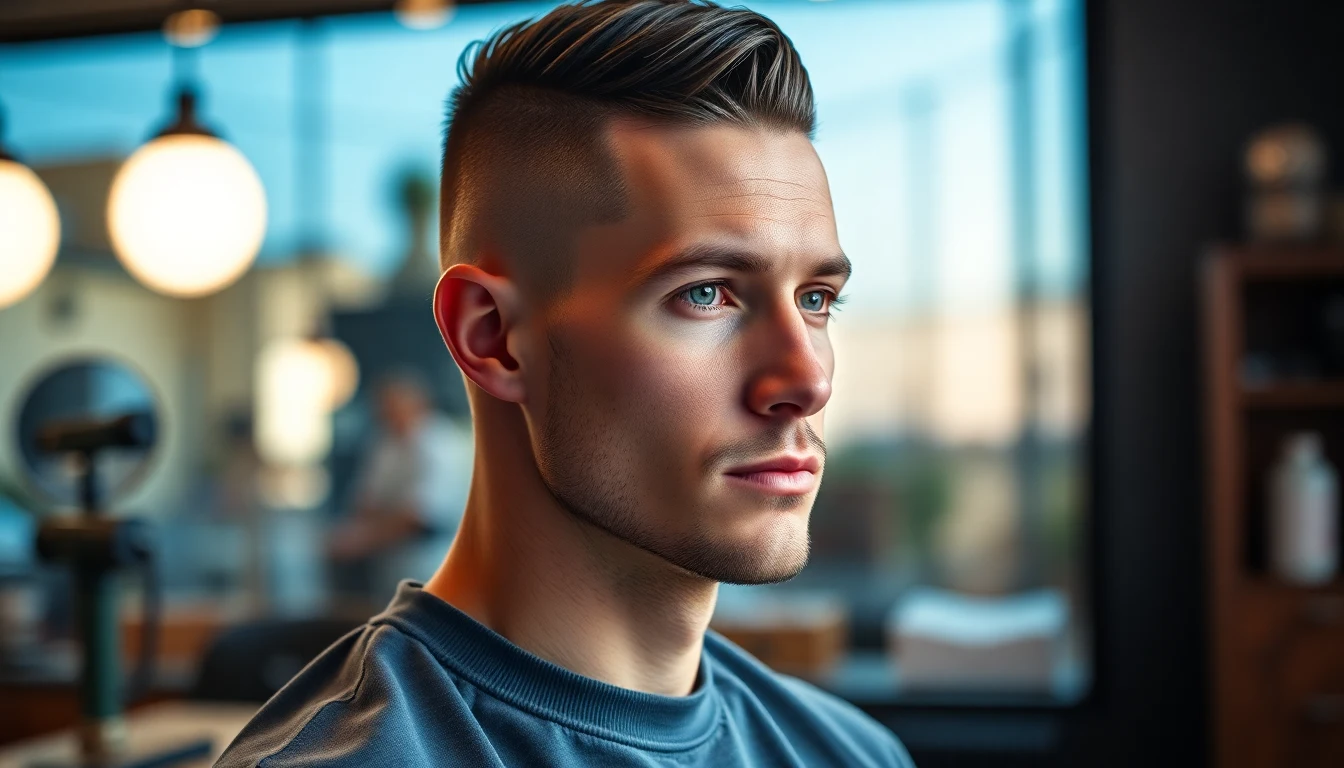
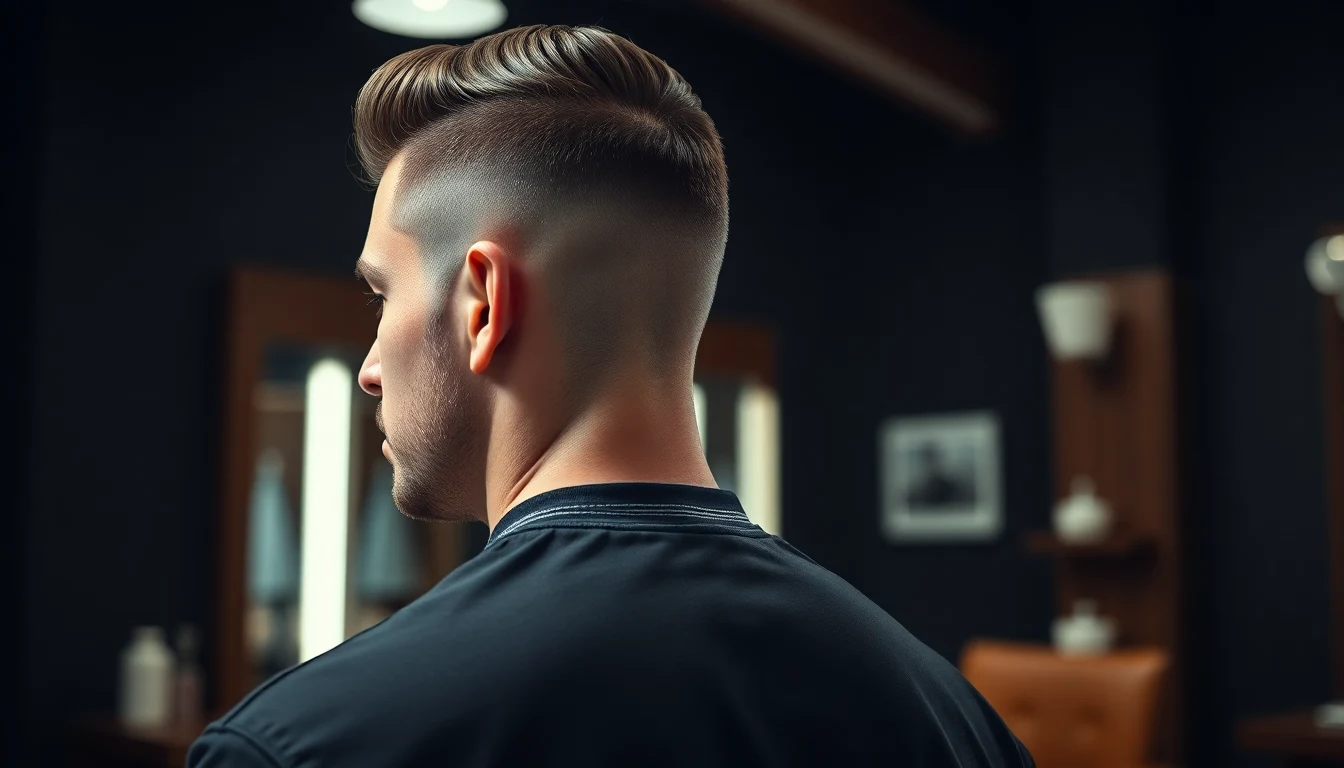
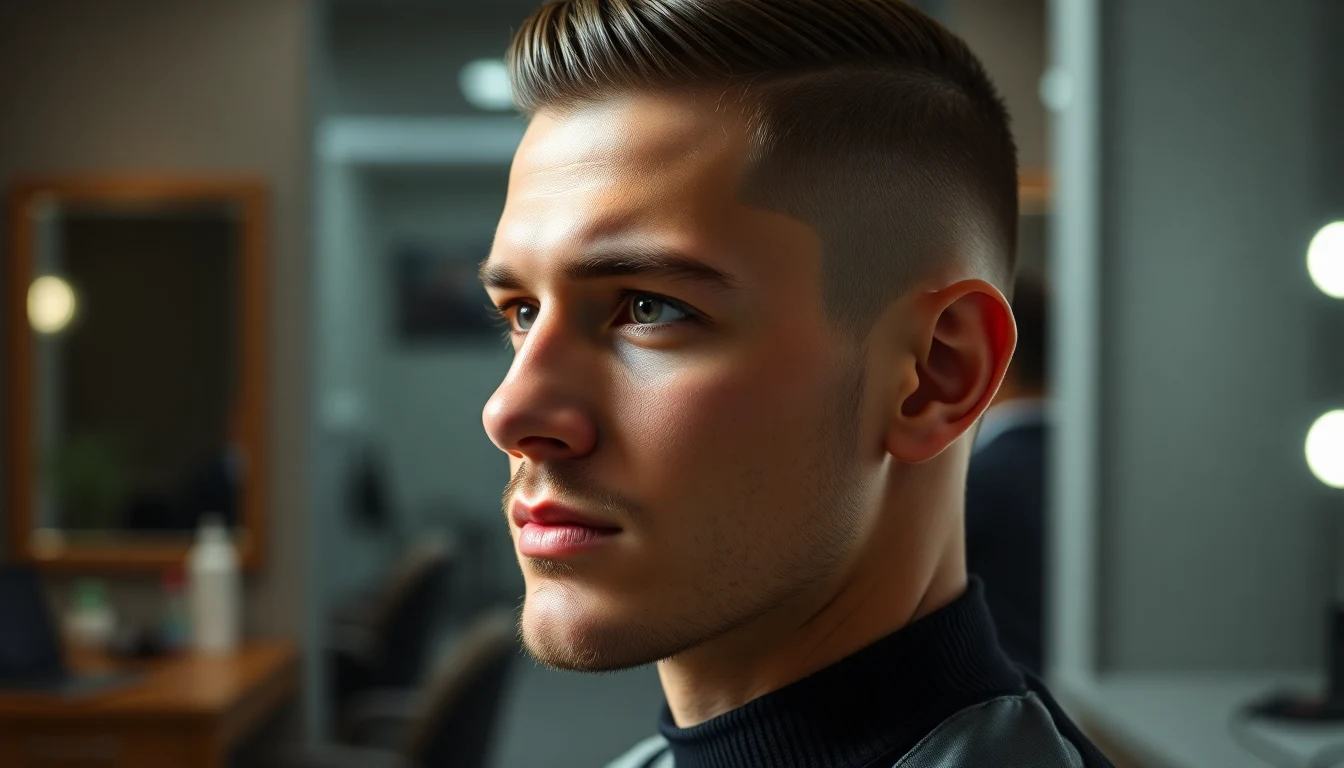
2. Blowout Fade
The most popular variation. Same voluminous top as the classic, but the fade is more deliberate and defined. The transition from the long top to the short sides is the focal point. You can customize this with a high fade, mid fade, or low fade depending on how dramatic you want the contrast.
High fade blowout: Maximum contrast. The fade starts near the top of the head, leaving all the volume concentrated at the crown. Dramatic, attention-getting, great for men who want a bold look. Read our complete high fade guide for details on the fade itself.
Mid fade blowout: Balanced look. The fade starts at the temple line. This is the most versatile option and works in both professional and casual settings. Our mid fade guide covers the specifics.
Low fade blowout: Subtle transition. The fade starts just above the ears. More conservative, easier to grow out, and works well in corporate environments. See our low fade guide for more.
Works best for: Every hair type. The blowout fade is the universal variation because the fade level can be adjusted to complement any texture.
3. Blowout Taper
Instead of a fade (which transitions to skin), the blowout taper maintains hair on the sides and back but gradually decreases in length. The transition is softer and more natural than a fade. Think of it as the difference between a cliff and a slope.
Works best for: Men who want the blowout volume without the high-maintenance fade. Professional settings where a sharp fade might feel too aggressive. Also excellent for men who go more than three weeks between cuts, because a taper grows out more gracefully than a fade. Our taper fade guide breaks down the full spectrum of taper options.
Less ideal for: Men who want maximum contrast and drama. The taper is the refined cousin of the fade.
4. South of France Blowout
Also called the “gentleman’s mohawk” or the “usher.” This variation concentrates the blowout volume in a strip down the center of the head, with the sides faded shorter than the front and back sections. The silhouette is wider at the top center and narrower at the temples.
The name “South of France” was popularized by Usher, who wore this style prominently in the early 2010s. It has evolved since then into a versatile template that works with various lengths and textures.
Works best for: Men with round or square face shapes who want to add vertical height. Curly and coiled textures (3B to 4C) create the most defined mohawk shape. Also works for men who want a blowout that stands out from the standard fade-and-volume approach. Mastering blowout haircut takes practice but delivers great results.
Less ideal for: Men with very long, narrow faces. The added height at the center can exaggerate the length.
5. Temp Fade Blowout
The temp fade (temple fade) targets only the temple area, creating a sharp, angular line where the hair meets the sideburns and forehead. Combined with a blowout on top, this creates a clean, geometric frame around the face while keeping the sides slightly longer than a full fade. Mastering blowout haircut takes practice but delivers great results.
Works best for: Men who want sharp lines without committing to a full fade. Great for oval and heart-shaped faces because the angular temple line adds definition to the jawline area. Works well with straight and wavy hair types that might not hold a full blowout fade as cleanly.
6. Textured Blowout
The modern evolution of the blowout. Instead of blow-drying the hair straight up for uniform volume, the barber uses a combination of blow-drying, texturizing scissors, and product to create a more natural, tousled look with movement and separation. The volume is there, but it looks lived-in rather than sculpted.
Works best for: Wavy hair (2A to 2C), where the natural texture provides movement. Also excellent for men with straight, thick hair who want volume without the round, uniform shape of the classic blowout. This is the variation I see most often on men with East Asian hair types, because the combination of thick strands and straight texture creates clean, defined textured movement when blow-dried with the right product.
Less ideal for: Very tightly coiled hair (4B to 4C), where the natural curl pattern already provides texture. For those textures, the classic blowout or blowout fade is the better choice.
Which Face Shape Works Best with a Blowout?
The blowout adds height and width to the top of the head. That geometry works differently depending on your face shape. Here is the breakdown.
| Face Shape | Works? | Best Blowout Variation | Notes |
|---|---|---|---|
| Oval | Excellent | Any variation | Balanced proportions. The blowout enhances without distorting. |
| Round | Excellent | Classic blowout, South of France | Added height elongates the face. Avoid wide, round volume; go for vertical lift. |
| Square | Good | Blowout taper, textured blowout | Softened edges from the taper complement the strong jawline. Avoid extremely angular fades. |
| Oblong/Long | Use caution | Blowout fade (low), textured blowout | Excessive height can make the face look longer. Keep top volume moderate. Use a low fade. |
| Diamond | Good | Blowout fade (mid), temp fade blowout | Volume on top balances narrow forehead and chin. Mid fade keeps the width proportional. |
| Heart | Good | Temp fade blowout, textured blowout | Volume adds balance to the narrower chin. Avoid extremely high, wide volume on top. |
| Triangle | Excellent | Classic blowout, blowout fade (high) | Volume on top balances the wider jawline. High fade creates the strongest visual balance. |
The universal rule: if your face is wider than it is long, add height. If your face is longer than it is wide, moderate the height. The blowout is adjustable enough to accommodate either direction.
How to Ask Your Barber for a Blowout
This is the section that saves you from walking out of the barbershop disappointed. I have talked to barbers across four cities about this, and the consensus is the same everywhere: most miscommunication happens because the client has a picture in their head that they cannot translate into words. Here is how to bridge that gap.
The Script
Use this as a template. Adjust based on the variation you want. For more guidance, GQ provides expert resources on men’s grooming.
“I want a blowout [variation]. Leave the top at [length] inches and blow dry it up for volume. I want a [high/mid/low] fade on the sides, [to skin/with a shadow] at the bottom. For the back, [same fade/tapered]. I want the lineup [sharp and angular/natural and soft].”
Examples by Variation
Classic blowout fade: “I want a blowout with a mid fade. Leave three to four inches on top and blow dry it up. Fade the sides to a 1 guard at the top and skin at the temple. Sharp lineup.”
South of France: “I want a South of France blowout. Keep the volume concentrated in a wider strip down the center, fade the sides higher than the front and back. High fade to skin on the sides.”
Textured blowout: “I want a textured blowout. Keep about three inches on top but use texturizing scissors to thin it out and create some separation. Mid fade on the sides. I want movement, not a solid block of volume.”
The Reference Photo Rule
Bring a photo. Always. Find someone on Instagram or in a barbershop portfolio whose hair texture is similar to yours and who has the blowout variation you want. Showing your barber a photo of a man with 4C hair when you have 2A waves will not produce the same result, because the blow-drying technique is completely different.
Your barber should be able to look at the photo, look at your hair, and tell you whether the exact style is achievable with your texture. A good barber will also suggest modifications: “I can get you that volume, but with your hair type, we should do a taper instead of a fade to help it hold.” Trust their expertise on the technical side. You bring the vision; they bring the execution.
Questions to Ask Before the Cut
- “How much length do I need on top for the volume in this photo?”
- “Will this work with my hair texture, or do we need to modify?”
- “What products should I use to maintain this between visits?”
- “How often will I need to come back for maintenance?”
- “Can you show me the blow-drying technique so I can do it at home?”
That last question is the most important one most men skip. If your barber blows out your hair perfectly but you cannot recreate it, you will only have the style for one day after every cut. Ask them to talk you through the technique while they do it. Watch in the mirror. Pay attention to the angle of the dryer, the direction of the comb, and where they start.
For more on communicating with your barber about fades specifically, our complete guide to types of fades covers every level and variation in detail.
How the Blowout Works Across Hair Textures
This is where most guides fail. They describe the blowout as if everyone’s hair behaves the same way with a blow dryer. It does not. Here is what changes based on your hair type.
Type 1: Straight Hair (1A, 1B, 1C)
The challenge: Straight hair lacks natural curl or coil to provide body. Volume comes entirely from technique and product. Without both, the hair falls flat within hours.
The technique: Use a round brush while blow-drying. Lift sections of hair at the root, wrap around the brush, and direct warm air from the dryer at the root area for five to 10 seconds per section. Work from the back of the head forward. The round brush creates bend and lift that straight hair cannot produce on its own.
The products: Volumizing mousse applied to damp hair before blow-drying (like Moroccan Oil Volumizing Mousse). Finish with a strong-hold hairspray to lock the volume. Without product, straight hair blowouts collapse quickly.
The result: A cleaner, more sculpted blowout. Less organic and wild than curly-hair blowouts, but polished and defined. The textured blowout variation works particularly well with straight hair because the texturizing scissors create movement that the hair does not have naturally.
Type 2: Wavy Hair (2A, 2B, 2C)
The advantage: Wavy hair has natural body and movement. It holds the blowout shape better than straight hair with less product.
The technique: Blow dry with a pick or your fingers rather than a round brush. Work against the natural wave direction to create lift. For 2A and 2B, direct the dryer upward from below while combing up with a wide-tooth comb. For 2C, a pick works better because the tighter waves respond to being lifted from the root.
The products: Sea salt spray on damp hair (like Bumble and bumble Surf Spray) adds texture and grip. Follow with a medium-hold spray. Avoid heavy mousse; the natural wave provides enough body that mousse can make it feel stiff.
The result: A textured, natural-looking blowout with movement. This is the “California surfer blowout” aesthetic that has been trending in barbershops since 2024. Understanding blowout haircut is key to a great grooming routine. Understanding blowout haircut is key to a great grooming routine.
Type 3: Curly Hair (3A, 3B, 3C)
The advantage: Curly hair is the sweet spot for blowouts. It has natural volume, holds shape well, and the blow-drying process stretches curls to create impressive height and fullness.

The technique: Use a blow dryer with a concentrator nozzle and a pick. Start at the nape and work upward. Insert the pick at the root, lift, and direct the dryer at the lifted section. Follow the pick upward as you dry. The heat stretches the curl while the pick lifts it away from the scalp. Work section by section until the entire top is stretched and lifted.
The products: A heat protectant before blow-drying is essential to prevent damage to the curl pattern. Apply a light mousse or volumizing spray mousse before drying for additional lift. Finish with a flexible-hold spray that allows some movement. For men who want to learn more about styling their curly hair with fades, our curly hair fade guide is a dedicated resource.
The result: Full, rounded volume with visible curl texture at the tips. This is the blowout you see most often in barbershops because it produces the most dramatic before-and-after transformation.
Type 4: Coily Hair (4A, 4B, 4C)
The advantage: Coily hair produces the most volume per inch of any texture. A man with three inches of 4C hair can achieve a blowout that looks like five inches of straight hair because the blow-drying process elongates the tight coil pattern.
The technique: This is where the afro pick is essential. Work in small sections. Spray each section with water or leave-in conditioner to soften the coils. Insert the pick at the root, lift away from the scalp, and direct the blow dryer at the stretched section. Use medium heat (high heat on 4C hair can cause heat damage and permanently alter the curl pattern with repeated use). Work patiently. Rushing leads to uneven stretch and frizz. (We recommend this TRESemmé Rich Moisture Moisturizing Conditioner with.)
The products: A leave-in conditioner or heat protectant is non-negotiable. 4C hair is more fragile than other types and susceptible to heat damage. Apply a light cream or spray leave-in to each section before blow-drying. After styling, use a light-hold spray or texturizing powder to define the shape. Avoid heavy oils or greases that weigh down the volume.
The result: Dramatic, full-bodied volume with a soft, cloud-like texture. The blowout on 4C hair is, in my opinion, one of the most visually striking men’s hairstyles that exists. It turns heads because the volume is real, organic, and unmistakable.
How to Style a Blowout at Home (Step by Step)
Your barber gives you the cut. You maintain the style between visits. Here is the exact technique to blow-dry your hair into a blowout at home, adapted for different textures.
What You Need
- Blow dryer with at least two heat settings and a concentrator nozzle. Ionic dryers reduce frizz. Budget pick: any $25-40 dryer with a nozzle attachment. Quality pick: BabylissPRO Nano Titanium.
- Afro pick (for Type 3 and 4 hair). Metal picks with wide teeth provide the best lift.
- Round brush (for Type 1 and 2 hair). A 1.5 to 2-inch barrel provides good root lift.
- Wide-tooth comb (alternative to pick for Type 2 hair)
- Sectioning clips (optional but helpful for thick hair)
- Heat protectant spray
- Volumizing product (mousse, spray, or powder depending on your texture)
- Finishing spray (light to strong hold depending on how long you need it to last)
Step-by-Step Process
-
Start with clean, damp hair. Wash your hair and towel dry until it is about 70% dry. Not dripping wet, not completely dry. Damp hair takes styling product better and is easier to shape with heat.
Blowout Haircut: The Complete Guide for Men (2026) — grooming guide image. -
Apply heat protectant. Spray evenly through the top section. This is not optional. Repeated blow-drying without heat protection damages the hair cuticle, leads to dryness and breakage, and can permanently alter your curl pattern over time.
-
Apply volumizing product. For straight and wavy hair: work a golf-ball sized amount of mousse through the roots and mid-lengths. For curly hair: spray a volumizing mist at the roots. For coily hair: apply a light leave-in conditioner to each section.
-
Section the hair. If your hair is thick, clip the top sections out of the way and start at the nape, working upward. If your hair is thinner, you can work from front to back without sectioning.
-
Blow dry with lift.
- For straight/wavy: Wrap sections around the round brush at the root. Direct the dryer at the root area while holding the brush in the lifted position for five to eight seconds. Release. Move to the next section.
- For curly: Insert the pick at the root, lift the section away from the scalp. Direct the dryer at the lifted hair while slowly pulling the pick upward through the section. Follow the pick with the dryer.
- For coily: Same pick technique but work in smaller sections and use medium heat. Gently stretch the coils as you dry. The key is patience. Do not rush. Each section takes 15 to 20 seconds.
-
Direct the airflow. Always blow the dryer from the roots toward the tips in the direction you want the hair to go (upward and slightly forward or slightly back, depending on your preferred silhouette). Blowing against the grain creates frizz.
-
Shape with your hands. Once the hair is fully dry and lifted, use your hands to shape the overall silhouette. Push hair forward if you want it to lean over the forehead. Pull it back if you want a cleaner profile. Pat the sides to keep them flat against the head.
-
Apply finishing spray. Hold the can 10 to 12 inches from your head and spray in a sweeping motion around the entire top. For all-day hold, use a strong spray like got2b Glued Blasting Freeze Spray or Kenra Volume Spray 25. For a softer, more natural finish, use a flexible-hold spray.
-
Final check. Look at your profile from both sides using a hand mirror. The blowout should have even volume across the top. If one side is flatter, re-dry that section with the pick or brush.
Total time: 10 to 15 minutes once you have the technique down. The first few times will take longer. That is normal.
The Best Products for a Blowout Haircut
We tested over 20 styling products across our editorial team to find what actually holds a blowout all day without making the hair feel crunchy, greasy, or stiff. Here are the ones that earned a spot.
Product Comparison Table
| Product | Type | Best For | Hold Level | Price | Key Feature |
|---|---|---|---|---|---|
| SexyHair Root Pump Mousse | Volumizing mousse | Straight, wavy hair (1A-2C) | Medium | $18-22 | Root-targeted formula. Lifts without weighing down. |
| Moroccan Oil Volumizing Mousse | Volumizing mousse | Curly, wavy hair (2B-3C) | Medium | $28-32 | Argan oil infused. Adds volume without drying curls. |
| Bumble and bumble Surf Spray | Sea salt spray | Wavy, textured hair (2A-3A) | Light-Medium | $27-31 | Adds grit and texture for the textured blowout variation. |
| Hanz de Fuko Quicksand | Texturizing powder/paste | All textures (dry application) | Medium-Strong | $19-23 | Matte finish. Revives volume on day 2-3 without rewashing. |
| got2b Glued Freeze Spray | Hairspray | All textures (finishing) | Strong | $5-8 | Budget-friendly. Locks blowout in place all day. Barber favorite. |
| Kenra Volume Spray 25 | Hairspray | All textures (finishing) | Strong | $18-22 | Professional-grade hold. Wind-resistant. Humidity-resistant. |
Product Recommendations by Hair Type
Straight hair (1A-1C): SexyHair Root Pump Mousse before blow-drying, Kenra Volume Spray 25 to finish. Straight hair needs the most help with hold, so the combination of root-lifting mousse and strong finishing spray is essential.
Wavy hair (2A-2C): Bumble and bumble Surf Spray on damp hair for texture, light finishing spray to set. The sea salt adds grip that waves naturally lack without making the hair feel heavy. For the textured blowout variation, surf spray alone might be enough.
Curly hair (3A-3C): Moroccan Oil Volumizing Mousse before blow-drying (the argan oil prevents the curls from drying out during the blow-dry process), flexible-hold spray to finish. Avoid anything that dries matte on curly hair; curls look healthier with slight sheen.
Coily hair (4A-4C): Leave-in conditioner before blow-drying. A light hold spray or texturizing powder after styling. Coily hair that has been blow-dried already has significant volume. The product’s job is to define and hold the shape, not create volume. Heavy sprays make blown-out coils feel crunchy and can be difficult to wash out.
Products to Avoid
- Heavy pomades and waxes. These weigh the hair down and kill volume. A blowout depends on lift. Pomade fights lift.
- Oil-based products before blow-drying. Oil conducts heat and can cause the dryer to overheat the hair strand, leading to damage. Save oils for post-styling touch-ups.
- Gel. Gel creates a hard, shiny hold that is the visual opposite of what a blowout should look like. Blowouts need movement and body, not a shellacked surface. If you are looking for gel-based styles, our buzz cut guide covers shorter styles where gel works better.
Maintenance: Keeping Your Blowout Sharp Between Cuts
A blowout is not a set-it-and-forget-it style. Here is the maintenance schedule that keeps it looking intentional rather than grown out. When it comes to blowout haircut, technique matters most.
Daily Maintenance (2-3 Minutes)
- Morning: If the volume has flattened overnight, re-blow dry the top section for two to three minutes with a pick or brush. You do not need to wet it first. Just hit it with the dryer and lift. A quick spritz of texturizing product before re-drying adds grip.
- Night: Sleep with a loose satin bonnet or on a satin pillowcase. Cotton pillowcases create friction that flattens the top and causes frizz. Satin preserves the shape. Do not sleep with a tight durag or compression cap; that defeats the purpose of the volume.
Wash Schedule
Every two to three days. Washing daily strips natural oils that help the hair hold shape. Going more than three days leads to product buildup that weighs the hair down. When it comes to blowout haircut, technique matters most.
After washing, you need to re-do the full blow-dry process. This is the maintenance commitment of a blowout. Every wash day is a styling day. Budget 10 to 15 minutes.
Barber Visit Schedule
| Service | Frequency | Purpose |
|---|---|---|
| Lineup touch-up | Every 2-3 weeks | Keeps the edges, temples, and neckline sharp |
| Full cut | Every 3-4 weeks | Resets the fade/taper and reshapes the top |
| Blow-dry shaping | Every 4-6 weeks | Barber adjusts the blow-dry technique as hair grows |
If you are getting a fade blowout, the fade grows out noticeably after about two weeks. Three weeks is the maximum before it starts looking unkempt. If you want a lower-maintenance version, the blowout taper grows out more gracefully and can stretch to four weeks between full cuts.
For men who want to maintain their own edges between visits, the Andis T-Outliner is the standard tool. See our best clippers for fades guide for a full breakdown of edge-up tools.
Growing Out a Blowout
If you decide to transition away from the blowout, here is the plan:
- Weeks 1-3: Stop blow-drying. Let the top settle into its natural pattern. Continue maintaining the fade or taper.
- Weeks 3-6: The sides and top will start to equalize. This is the awkward phase. A shadow fade can help manage the transition by softening the contrast.
- Weeks 6-12: The grow-out is established. You can transition into a longer style, a different cut, or start the blowout again with the added length.
Blowout vs. Similar Styles: What Is the Difference?
The blowout gets confused with several other styles. Here is how they differ.
| Style | Key Difference from Blowout | Hair Direction | Product Weight |
|---|---|---|---|
| Blowout | Hair blown upward and outward for volume | Up and out | Light to medium |
| Pompadour | Hair swept backward and upward; more structured | Up and back | Medium to heavy |
| Quiff | Hair swept forward and upward at the front; back may be flat | Forward and up | Medium |
| Faux hawk | Hair spiked upward in a center strip; sides shorter | Straight up (center) | Medium to heavy |
| Afro blowout | Same technique as blowout but grown to afro length; no fade | Up and out (all directions) | Light |
| Crew cut | Shorter overall; minimal volume; no blow-drying required | Forward or natural | Light |
The blowout’s defining characteristic is that the blow dryer is the primary styling tool. If the style relies more on pomade, gel, or the cut itself, it is not a blowout. It might be great, but it is a different style.
Common Mistakes to Avoid
After testing this style across our team and talking to barbers who do blowouts daily, these are the mistakes that come up most often.
Mistake 1: Using High Heat on Every Texture
High heat works on thick, dense hair that can absorb it. On fine, straight, or fragile coily hair, high heat causes damage quickly. Use medium heat for 4C, fine, and damaged hair. Reserve high heat for thick, dense, healthy hair that can handle it. Always use heat protectant regardless of setting.
Mistake 2: Skipping the Fade Maintenance
A blowout with an overgrown fade looks unfinished. The contrast between the voluminous top and the tight sides is the point. When the sides grow out, the contrast disappears and the style looks like you simply did not get a haircut. Stay on the two to three week maintenance schedule.
Mistake 3: Using Heavy Product
The number one killer of a good blowout is heavy product. Pomades, waxes, heavy creams. They all add weight that fights against the lift you created with the dryer. Use lightweight products: mousse, spray, powder. If you can feel the product weighing your hair down, switch to something lighter.
Mistake 4: Blow-Drying Soaking Wet Hair
Starting with dripping wet hair extends the drying time and increases heat exposure. Towel dry to about 70% first. The product applies better on damp hair, and the actual blow-drying takes less than half the time.
Mistake 5: Ignoring the Back
Most men focus on the front and sides because that is what they see in the mirror. But the back of the head is visible to everyone else. Make sure the volume extends evenly across the top from front to back. Use a hand mirror to check the rear profile.
Mistake 6: Sleeping Without Protection
One night on a cotton pillowcase flattens hours of styling work. Cotton creates friction. Friction destroys volume. Use satin. It is a two-dollar investment that preserves a $40 haircut.
Frequently Asked Questions
What is a blowout haircut?
A blowout is a style where the hair on top is blow-dried upward and outward for volume and height, with the sides faded or tapered short for contrast. The blow dryer is the primary styling tool. It works across all hair textures, from straight to tightly coiled.
How do you ask your barber for a blowout?
Specify the variation (classic, fade, taper, South of France, textured), the length on top, the fade level, and the lineup style. Bring a reference photo of someone with a similar hair texture. Ask your barber to walk you through the blow-drying technique so you can maintain it at home.
How long does your hair need to be for a blowout?
Minimum two inches on top, but three to four inches is ideal. Coily hair (4B, 4C) can achieve more volume with less length because blow-drying elongates the curl pattern. Straight hair may need more length to compensate for the lack of natural body.
How do you maintain a blowout between barber visits?
Wash every two to three days. Re-blow-dry after each wash. Sleep on satin. Get a lineup every two to three weeks and a full cut every three to four weeks. Use lightweight texturizing products for day-two touch-ups.
Does a blowout work on all hair types?
Yes. The technique and products change, but the principle works for Type 1 straight through Type 4C coiled hair. Curly and coily textures often get the most dramatic results because the blow-drying process stretches natural curl pattern, creating significant volume.
What is the difference between a blowout and a blowout fade?
“Blowout” describes the styling technique on top. “Blowout fade” specifies that the sides are cut with a fade rather than left longer or tapered. You can pair a blowout with any side treatment: high fade, mid fade, low fade, taper, or skin fade. The blowout fade is just the most common combination.
The Bottom Line
The blowout haircut works because it respects what your hair already does and amplifies it. Whether you have tight 4C coils, loose 2A waves, or pin-straight 1B hair, the blow dryer and the right technique turn your natural texture into volume that commands attention.
Here is the recap:
- Choose your variation based on your face shape, hair texture, and maintenance willingness. Classic blowout fade is the safest bet for first-timers.
- Bring a reference photo to your barber. Specify the fade level, top length, and ask them to demonstrate the blow-dry technique.
- Use lightweight products. Mousse before drying, texturizing spray or powder for grip, light hairspray to finish. No pomade. No wax. No gel.
- Maintain the fade every two to three weeks. An overgrown fade eliminates the contrast that makes the blowout work.
- Sleep on satin. It costs two dollars and preserves your style overnight.
Start with a conversation with your barber, a good reference photo, and a willingness to spend 10 to 15 minutes with a blow dryer. The rest falls into place.
Ready to explore more fade options? Our complete guide to types of fades covers every level and variation. For men interested in other short, bold styles, check out our buzz cut guide and skin fade guide for alternatives that pair well with the blowout aesthetic.
Further reading: For research-backed grooming advice, see Healthline Men’s Health.
Explore more tips at CulturedGrooming.com.
Further reading: For research-backed grooming advice, see Healthline Men’s Health.