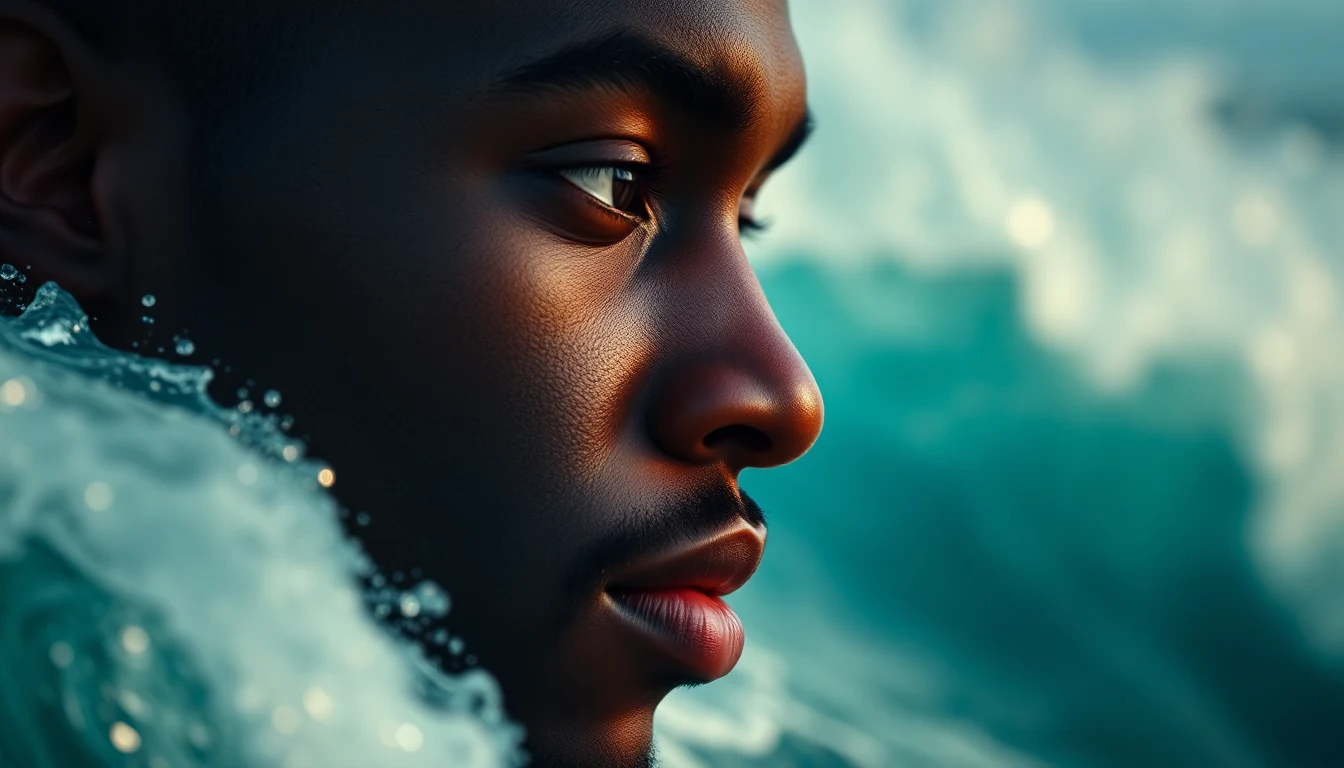
If you want to master how to get 360 waves, this guide covers everything you need to know.
If you want to master how to get 360 waves, this guide covers everything you need to know. Last updated: February 2026 by Darius Washington, Black Men’s Grooming Editor
I grew up watching my older cousins brush their hair in my uncle’s barbershop in Atlanta. Forty-five minutes, twice a day, no excuses. They were not just grooming. They were training. And when they pulled that durag off and the light caught those 360 waves, the whole shop had something to say about it. That is what how to get 360 waves really comes down to: a system, not a shortcut.
This guide breaks down the complete process from day one, including what products you need, how to brush, how long to wolf, and what to expect week by week. I have adapted this for different hair types because 4C waves and 3C waves are not the same journey. Follow this system and you will see a visible wave pattern within four to six weeks.
If you only read one section, jump to the week-by-week timeline. If you want the full system, keep reading.
What Are 360 Waves?: How To Get 360 Waves
360 waves are a hairstyle where your natural curl pattern is trained to lay flat in a continuous ripple that radiates outward from the crown in every direction. The “360” means waves go all the way around: front, sides, back, and crown.
Most guides describe waves like a haircut. They are not. Waves are a trained curl pattern. Your hair already has a natural curl. What you are doing is brushing every curl in the same direction, compressing it into position, and repeating that process until the hair holds that shape on its own.
Tightly coiled hair (4A through 4C) naturally wants to spiral. Brushing forces those spirals to flatten in one direction. Compression from a durag holds the hair in that position while you sleep, work, and live your life. Over weeks, the curl sets into a wave. Multiply that across your entire head and you have 360s. (We recommend this Lusters S-Curl 360 Wave Control Pomade.)
Anyone telling you waves happen overnight is selling something. This takes six to 12 weeks of consistent daily brushing, proper wolfing, and durag compression. My uncle used to say the best waves in the shop always belonged to the most patient man in the chair. He was right.
What You Need to Start
You do not need 15 products. You need four good ones.
1. A Quality Wave Brush
Start with a medium bristle brush. Medium bristles are firm enough to train the curl pattern without irritating your scalp on short hair. I recommend the Torino Pro Wave Brush. The bristle density is consistent, the handle sits right in your palm, and it holds up through months of daily sessions.
After four weeks, add a hard bristle brush for deeper penetration once your hair has more length. Do not start with hard bristles on short hair. You will scratch your scalp and create irritation that makes you want to quit.
2. A Durag
Compression is not optional. Without a durag, your brushwork means nothing because the hair springs right back to its natural position. The Wavebuilder Premium Velvet Durag is my pick for wave training. Velvet provides the heaviest compression. For overnight wear, silk or satin retains moisture and reduces friction. Check our full best durag for waves guide for a complete material breakdown.
3. Wave Pomade
Sportin’ Waves Pomade has been the barbershop standard for decades. Affordable, medium hold without flaking, and no heavy buildup. Apply a dime-sized amount before each brush session.
Quick note on product types: wave grease (petroleum-based) gives the strongest hold but causes buildup. Pomade (water-based) balances hold and moisture. Moisturizers add hydration with minimal hold. For beginners, water-based pomade is the safest choice.
4. Sulfate-Free Shampoo
Regular shampoo strips the natural oils your waves need. Wavebuilder Wave Shampoo cleans without disrupting your wave pattern. Wash once a week during wolfing. Mastering how to get 360 waves takes practice but delivers great results.
Starter Checklist
| Item | Product | Price | Purpose |
|---|---|---|---|
| Medium brush | Torino Pro Wave Brush | $12-18 | Primary training tool |
| Velvet durag | Wavebuilder Velvet Durag | $8-15 | Compression and pattern setting |
| Wave pomade | Sportin’ Waves Pomade | $3-5 | Hold and moisture |
| Wave shampoo | Wavebuilder Wave Shampoo | $6-9 | Gentle cleansing |
Total startup cost: $29 to $47. Less than a single barbershop visit in most cities.
The Daily Wave Routine (Step by Step)
This is the system. Every step matters. Mastering how to get 360 waves takes practice but delivers great results.
Step 1: Start With a Fresh Haircut
Go to your barber and ask for a 1.5 or 2 guard with the grain (WTG). Tell them you are growing waves so they cut with the grain instead of against it. Cutting against the grain disrupts the curl direction you are trying to train. If your barber does not know what WTG means for waves, find one who does. Check our best clippers for Black men guide if you want to do maintenance cuts at home.
Step 2: Apply Pomade
Dime-sized amount, rubbed between your palms until warm. Distribute evenly from the crown outward. Thin, even coat. Too much causes buildup that blocks your wave pattern. Too little means the brush drags.
Step 3: Brush
Set a timer for 10 to 15 minutes and brush. Every stroke starts at the crown and pushes outward toward the hairline. I break down specific brushing patterns in the next section, but the fundamental rule is: crown outward, always.
Use moderate pressure. You are training each curl to lay in a specific direction, not scrubbing a floor. If your scalp feels raw, lighten up or use a softer brush until your scalp adjusts.
Step 4: Compress
Immediately after brushing, put your durag on. Tie it snug but not tight. You should fit one finger between the fabric and your forehead. Tying too tight causes headaches and can lead to traction alopecia (hair loss from sustained tension) over time. Wear the durag for a minimum of 30 minutes after every session.
Step 5: Wash and Style (Weekly)
Once a week, do a wash-and-style session: For more guidance, AAD provides expert resources on Black hair care.
- Wet your hair with warm water.
- Apply a quarter-sized amount of wave shampoo.
- Wash in the same direction you brush. Crown outward. Do not scrub in circles.
- Rinse thoroughly.
- While hair is still damp, apply pomade and do a full brush session.
- Durag on immediately. Leave it for at least one hour.
Damp hair is more pliable and sets deeper into the wave pattern. The wash-and-style creates some of the deepest wave impressions you will get all week.
Step 6: Sleep With Your Durag
Every night. No exceptions. Eight hours of uncompressed movement on a pillowcase undoes a significant amount of your brushwork. Keep a backup durag by your bed so you never have an excuse.
Brushing Patterns Explained
Your brush pattern determines where your waves form and how they flow. There are four zones, and each one gets brushed in a specific direction.
The Crown
The crown is the spiral point at the top-back of your head where hair naturally radiates outward. This is the center of your 360 pattern. Place your brush at the crown and push forward toward your forehead. Return to the crown and push backward toward your nape. Then crown to the left temple. Then crown to the right temple. Think of clock hands with the crown as center. You are brushing outward in every direction.
The Front and Top
Brush from your hairline straight back toward the crown. Smooth, overlapping strokes, each covering about an inch of width. Work from the center of your forehead outward to each temple, always brushing backward. The connection between front brushing and crown brushing is where your front waves form. These are the waves people notice first.
The Sides
Brush from the top of your head downward toward your ear. Start at the part line and brush straight down, then move forward and repeat, then backward. Cover the entire side with downward strokes. Side waves are the hardest to develop because most people neglect them. Spend at least three minutes per side.
The Back
Brush from the crown straight down to the nape of your neck. Work from center outward. Back waves take the longest because the durag sits loosest here.
Pattern Summary
| Zone | Direction | Time | Common Mistake |
|---|---|---|---|
| Crown | Outward in all directions | 3-4 min | Not finding your true crown location |
| Front/Top | Hairline back toward crown | 3-4 min | Brushing too fast, not overlapping |
| Sides | Top down toward ear | 2-3 min each | Skipping this zone entirely |
| Back | Crown down toward nape | 2-3 min | Not brushing low enough |
Total session: 13 to 17 minutes. Two to three times per day.
The Wolfing Guide
Wolfing is growing your hair out for four to eight weeks without getting a haircut, while maintaining your daily brush and compression routine. This is the phase that separates people who have waves from people who have a slightly textured low cut.
Why Wolfing Works
When your hair is freshly cut at a 1.5 guard, the curls are too short to fully lay into a wave pattern. They need length to bend. Think of it this way: a fresh cut is like writing in pencil. Wolfing is like tracing those pencil marks with a pen, again and again, until the lines are permanent. Understanding how to get 360 waves is key to a great grooming routine.
How Long to Wolf
| Wolf Length | Best For | What to Expect |
|---|---|---|
| 4 weeks | Beginners, first wolf | Pattern starts forming, may not be fully visible |
| 6 weeks | Ideal first wolf | Clear wave pattern, noticeable definition |
| 8 weeks | Experienced wavers | Deep impressions, waves hold after a fresh cut |
| 10+ weeks | Advanced, thick hair | Maximum depth, harder to manage daily |
Surviving the Wolf
Wolfing is uncomfortable. By week three, your hair looks puffy and unkempt. You will be tempted to cut. Do not. Understanding how to get 360 waves is key to a great grooming routine.
- Durag all day. Outside of work, keep it on. Manages the appearance and maintains compression.
- Double compression. Durag underneath, wave cap on top for extra hold when hair gets longer.
- More brush sessions. Bump to three or four per day during wolfing.
- Extra moisture. Longer hair dries out faster. Use slightly more pomade or add a light moisturizer underneath.
The Post-Wolf Cut
After wolfing, tell your barber you need a WTG cut at a 2 or 3 guard. Do not go back to a 1 or 0. You want to trim excess length while keeping enough for the wave pattern to show. After the cut, do a wash-and-style immediately to set the waves at the new length. Then start your next wolf. Each cycle deepens the pattern.
For fade options that complement waves, see our types of fades guide or the taper fade haircut breakdown.
Week-by-Week Timeline
This is the section I wish someone had given me when I started. Knowing what is normal keeps you from quitting when you should be pushing through.
Week 1-2: Foundation
Hair is short (1.5 to 2 guard). You probably see nothing, maybe faint ripples under direct light. Your curls are beginning to lay in the direction you brush them, but the hair is too short for visible depth. Brush two to three times daily, apply pomade before every session, wear your durag after every session and all night. One wash-and-style at the end of week one.
Week 3-4: Pattern Emerging
Under good lighting, you see the beginnings of a wave pattern. It will be patchy. Some areas show waves while others are flat. The areas you brush most thoroughly show the clearest pattern, which tells you where your technique needs work. Identify your weak spots (usually sides and back) and give them extra time. Do not get a haircut. This is the beginning of your wolf.
Week 5-6: Definition
After a wash-and-style or removing your durag in the morning, you see a clear wave pattern across most of your head. Not perfectly uniform, but undeniably there. Increase brush sessions to three or four daily. Consider adding a hard bristle brush for the top and front. You may get your first cleanup cut at the end of week six.
Week 7-8: Locked In
Waves are visible without ideal lighting. People are noticing. You are getting your first wave checks. Get a cleanup cut (2 or 3 guard, WTG) if you have not already, then start your next wolf to deepen the pattern further.
Timeline Summary
| Week | Phase | What You See | Sessions/Day | Key Focus |
|---|---|---|---|---|
| 1-2 | Foundation | Faint ripples or nothing | 2-3 | Build the habit |
| 3-4 | Emerging | Patchy waves under good light | 2-3 | Find weak spots |
| 5-6 | Definition | Clear pattern forming | 3-4 | Intensify weak zones |
| 7-8 | Locked In | Visible 360 waves | 3-4 | First cut, next wolf |
Hair Type Adaptations
The Andre Walker typing system is imperfect (most people have mixed textures), but it gives us a useful framework for adjustments. The standard routine I described above is built around 4B hair. Here is how to adapt.
4C Hair (Tightest Coils)
Once trained, 4C waves hold their pattern extremely well. The tight coils lock into position and resist coming undone. The tradeoff is that 4C takes longer to show visible progress and loses moisture faster. Use a slightly heavier pomade or wave grease during wolfing. Add a leave-in conditioner under your pomade. Expect results in six to eight weeks rather than four to six. Wolf for a minimum of six weeks, ideally eight.
4A Hair (Defined S-Curls)
4A sits on the border between the Black Men Grooming and curly hair categories. Waves show up faster (three to four weeks) because the looser curl lays flat more easily. The tradeoff is shallower wave depth and faster loss of definition between sessions. Use a hard bristle brush from the start. Use a stronger hold pomade. Wear your durag 45 to 60 minutes after each session instead of 30.
3C Hair (Loose Curls)
Getting 360 waves with 3C hair is possible but demands more work. Use a hard bristle brush exclusively and a heavy-hold pomade or gel-pomade hybrid. Wolf for a minimum of eight weeks. Double compress (durag plus wave cap) at all times. Your waves will look more like ripples than deep ridges, and that is normal for your texture. (We recommend this OCEAN VIEW DEEP WAVES POMADE –.)
Common Mistakes and How to Fix Them
Cutting too early. The number one wave killer. You get impatient at week three, cut, and start over. Set a calendar reminder for your wolf end date and do not touch the barber chair before then.
Sleeping without a durag. Eight hours of uncompressed pillow friction undoes a significant amount of brushwork. Cotton pillowcases are the worst. Keep a durag on your nightstand. If it comes off at night, add a wave cap on top for extra hold.
Brushing too hard. More pressure does not mean faster waves. You are training curl direction, not sanding a floor. If your scalp is red or raw, lighten up or drop to a softer brush until your scalp adjusts.
Ignoring sides and back. Most beginners obsess over the top because that is what they see in the mirror. Time your sessions by zone. Use a hand mirror to check the back. Allocate specific minutes to each area.
Wrong guard on cuts. Going too low removes trained hair. Going too high defeats the purpose. A 2 or 3 guard WTG is the sweet spot. Tell your barber: “Clean the lineup, 2 guard with the grain, do not touch the wave pattern.” Our best clippers for fades guide covers home maintenance. When it comes to how to get 360 waves, technique matters most.
Too much product. Excess pomade causes buildup that masks your wave pattern. Dime-sized amount per session. If you see white residue or your hair feels heavy, do a clarifying wash. When it comes to how to get 360 waves, technique matters most.
Skipping wash-and-style. Some beginners avoid water thinking it disrupts the pattern. The opposite is true. Damp hair sets deeper. One wash-and-style per week, always brushing with the grain while damp.
Products I Recommend
I have kept this tight. Four products, each chosen for performance on 4B and 4C hair, wide availability, and reasonable price.
Torino Pro Wave Brush ($12-18). The medium bristle version is the industry standard. Consistent bristle density, comfortable handle, months of daily use without losing shape. Best for all hair types starting out. Switch to a hard bristle Torino Pro after your first four weeks.
Sportin’ Waves Pomade ($3-5). Been in barbershops for over 30 years. Medium hold, decent moisture, washes out clean. Not ideal for 3C or 4A hair that needs stronger hold; in those cases, look for a heavy-hold wave grease.
Wavebuilder Premium Velvet Durag ($8-15). Long tails for a secure tie, thick velvet for serious compression, stitched seam that holds up daily. Best for wave training and wolfing. Switch to silk for sleeping if velvet runs too warm. Full durag roundup in our best durag for waves guide.
Wavebuilder Wave Shampoo ($6-9). Sulfate-free formula that cleans product buildup without stripping moisture. For heavy grease buildup after extended wolfing, use a clarifying shampoo once, then return to Wavebuilder for regular washes.
Frequently Asked Questions
How long does it take to get 360 waves?
Four to six weeks for a visible pattern. Eight to 12 weeks for fully defined 360 waves. The timeline depends on hair texture, brushing consistency, and wolfing discipline. 4C hair takes slightly longer but holds the pattern better once established.
What is wolfing and why does it matter?
Wolfing means growing your hair out for four to eight weeks without cutting, while continuing daily brush and compression routine. The extra length trains deeper wave impressions. Without wolfing, you cut away progress before the pattern sets.
Can you get 360 waves with any hair type?
Waves work best on Type 4 hair (4A, 4B, 4C). 4B is the sweet spot. 3C hair can achieve waves with harder bristles, stronger products, and longer wolfing. 3B or straighter hair will struggle significantly because the curl pattern is too loose to hold the wave shape.
How often should I brush?
Minimum two sessions per day, ideally three. Ten to 15 minutes each. The evening session before durag compression is the most important. During wolfing, increase to three or four sessions.
Do I need a durag?
Yes. Compression is not optional. Without it, your hair springs back to its natural curl direction after every brush session. Wear your durag 30 minutes after each session and all night. During wolfing, as much as possible.
Start Today, See Waves in Six Weeks
360 waves are not complicated. They are not magic. They are the result of a simple system applied consistently. Every person I have seen quit did so because they expected instant results. Every person I have seen succeed did so because they kept brushing when it felt pointless.
Your action plan:
- Get the four essentials: medium brush, velvet durag, wave pomade, sulfate-free shampoo
- Brush two to three times daily, 10 to 15 minutes, crown outward
- Compress after every session and all night
- Wolf four to six weeks before your first cleanup cut
- Wash and style weekly for the deepest impressions
Grab a Torino Pro Wave Brush and a Wavebuilder Velvet Durag. Get a fresh cut at a 1.5 or 2 guard WTG. Start your first session tonight. Six weeks from now, you will be glad you did.
For barbershop styles that pair with waves, check our guides on types of fades, the taper fade, and our best clippers for Black men roundup. If you have softer texture, explore our best electric shaver for Black men guide for lineup maintenance.
Further reading: For research-backed grooming advice, see Healthline Men’s Health.
Explore more tips at CulturedGrooming.com.
Further reading: For research-backed grooming advice, see Healthline Men’s Health.
Frequently Asked Questions
How long does it take to get 360 waves?
Getting 360 waves typically takes 2 to 3 months of consistent effort, though you’ll start seeing results within the first 2 to 3 weeks. The timeline depends on your hair texture, dedication to brushing, and how well you maintain compression with a durag. Most people see defined wave patterns after the wolfing phase, which lasts 4 to 6 weeks.
What’s the difference between wolfing and the regular wave maintenance phase?
Wolfing is the initial growth phase where you let your hair grow out for 4 to 6 weeks without cutting to establish your wave pattern, while regular maintenance happens after your first cut when you keep your waves sharp with consistent brushing and compression. During wolfing, your hair trains into the wave structure, making it easier to maintain the pattern long term. After wolfing, you’ll get regular fades or shape-ups to keep your waves looking fresh.
Can you get 360 waves if you have coily or textured hair?
Yes, you can get 360 waves with coily or textured hair, but your approach may differ based on your specific hair type and curl pattern. Coarser hair textures often respond well to wave training, though you may need a stiffer brush and more frequent brushing sessions to set the pattern. The key is finding the right brush bristle strength and brushing technique that works with your natural hair texture.
What brush and durag should I use to get 360 waves?
You’ll need a medium to stiff bristle wave brush (not too soft, which won’t create enough tension) and a velvet or silk durag to compress your waves after brushing. The durag should be snug enough to hold compression but not so tight that it causes discomfort or hair damage. Most beginners benefit from starting with a medium bristle brush and upgrading to a stiffer brush once they understand the brushing pattern.