How to Shave with an Electric Razor: Step-by-Step Guide
Last updated: February 2026 by Jack Brennan, White Men’s Grooming Editor
Most men who say they “tried electric and went back to blades” did not actually give electric razors a fair shot. They pulled the shaver out of the box, ran it over their face the same way they would use a manual razor, got a mediocre result, and decided the tool was the problem. It was not the tool. It was the technique.

Knowing how to shave with an electric razor properly is a different skill than blade shaving. The prep is different. The motions are different. The pressure, angle, and direction all work differently. Get these right, and an electric razor will give you a close, comfortable shave in half the time of a manual razor, with a fraction of the irritation. Get them wrong, and you will wonder why anyone bothers with electric at all.
Let me walk you through the entire process, from prep to post-shave, so you can actually get the results your shaver was designed to deliver.
Why Technique Matters with Electric Razors: How To Shave With An
A manual razor cuts hair through direct blade-to-skin contact. You lather up, put the blade on your face, and drag it through the foam. The technique is straightforward because the blade does all the work. If the blade is sharp and you do not press too hard, you get a decent shave.
An electric razor works completely differently. Whether it is a foil or rotary shaver, the cutting elements are enclosed behind a protective screen or guard. Hair has to be captured, lifted, and fed into the cutting mechanism before it gets cut. This means the angle you hold the shaver at, the direction you move it, and the speed of your strokes all directly affect how many hairs actually get cut on each pass.
The single biggest misconception is that you should use an electric razor the same way you use a blade. Long, slow strokes with heavy pressure. That approach pulls the skin into the foil or head, creates friction burns, and actually prevents the shaver from capturing hairs efficiently. Proper electric shaving technique is almost the opposite: light pressure, short strokes, and a consistent angle that lets the shaver’s mechanism work as designed.
Prep: Dry Shaving vs Wet Shaving
The first decision you need to make is whether you are shaving dry or wet. Both methods work with most modern electric razors (check your model’s specs to confirm it is waterproof if you want to use it wet). Each approach has advantages, and your skin type should drive the decision.
Dry Shaving
Dry shaving is the fastest option. No lather, no water, no prep time. You pick up the shaver and go. For daily maintenance shaves where you are just knocking down overnight stubble, dry shaving takes two to four minutes total.
The key to good dry shaving is making sure your face is actually dry. Sounds obvious, but moisture on your skin causes the foils or heads to drag instead of glide. Wash your face with warm water 10 to 15 minutes before shaving, then let it dry completely. Some men find that applying a light dusting of talcum powder or a dedicated pre-electric shave powder helps absorb any remaining moisture and allows the shaver to move freely.
Pre-shave lotions designed for electric razors (like Williams Lectric Shave) work by stiffening the hairs so they stand up straighter, making them easier for the shaver to capture. These products also reduce friction. If you shave dry and experience tugging or inconsistent results, a pre-shave product is the first thing to try before blaming the shaver. (We recommend this Williams Lectric Shave, Electric Razor Pre-Shave.)
Wet Shaving
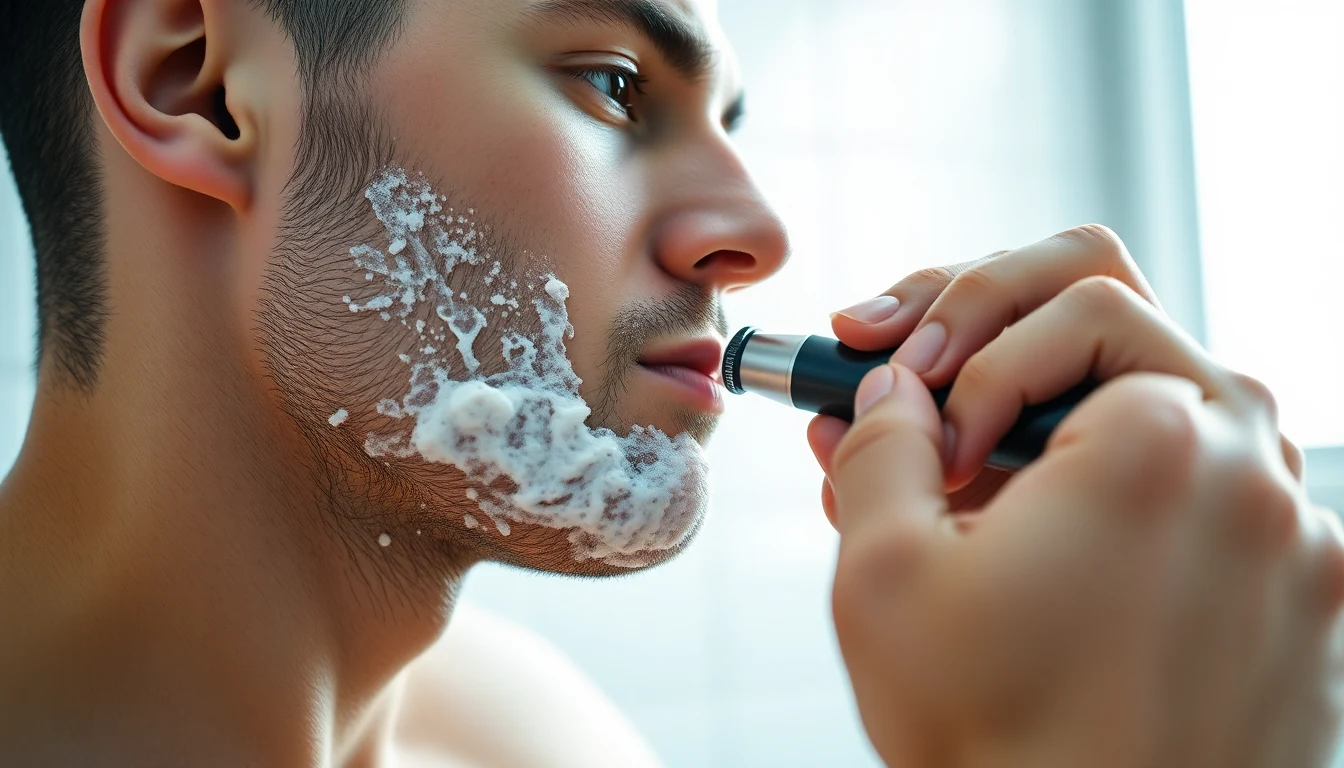
Wet shaving with an electric razor means using the shaver with water, shaving cream, or a shaving gel. This method adds lubrication, which reduces friction and irritation. It is the better choice for men with sensitive skin, those prone to razor burn, or anyone who finds dry electric shaving uncomfortable. (We recommend this Kurener Electric Shaver Razor for Men.)
For wet shaving, prep your face the same way you would for a blade shave. Wash with warm water to soften the beard and open the pores. Apply a thin layer of shaving cream or gel. Do not use thick, foamy lather because it clogs the shaver heads. A clear gel or a thin cream works best because it provides lubrication without blocking the cutting mechanism. Mastering how to shave with an takes practice but delivers great results.
Wet shaving generally produces a closer result than dry shaving because the hair is softened and stands up better when wet. The trade-off is cleanup time. You need to rinse the shaver thoroughly after each wet shave to prevent product buildup inside the cutting heads. Mastering how to shave with an takes practice but delivers great results.
Which Method Should You Choose?
| Factor | Dry Shaving | Wet Shaving |
|---|---|---|
| Speed | Faster (no prep or cleanup) | Slower (prep + cleanup) |
| Closeness | Good | Better |
| Comfort | Good for normal skin | Better for sensitive skin |
| Convenience | Can shave anywhere | Needs water and products |
| Maintenance | Less cleanup needed | Must rinse heads after each use |
Step-by-Step: How to Shave with a Foil Shaver
Foil shavers have one or more flat, perforated screens with oscillating blades beneath them. They work best with straight, linear strokes. If you own a Braun, Panasonic, or any shaver with flat foil heads, this is your technique.
Step 1: Hold the Shaver at the Right Angle
Hold the foil shaver perpendicular to your skin, at roughly a 90-degree angle. The flat foil surface should sit flush against your face. Tilting the shaver reduces contact area and means fewer hairs get captured on each pass. Keep the head flat against the skin with consistent contact.
Step 2: Use Short, Straight Strokes
Move the shaver in short, straight strokes going against the direction of hair growth. On most of the face, this means shaving upward from the jaw toward the cheekbone. Each stroke should be about 1 to 2 inches long. Short strokes give the oscillating blades time to capture and cut each hair, rather than gliding over them.
Do NOT use circular motions with a foil shaver. The linear blade design is optimized for straight passes. Circular movements lift the foil off the skin and reduce cutting efficiency.
Step 3: Stretch the Skin
Use your free hand to gently pull the skin taut in the area you are shaving. Stretched skin brings the hair follicles closer to the surface and creates a flatter surface for the foil to glide across. This makes a significant difference in closeness, especially around the jaw and neck where the skin naturally has more slack.
Step 4: Work in Sections
Divide your face into zones and work through them methodically. Start with one cheek, then the other, then the chin, upper lip, and finally the neck. Working in sections ensures you cover every area without repeatedly going over the same spot (which causes irritation). For more guidance, Men’s Health provides expert resources on men’s grooming.
Step 5: Light Pressure Only
Press the shaver against your skin with light, even pressure. Pressing hard does not give you a closer shave. It pushes the skin into the foil, creates more friction, and actually prevents hairs from poking through the perforations properly. Let the weight of the shaver do most of the work. If your face is red and irritated after shaving, you are pressing too hard.
Step-by-Step: How to Shave with a Rotary Shaver
Rotary shavers use three or four circular cutting heads that spin beneath rounded guards. They are more forgiving with technique and work well with circular motions. If you own a Philips Norelco or any shaver with round, spinning heads, follow this approach.
Step 1: Let the Heads Float
Rotary heads are designed to pivot and flex independently, following the contours of your face. Hold the shaver against your skin and let the heads do the adjusting. Do not press down trying to flatten the heads against your face. The floating action is the whole point of the design.
Step 2: Use Slow Circular Motions
Move the shaver in small, slow circles about the size of a quarter. The circular motion matches the rotary cutting action and feeds hairs into the spinning blades from multiple angles. This is especially effective for catching hairs that grow in different directions, which is common on the neck and jawline.
You can also use straight strokes with a rotary shaver, and some areas (like the flat part of the cheeks) work fine with either motion. But for contoured areas, circular wins.
Step 3: Work Against the Grain
Move the shaver generally against the direction of hair growth for the closest result. On the cheeks, this usually means upward. On the neck, hair growth patterns vary. Some men have hair that grows downward, some sideways, and some in multiple directions. Pay attention to your specific growth pattern and adjust your direction accordingly.
Step 4: Cover Problem Areas Twice
The neck and the area directly under the chin are problem zones for every type of electric shaver. The skin is looser, the hair grows in irregular patterns, and the contours make consistent contact harder. For these areas, make your initial pass, then go back with shorter, more deliberate strokes. Use your free hand to stretch the skin taut under your chin and along the front of your neck.

Step 5: Finish with the Grain
On your final pass, especially on sensitive areas, go with the grain rather than against it. This smooths out any remaining stubble without adding significant irritation. Think of it as a finishing pass, similar to how a barber does a final light pass to clean up after the main shave. Understanding how to shave with an is key to a great grooming routine. Understanding how to shave with an is key to a great grooming routine.
Problem Areas and How to Handle Them
The Neck
The neck is the hardest area to shave with any razor, electric or manual. The skin is thin and sensitive, hair grows in multiple directions, and the contour includes the Adam’s apple and the hollows on either side. Stretch the skin aggressively with your free hand. Tilt your head back and to the side to flatten the surface as much as possible. Use short, light strokes and avoid going over the same spot more than twice.
The Upper Lip
The area between your nose and upper lip is tricky because the skin is tight against the bone and the hair grows downward. Pull your upper lip down over your teeth to create a flat, taut surface. Use short downward strokes (with the grain) or across the grain for stubborn stubble. Going against the grain here causes irritation for most men.
The Jawline and Chin
The jawline’s sharp angle can cause the shaver to lose contact with the skin. Open your mouth slightly to stretch the skin over your chin and jaw. Work along the jawline rather than across it, maintaining consistent foil or head contact. For the chin itself, stretch the skin by pushing your lower lip upward toward your nose.
Around the Ears and Sideburns
Use the edge of the shaver head or the pop-up trimmer (most electric razors include one) to clean up the area directly in front of and below your ears. The main shaving heads are too bulky to get precise results at the sideburn line. For maintaining sharp sideburns, a dedicated trimmer gives you more control than the built-in pop-up.
Post-Shave Care
What you do after shaving matters almost as much as the shave itself. Electric shaving generates less irritation than blade shaving, but your skin still needs attention.
Rinse with Cold Water
Splash cold water on your face immediately after shaving. Cold water closes the pores and reduces the mild inflammation caused by the shaving process. This step alone prevents a significant amount of post-shave irritation.
Apply Aftershave or Balm
Use an alcohol-free aftershave balm rather than a traditional alcohol-based splash. Alcohol dries out the skin and causes stinging on micro-abrasions you cannot see. A soothing balm with aloe vera or witch hazel calms the skin, adds moisture, and reduces any redness. If you shave daily, this step is not optional.
Moisturize
Apply your regular facial moisturizer after the aftershave has absorbed (give it a minute). Electric shaving removes dead skin cells along with hair, which can leave the skin feeling tight and dry. A good moisturizer restores the barrier and keeps your skin healthy between shaves. Men with sensitive skin should look for fragrance-free, non-comedogenic formulas.
Common Mistakes Most Men Make
Pressing Too Hard
This is the number one mistake. Men assume that more pressure equals a closer shave. With an electric razor, the opposite is true. Pressing hard distorts the skin, pushes it into the cutting mechanism, and creates friction burns. Light, consistent pressure allows the foils or heads to capture hairs properly. If you find yourself pressing down hard, your blades probably need replacing, not more force. (We recommend this GDKLXL Rechargeable Electric Razor for Men:.)
Not Cleaning the Shaver
Hair clippings, dead skin cells, and oils accumulate inside the shaver head after every use. If you do not clean the shaver regularly, this buildup clogs the cutting mechanism, reduces performance, and creates a breeding ground for bacteria. Rinse the heads under running water after each use (if your model is waterproof). Deep clean weekly by removing the head assembly and brushing out trapped debris. Most shavers come with a small cleaning brush for this purpose.
Using Old Blades
Shaver foils and blades wear out. When they do, they stop cutting cleanly and start pulling, tugging, and irritating your skin. Most manufacturers recommend replacing the cutting heads every 12 to 18 months, but if you shave daily and have coarse hair, you might need new heads sooner. If your shave is getting progressively worse despite good technique, the blades are the first thing to check. Our budget electric shaver guide covers replacement costs for popular models.
Shaving Too Fast
Rushing through an electric shave leaves patches of stubble. The cutting mechanism needs a fraction of a second to capture and cut each hair. If you race the shaver across your face, you skip hairs. Slow, deliberate strokes produce a cleaner result than fast, sweeping passes. Two or three slow passes will always beat six fast ones.
Not Giving Your Skin Time to Adjust
If you are switching from blade to electric, your skin needs two to three weeks to adapt. During this adjustment period, the shave will feel less close than what you are used to, and you might experience some irritation. This is normal. Your skin and hair follicles need time to adjust to the different cutting action. Push through the adjustment period before deciding whether electric shaving works for you.
Skipping Pre-Shave Prep
Even for dry shaving, a quick face wash with warm water makes a measurable difference. Clean skin with no excess oil lets the shaver glide smoothly. Dirty or oily skin creates drag and reduces the shaver’s ability to lift and capture hairs. Take 30 seconds to wash your face first. Your shave will be noticeably better. When it comes to how to shave with an, technique matters most.
Keeping Your Shaver in Top Condition
A well-maintained electric razor performs dramatically better than a neglected one. These habits take seconds but make a significant difference in shave quality. When it comes to how to shave with an, technique matters most.
Oil the Blades
Apply a drop of light machine oil or dedicated shaver oil to the foils or heads every week (more often if you shave daily). The oil reduces friction between the moving parts, extends blade life, and keeps the motor running efficiently. This single step can extend the life of your cutting heads by 30 to 50 percent.
Replace Heads on Schedule
Mark your calendar. Foil and cutter combos for Braun shavers last about 18 months. Philips rotary heads last about 24 months. Panasonic foils and blades last 12 to 18 months. These are rough guidelines. If you shave daily with coarse hair, replace sooner. If you shave twice a week with fine hair, you can stretch it longer.
Store It Properly
Keep your shaver in its case or on its charging stand in a dry location. Leaving it loose in a drawer where it bangs against other items damages the foils and heads. Moisture from a steamy bathroom can corrode internal components over time. If your bathroom gets very humid, store the shaver in your bedroom instead.
When to Choose Electric Over Blade (and Vice Versa)
Electric razors are not better than blades, and blades are not better than electric. They are different tools for different priorities. Here is an honest comparison.
Choose electric if you value speed, convenience, and skin comfort. An electric shave takes half the time, requires less prep, and causes less irritation for most men. If you shave daily and have sensitive skin prone to razor burn, an electric shaver is almost certainly the better choice. For understanding the options within electric, our foil vs rotary comparison breaks down which style suits your needs.
Choose a blade if absolute closeness is your top priority and you are willing to invest more time in the process. A quality safety razor or manual razor still gets marginally closer than even the best electric shaver. For men who need a completely smooth, baby-face result for professional or personal reasons, blades deliver that last fraction of a millimeter that electrics cannot quite match.
Many men use both: an electric razor for weekday speed shaves and a blade for the weekend when they have time to enjoy the ritual. There is no rule saying you have to commit to one method exclusively. For men exploring the best electric shavers, our dedicated guides cover specific recommendations by skin type and budget.
Frequently Asked Questions
Is an electric razor as close as a blade?
Premium electric razors from Braun and Panasonic get within 0.03mm of the skin, which is close enough that most people cannot tell the difference by looking or touching. A blade can cut slightly below the skin surface, giving a marginally closer result. In practical terms, the difference is minimal for daily maintenance shaving. If you need an absolutely glass-smooth finish for specific occasions, a blade still has a slight edge. For everyday use, modern electrics are close enough that the speed and comfort advantages outweigh the tiny gap in closeness.
How long does it take to shave with an electric razor?
A full-face dry shave with an electric razor takes two to four minutes once you have your technique dialed in. Wet shaving with cream or gel adds another two to three minutes for prep and cleanup. Compare this to a full blade shave, which typically takes seven to twelve minutes including lather, shave, rinse, and cleanup. The time savings with electric are real and significant, especially over a week or month of daily shaving.
Is wet or dry electric shaving better?
It depends on your skin. Dry shaving is faster and more convenient. Wet shaving is more comfortable and produces a slightly closer result because the warm water and cream soften the hair and reduce friction. Men with sensitive skin, coarse beards, or a history of razor burn should wet shave. Men with normal skin who prioritize speed can dry shave without issues. Try both methods for a week each and see which gives you better results. Your skin and hair type are the deciding factors, not anyone else’s opinion.
When should I replace my electric razor blades?
Replace foils and cutters every 12 to 18 months for daily use. Signs that your blades need replacing include: the shave takes longer than it used to, the shaver pulls or tugs at hairs, your skin feels more irritated after shaving, or the shaver runs noticeably hotter during use. Do not wait for the blades to feel dull like a kitchen knife. By the time you notice obvious dullness, you have been getting subpar shaves for weeks. Set a reminder and replace proactively.
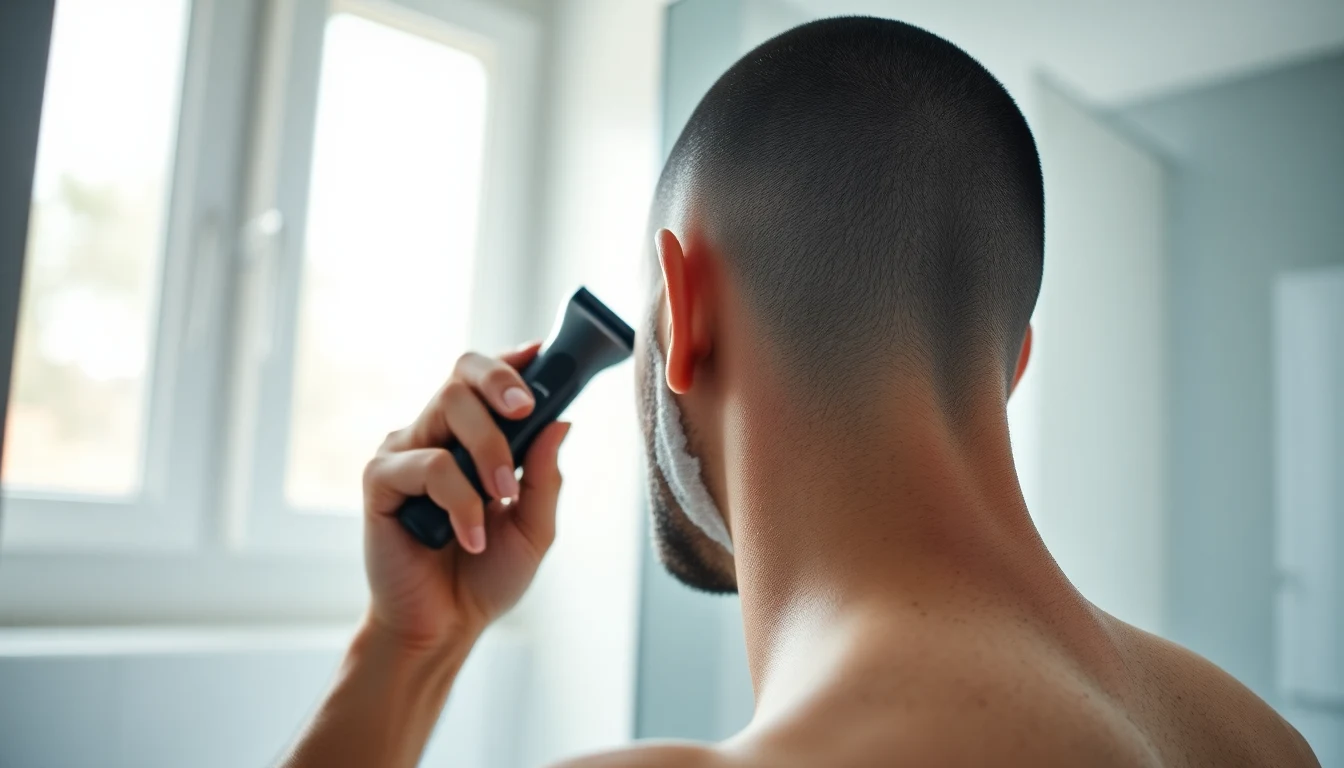
Can I use an electric razor on my head?
Yes, and many electric razors work well for head shaving. Rotary shavers tend to be better for heads because the circular cutting heads follow the curved contour of the skull naturally. Foil shavers work too but require more attention to angle and positioning. For the closest head shave, use an electric razor in the shower with shaving cream, and shave against the grain in short strokes. Dedicated head shavers are designed specifically for this purpose, with ergonomic shapes that make it easier to reach the back of your head.
Further reading: For research-backed grooming advice, see Healthline Men’s Health.
Explore more tips at CulturedGrooming.com.
Further reading: For research-backed grooming advice, see Healthline Men’s Health.
Frequently Asked Questions
What’s the difference between a foil shaver and a rotary shaver for electric razors?
Foil shavers use straight, back-and-forth strokes with oscillating blades under a thin foil, making them ideal for precise lines and sensitive skin. Rotary shavers use circular motions with spinning heads and work best against the grain, making them better for longer beards and larger facial areas.
Why do most men fail when they first try an electric razor?
Most men use an electric razor the same way they use a manual blade, applying heavy pressure and fast strokes, which doesn’t work with electric technology. Electric razors require light pressure, proper technique, and a skin adjustment period of several weeks before you’ll see optimal results.
Is dry shaving or wet shaving better when using an electric razor?
Both methods work, but wet shaving with pre-shave oils or creams provides more lubrication and reduces irritation, especially for men with sensitive or textured hair. Dry shaving is faster and more convenient, though it may cause more friction on certain skin types.
How often should you replace the blades on your electric razor?
Most electric razor blades last 12-18 months with regular use, depending on your hair density and shaving frequency. You’ll notice a decline in shaving quality when blades are worn out, so replacing them on schedule prevents skin irritation and ensures a close shave.