Last updated: February 2026 by Darius Washington, Black Men’s Grooming Editor
I remember the first time my waves passed a real wave check. I was fifteen, sitting in my uncle’s barbershop in Atlanta, and one of the older guys told me to tilt my head under the ceiling light. I leaned forward, the fluorescent caught the ripples, and the whole shop went quiet for exactly one second before somebody said, “Alright, young blood. You official.” That one second changed how I thought about my hair forever.
A wave check is more than showing off your 360 waves. It is a ritual, a proof of work, and a cornerstone of Black hair culture. This guide covers everything you need to know: what a wave check actually is, how to do one properly with the right lighting and angles, the culture behind wave checks in barbershops and on social media, the rating system people use, and how to get your waves ready for inspection. Whether you are six weeks into your first wolf or rocking spinners after a year of dedication, you need to know how to present your work.
If you only read one section, skip to the step-by-step wave check guide. If you want to understand the culture and get your waves to the next level, read the whole thing.
What Is a Wave Check?
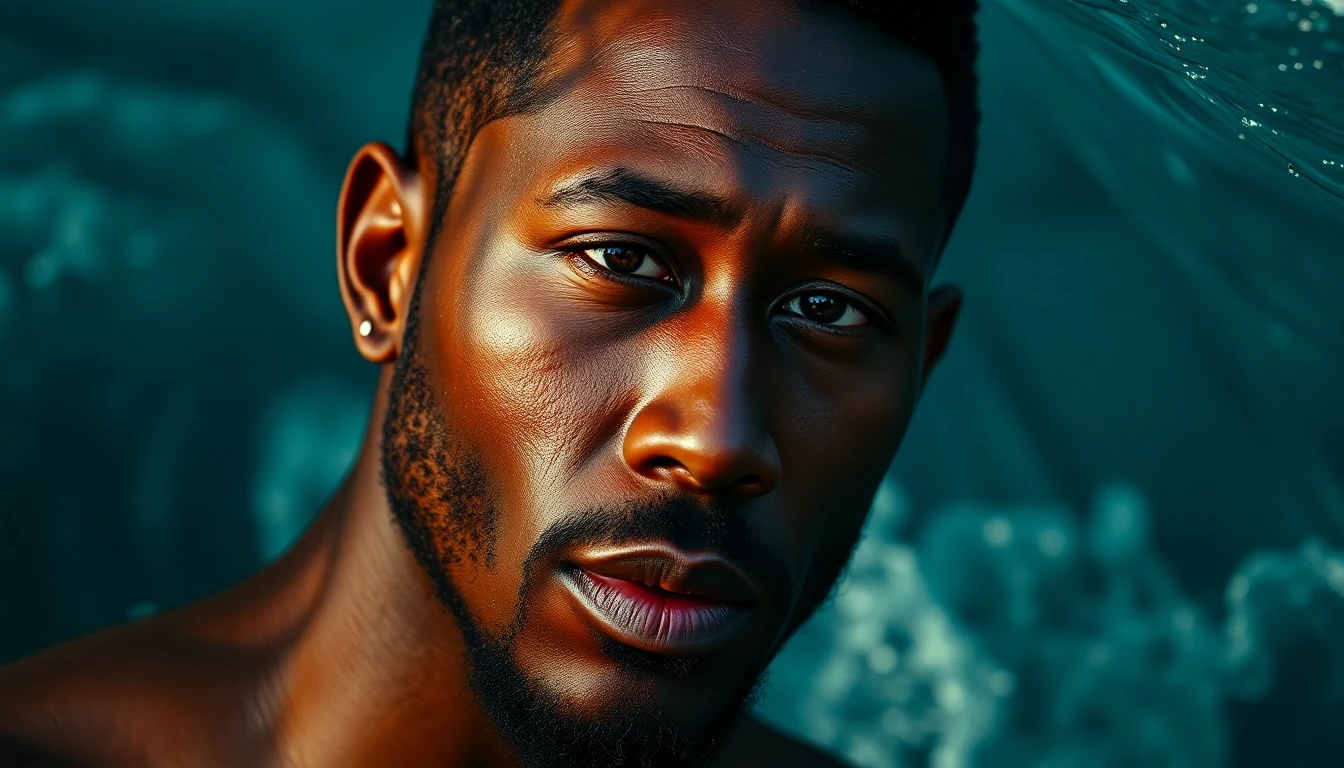
A wave check is the act of displaying your 360 wave pattern under good lighting so others can see the depth, definition, and symmetry of your waves. You tilt your head, position yourself under a light source, and let the ripples speak for themselves. That is it at its core. But the cultural weight behind those few seconds is enormous.
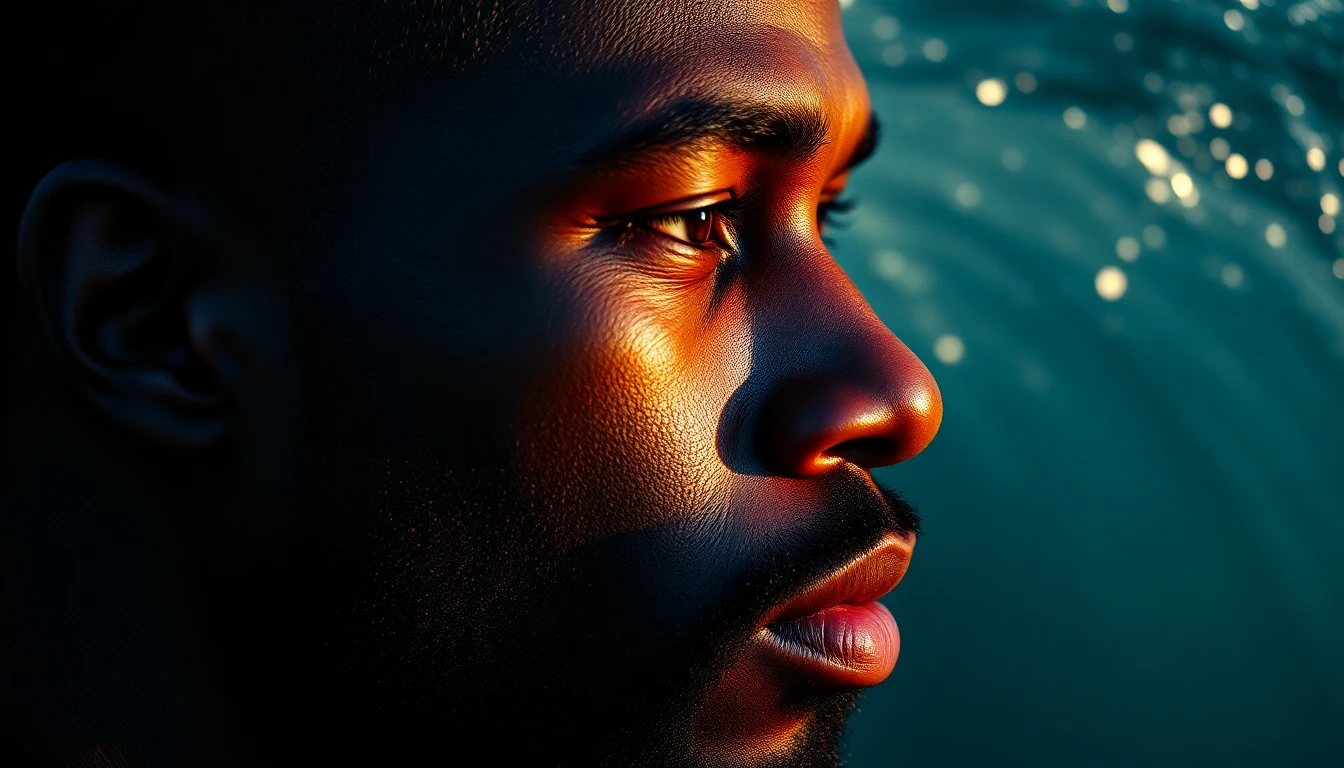
In practical terms, a wave check involves three elements: positioning your head so the waves are visible, finding lighting that creates shadows between the wave ridges, and presenting the pattern from an angle that shows its best features. The goal is to let people see the work you have put in. Waves do not happen overnight. They are the result of weeks or months of consistent brushing, compression, wolfing, and product discipline. A wave check is the proof.
The term originated in barbershop culture. After a fresh cut, a barber hands you the mirror, and the first thing you do is check your waves. Did the pattern hold through the cut? Are the connections tighter? Did the wolf pay off? That inspection moment became a social act. When someone says “wave check,” they are asking you to prove what your hair can do.
The Culture Behind the Wave Check
Barbershop Origins
The barbershop has always been where waves get validated. I grew up in Atlanta, and the unwritten rule was simple: if your barber finishes your cut and nobody in the shop comments on your waves, you have more work to do. A good wave check in the shop earns respect. It means you have been putting in the brush time, sleeping in your durag, and resisting the urge to cut too early during the wolf.
In most barbershops I have been to, the wave check happens naturally. The barber spins the chair, holds the mirror behind your head, and you tilt forward to see the crown. If the waves are connecting from front to back with no forks or breaks, the reaction is immediate. It is not about vanity. It is about recognizing discipline. Barbershops have been the proving ground for wave culture since before Instagram existed.
The dynamic is specific, too. Older heads in the shop might have been rocking waves since the 1990s. Younger guys come in with their first wolf still growing out. The wave check is the great equalizer. Your age does not matter, your outfit does not matter, and your barber’s reputation does not matter. The waves either speak or they do not.
Social Media and the Wave Check Revolution
Social media took the barbershop wave check and turned it into a global phenomenon. Instagram accounts like @wavecheck and @360waves built massive followings by posting daily wave check content. TikTok amplified it further with short-form video wave checks set to music, where the durag removal is treated like a reveal moment. The hashtag #wavecheck has hundreds of millions of views across platforms.
What makes social media wave checks different from barbershop checks is the performance element. In a shop, you tilt your head and people react in real time. On social media, you choreograph it. The camera angle, the lighting setup, the durag pull, the slow head tilt. All of it is intentional. And the comment sections serve as the rating panel. “9/10.” “Spinners crazy.” “The connections on the sides need work.” It is crowd-sourced quality control.
The social media wave check also created competition. Wave check challenges, where users tag each other and compare patterns, pushed wavers to get more serious about their routines. I have talked to guys who started wolfing for eight weeks instead of four because they saw someone on TikTok with deeper connections. That is the power of visible accountability.
Wave Checks as Cultural Identity
Waves are one of the most recognizable hairstyles in Black culture, and the wave check reinforces that identity. It connects to a broader tradition of Black men taking pride in their hair despite a society that has historically policed it. The durag itself has been banned in schools, malls, and workplaces. Waves and the tools used to maintain them have been treated as “unprofessional” in spaces that simply did not understand the culture.
When a young man posts a wave check online and gets hundreds of positive comments from other Black men, that is community. When a barber inspects a client’s waves and gives an honest assessment of what needs work, that is mentorship. The wave check is not just about aesthetics. It is a handshake between people who understand the work.
How to Do a Wave Check Properly
A bad wave check can make good waves look mediocre. A well-executed wave check can make decent waves look impressive. Here is the complete breakdown of how to present your 360 waves for maximum impact.
Step 1: Find the Right Lighting
Lighting is the single most important factor in a wave check. The wrong light will flatten your pattern and make deep waves look like a low buzz cut. The right light will create shadows between each wave ridge, making the ripples pop with dramatic depth.
Best lighting sources for wave checks:
- Overhead single-point light: This is the classic barbershop setup. One bright light directly above your head creates strong shadows between wave ridges. Ceiling-mounted LED panels and ring lights work perfectly.
- Natural sunlight at an angle: Step outside during golden hour (the hour before sunset or after sunrise) and tilt your head. The low sun angle hits the waves at a slant that deepens every ripple. This is the best free lighting available.
- Bathroom vanity lights: If you position yourself so the light hits from above and slightly in front, bathroom lights can produce a solid wave check. Avoid standing directly under them where the light falls flat on top.
- Ring light: For social media wave checks, a ring light positioned about two feet above your head gives consistent, even lighting that photographs well.
Lighting to avoid:
- Flat fluorescent panels: These spread light evenly across your head and eliminate the shadows that make waves visible. Office lighting and some kitchen lights fall into this category.
- Direct flash from a phone camera: Flash kills wave definition by washing out the surface texture. Turn it off and rely on ambient light.
- Backlit situations: If the light source is behind you, your head is in shadow and no one can see the pattern.
Step 2: Get Your Angles Right
Different angles showcase different parts of your wave pattern. The goal is to know which angle highlights your strongest section.
The overhead angle (most popular): This is the wave check standard. Tilt your chin down so the top of your head faces the camera or the person inspecting your waves. This angle shows the crown spiral and the connections from front to back. For photos, hold the camera directly above your head and shoot downward.
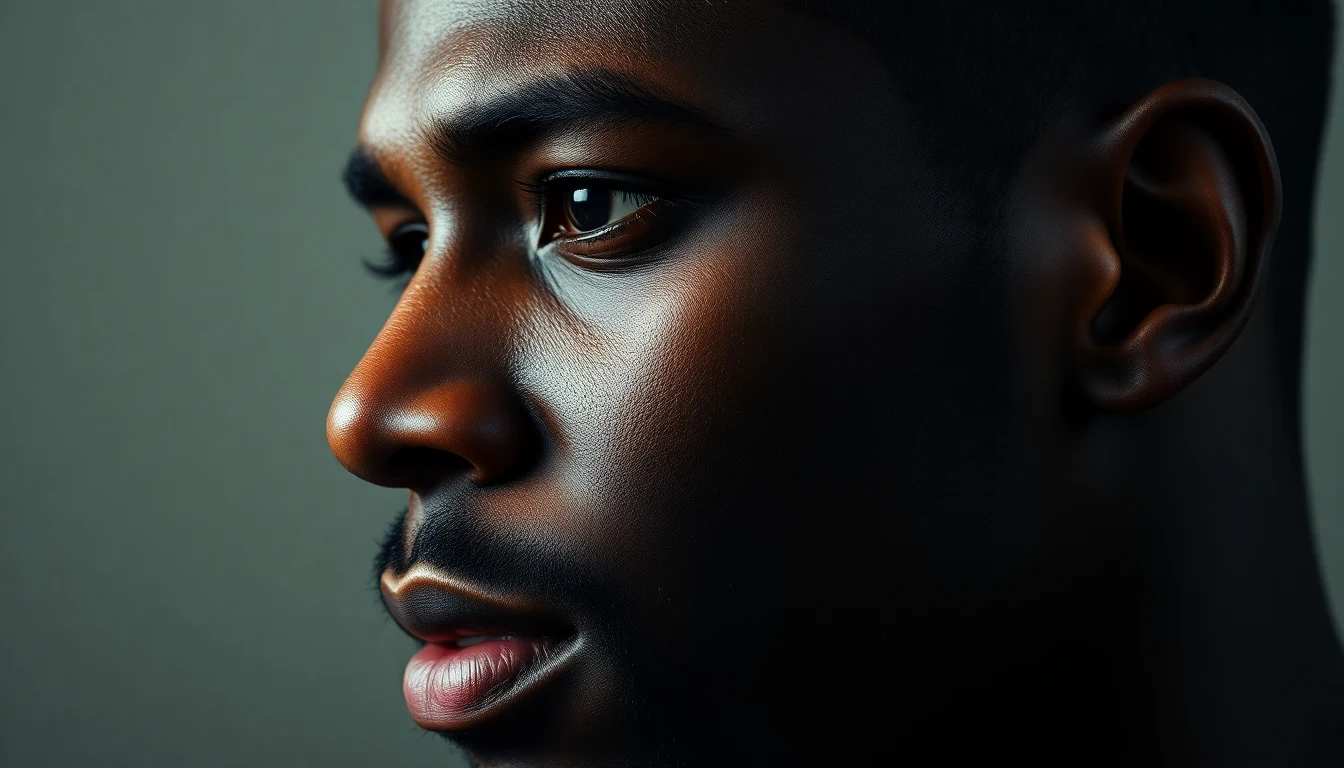
The 45-degree front angle: Position the camera slightly above eye level, tilted down at about 45 degrees. This catches the front wave connections and the transition into the sides. Use this angle if your front waves are your strongest feature.
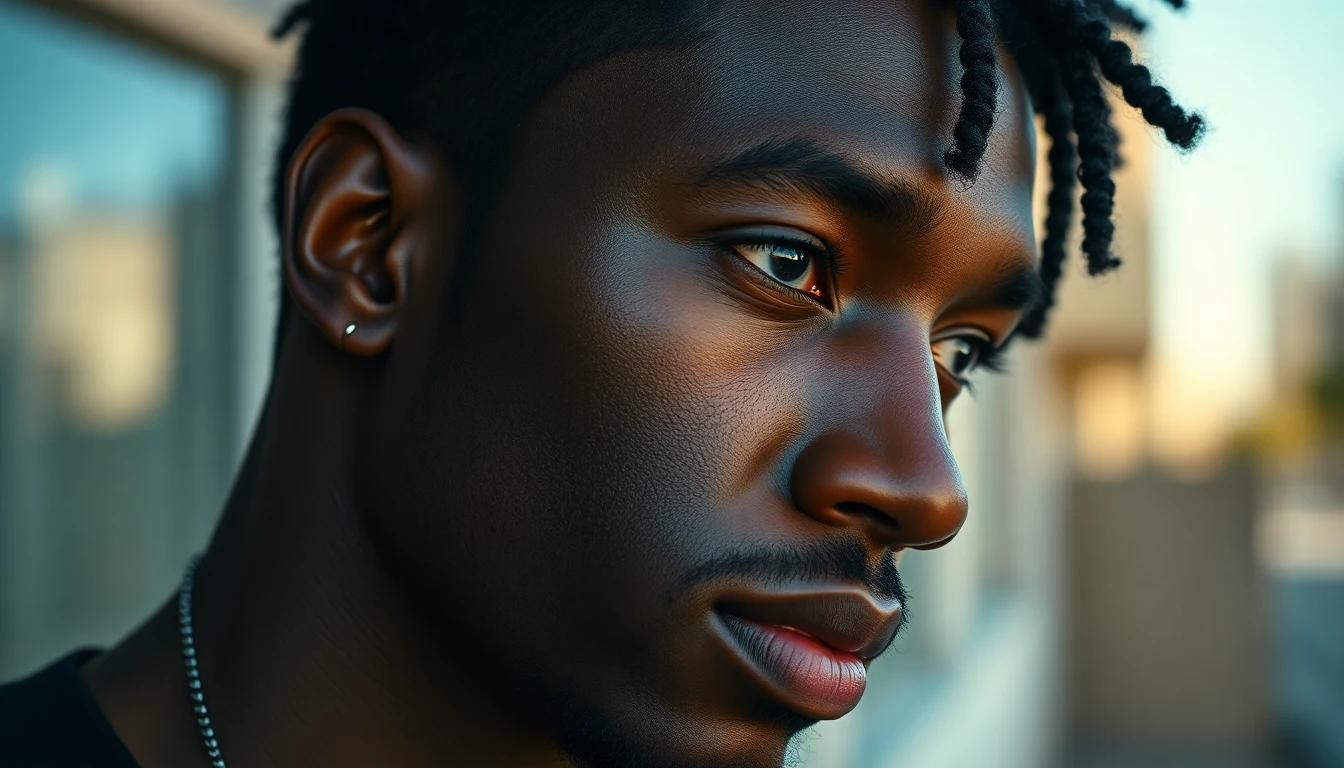
The side profile: Turn to the side and tilt slightly. This shows how well your waves extend past the temples and connect to the back. Side waves are harder to develop than top waves, so a strong side profile wave check earns extra respect.
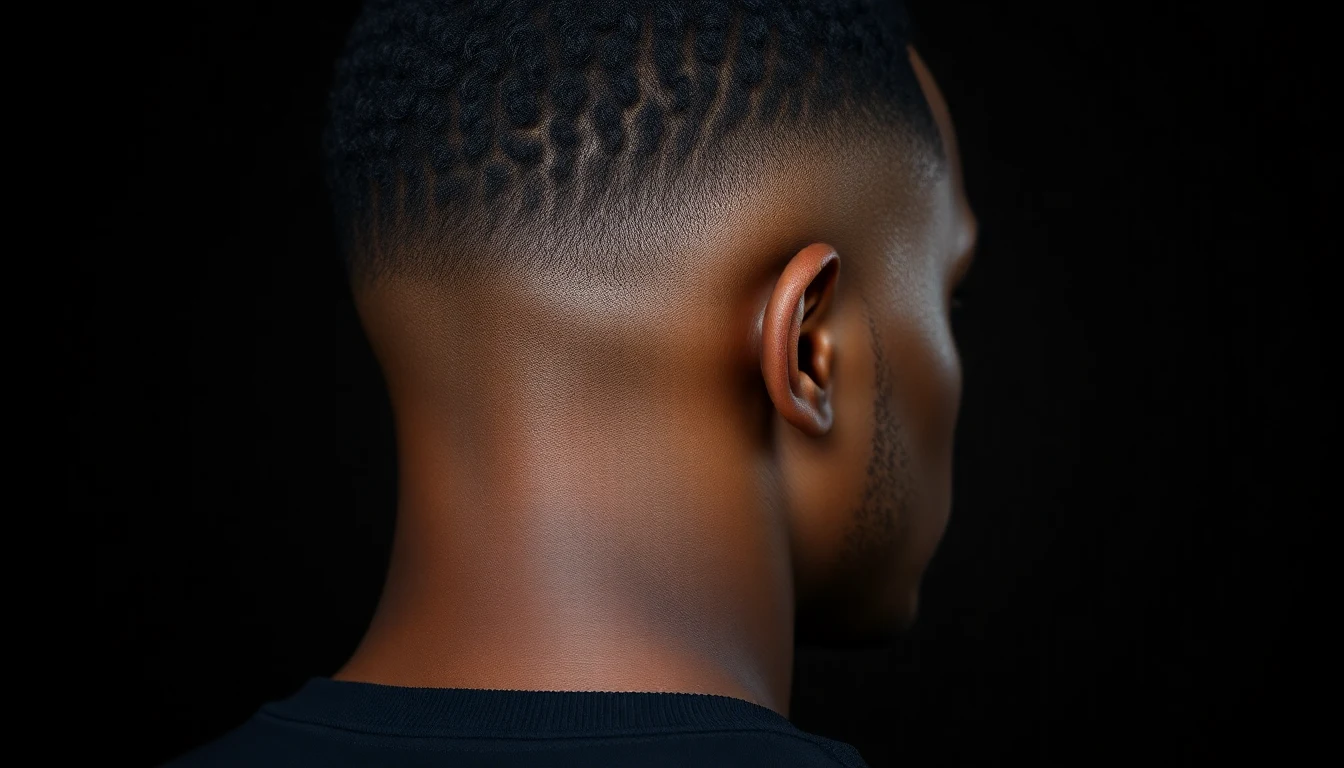
The crown shot: Have someone stand directly behind and above you while you look straight down. This isolates the spiral at the crown, which is where spinner patterns are most visible. If you have spinners, this is your money angle. For more guidance, American Academy of Dermatology provides expert resources on skin and hair care.
The full 360 video: For social media, the slow head rotation video is the ultimate wave check. Sit in a chair, tilt your head slightly forward, and rotate slowly while the camera stays fixed above you. This shows every angle and exposes any weak spots or forks.
Step 3: Camera Settings for Wave Check Photos
If you are posting wave checks on social media, camera settings matter more than most people realize.
| Setting | Recommendation | Why |
|---|---|---|
| Flash | Off | Flash washes out wave shadows |
| HDR | Off | HDR smooths textures and reduces wave depth |
| Resolution | Maximum | Higher resolution captures wave detail |
| Focus | Tap to focus on waves | Ensures the wave pattern is sharp, not the background |
| Portrait mode | Off for close-ups, on for full head shots | Portrait mode can blur wave details on tight crops |
| Zoom | No zoom; move the camera closer | Digital zoom degrades image quality |
| Filter | None or slight contrast boost | Heavy filters obscure the natural wave texture |
One tip I learned the hard way: wipe your camera lens before shooting. A smudged lens makes everything look soft, and soft photos do not show wave definition. It takes two seconds and makes a noticeable difference.
Step 4: The Durag Removal (For Social Media)
On TikTok and Instagram Reels, the durag removal has become the signature opening of a wave check video. The routine is simple but has its own technique.
- Start with the durag on. The durag should have been on for at least 30 minutes after your most recent brush session, ideally longer. This ensures the pattern is compressed and fresh.
- Position yourself under good lighting first. Do not remove the durag and then go searching for light. Be set up before you pull.
- Untie slowly from the back. Pull the tails, let the wrap loosen, then slide the durag off from front to back in one smooth motion. No rushing.
- Tilt your head immediately. The first few seconds after durag removal are when the compression is sharpest and the waves look their deepest. Tilt forward and let the camera capture the pattern.
- Do not touch your hair. Your hands disrupt the compression. Let the waves sit exactly as they land after removal.
I have seen guys with solid waves ruin their wave check videos by fumbling the durag removal or touching their head too soon. The reveal is part of the presentation. Treat it with the same discipline as the brushing itself.
Wave Check Ratings and Grades
Wave check culture has developed its own informal rating system. Whether you are getting rated in a barbershop or in the comments of a social media post, here is what the numbers mean.
The 1 to 10 Scale
| Rating | Wave Status | What It Looks Like |
|---|---|---|
| 1-2 | No visible pattern | Hair looks like a regular low cut. No wave definition at all. Either not brushing or just started. |
| 3-4 | Forkiness / early stage | Some wave lines forming but they fork, split, or do not connect. Inconsistent pattern with gaps. This is where most beginners sit after two to three weeks. |
| 5-6 | Connecting waves | Wave lines are running consistently from the crown outward. Most forks are gone. Pattern is visible but shallow. This is the “almost there” stage, usually around four to six weeks. |
| 7-8 | Defined 360 pattern | Waves are deep, consistent, and visible from every angle. Connections run clean from front to back and around the sides. Good symmetry. This is where most dedicated wavers land after two to three months. |
| 9-10 | Spinners / elite | Deep, crisp waves that appear to spiral from the crown. Perfect symmetry on all sides. No forks, no breaks, no thin spots. The wave ridges cast visible shadows under any decent lighting. Typically requires six months to a year of consistent work. |
What Raters Look For
When someone rates your waves, whether in the barbershop or in your comments, they are evaluating five key areas:
- Depth: How deep are the wave ridges? Shallow ripples score lower. Deep, visible grooves that cast shadows score high.
- Definition: Are the individual wave lines crisp and clean, or blurry and muddled? Each line should be distinct.
- Symmetry: Do the waves radiate evenly from the crown in all directions? Asymmetric patterns, where the left side looks different from the right, lose points.
- Connection: Do the wave lines run continuously from the crown all the way to the edges? Breaks, forks, or disconnects are the most common deductions.
- Coverage: For 360 waves specifically, the pattern needs to cover the entire head. Strong top waves with weak sides will not score above a 7. Full 360 coverage is what separates good from great.
The Unspoken Rules
Nobody writes these down, but everyone in wave culture knows them:
- Fresh cut bias: Waves look their sharpest right after a cut because the shorter length makes the pattern more visible. Some experienced raters mentally adjust for this, evaluating the wave depth independent of the haircut freshness.
- Lighting matters to the rating. If your wave check photo has poor lighting, expect lower ratings even if your waves are solid. Presentation counts.
- Wolfing waves get respect. If someone posts a wave check during a wolf (longer hair length), the ratings tend to be more generous because the community knows the discipline required to maintain waves during a wolf.
- Self-ratings are always questioned. If you post your own wave check and caption it “9/10,” the comments will let you know whether that assessment is accurate.
Wave Progress Stages: From Forkiness to Spinners
Understanding where you are in the wave journey helps you set realistic expectations for your wave check. Here are the five stages every waver goes through.
Stage 1: Forkiness (Weeks 1-3)
This is where every wave journey starts. Your curl pattern has not been trained yet, so the waves split, fork, and go in different directions. Under a light, the pattern looks scattered and random. Some lines might start to form, but they do not connect.
What you see: Wave lines that split into a “Y” shape instead of running straight. Random swirls that do not follow a consistent direction. Patches where the hair lays flat with no pattern at all.
What to do: Brush three times daily for 15 minutes each session. Focus on brushing from the crown outward in consistent directions. Wear your durag after every session and all night. Use a medium bristle wave brush and a light pomade. Do not expect to pass a wave check at this stage. This is the foundation phase.
Stage 2: Connecting (Weeks 3-6)
The forks start resolving. Wave lines begin to merge and run in longer, more consistent paths from the crown. You can see a pattern forming, but it is still shallow and may have inconsistencies on the sides or back.
What you see: The top of your head has visible wave lines that mostly run in the right direction. Forks are fewer. The sides and back still lag behind because those areas are harder to brush consistently. Under good lighting, the pattern is visible but not dramatic.
What to do: Continue the three-session daily routine. Start paying extra attention to side and back brushing. Begin your first wolf if your barber gave you a fresh cut at the start. Do not cut your hair during this phase. Add a hard bristle brush for your evening session if the hair has enough length (about a quarter inch or more).
Stage 3: Defined Waves (Weeks 6-12)
This is where wave checks become worth posting. The pattern is visible from multiple angles. Connections run from front to crown and down the sides. The depth is developing. Under proper lighting, you can see distinct shadow lines between each wave ridge.
What you see: Consistent wave lines across the top with clear connections. Sides starting to fill in. Crown area showing a spiral pattern. The waves hold their shape even after light touching or wind.
What to do: Maintain the brushing routine, but you can start using a harder brush more frequently. Wave grease or a stronger hold pomade can help the pattern set deeper. Your first post-wolf haircut should be a 1.5 or 2 guard with the grain (WTG). Tell your barber you are maintaining waves.
Stage 4: Deep 360s (Months 3-6)
The waves are deep, defined, and cover the entire head. The 360 pattern is complete, meaning the waves extend from the crown in every direction, including the sides and back. Wave checks at this stage consistently score 7 to 8 on the informal scale.
What you see: Deep grooves between wave ridges that cast visible shadows. Full 360 coverage. The pattern holds through daily activity without significant disruption. When you remove your durag, the waves pop immediately.
What to do: Continue the routine but focus on perfecting symmetry. If one side is deeper than the other, increase brushing on the weaker side. Wolf for longer periods (six to eight weeks) to deepen the pattern. This is when deep wave techniques become critical.
Stage 5: Spinners (6-12+ Months)
Spinner waves are the pinnacle. The wave pattern is so deep and perfectly trained that the ripples appear to spiral outward from the crown in a continuous, unbroken rotation. This is the 9 to 10 on the scale. This is what wave check accounts repost.
What you see: A visible spiral effect from the crown. Every wave line connects without breaks. The depth creates strong shadows under even moderate lighting. The pattern is symmetrical in all directions. People who are not into wave culture will notice your hair and comment on it.
What to do: Maintain everything that got you here. Do not get complacent with brushing or durag discipline. Spinner maintenance is about consistency. One week of skipping sessions can soften a pattern that took months to build. Many experienced wavers at this stage brush twice daily and wolf for eight-plus weeks between cuts.
How to Get Your Waves Wave-Check Ready
Before you tilt your head under a light or point a camera at your crown, your waves need to be prepared. A wave check is only as good as the routine that built the pattern. Here is what to do in the 24 hours before you plan to show off your waves.
The Night Before
- Complete a full brush session. Fifteen minutes minimum, all directions from the crown. Use your hard bristle brush if your hair has length. Use a Torino Pro Wave Brush or Crown Quality Products brush for consistent bristle pressure.
- Apply pomade or wave grease sparingly. A thin coat of Sportin’ Waves Pomade or WaveBuilder Cocoa and Shea helps the pattern hold under compression overnight. Do not overdo it. A dime-sized amount is enough.
- Put on your durag. A velvet durag like the Wavebuilder Premium Velvet Durag provides the heaviest compression for locking in your pattern overnight. Tie it firm but not painful. The seam should sit centered on your forehead.
- Sleep without removing it. I know this is obvious, but it matters. Every hour of compression contributes to how sharp those waves look tomorrow.
The Morning Of
- Do not remove the durag immediately upon waking. Leave it on through your morning routine. Eat breakfast, brush your teeth, get dressed. The longer the compression holds, the deeper the pattern sets.
- When you remove the durag, do not touch your hair. Slide the durag off from front to back in one clean motion. Let the waves sit exactly as they are. Your hands will disrupt the compression lines.
- Quick mirror check. Inspect the pattern in your bathroom mirror. Look for areas where the compression might have been uneven. If one section looks flat, you can do a quick two-minute brush-up on that spot, then compress again with the durag for 15 minutes before doing the actual wave check.
If You Are Getting a Fresh Cut First
The best wave checks happen right after a haircut. A fresh lineup and fade cleans up the edges and removes bulk that can obscure your wave pattern. Tell your barber you are doing a wave check and want a 1.5 or 2 guard with the grain. Ask them to taper the sides without disrupting the wave connections.
After the cut, your barber will usually brush your waves down and show you the back with a mirror. This is your barbershop wave check. If the reaction is good, you know the social media wave check will land too.
Products for Maximum Wave Definition
| Product Type | What It Does for Wave Checks | Recommended Product | Price |
|---|---|---|---|
| Medium hold pomade | Adds shine, defines wave ridges, prevents frizz | Sportin’ Waves Pomade | $3-5 |
| Wave grease | Heavier hold, deepens shadow lines between ridges | WaveBuilder Cocoa and Shea | $5-8 |
| Hard bristle brush | Deepens wave impressions on longer hair | Crown Quality Products Brush | $20-30 |
| Medium bristle brush | Defines pattern without scalp irritation on shorter hair | Torino Pro Wave Brush | $12-18 |
| Velvet durag | Maximum compression for deepest pattern lock-in | Wavebuilder Velvet Durag | $8-15 |
| Silk durag | Gentle compression, retains moisture, reduces friction | Slippery Customs Silk Durag | $15-25 |
Posting Wave Checks on Social Media
If you are going to put your waves on the internet, do it right. The difference between a wave check that gets 50 likes and one that gets 5,000 is almost always about execution, not the waves themselves.
Platform-Specific Tips
TikTok: The durag-removal video format dominates on TikTok. Start with the durag on, add trending audio (wave culture has its own audio trends), and time the removal to a beat drop. Keep the video under 15 seconds for maximum replay value. Vertical format, of course. Use the hashtags #wavecheck, #360waves, and #wavygang.
Instagram: Instagram wave checks work as both Reels and carousel posts. For carousels, lead with your strongest angle (usually overhead), then include side shots, crown shots, and a comparison photo from earlier in your wave journey. Progress comparisons perform extremely well. For Reels, use the same durag-removal format as TikTok.
X (Twitter): Simple photo or short video with a caption like “wave check” and the day count. “Day 60 wave check” tells your followers how long you have been working. The wave community on X appreciates milestone posts.
Content That Performs
- Progress updates: “Week 4 vs. Week 12” side-by-side comparisons get shared heavily. People love seeing the transformation from forkiness to defined 360s.
- Wolf updates: Posting during a wolf, when your hair is longer and the waves are still visible, earns credibility. It shows you are in the grind, not just flexing after a fresh cut.
- Routine breakdowns: Show what you use and how you use it. Product flatlays with your brush, durag, pomade, and shampoo perform well as educational content.
- Barber reactions: Film your barber’s reaction when they see your wave progress. Authentic reactions are engaging content.
Common Mistakes in Social Media Wave Checks
- Using flash photography. Flash eliminates the shadows between wave ridges. Your waves will look flat and undefined in every photo where the flash fires.
- Shooting from too far away. Wave details disappear at distance. Get the camera within 12 to 18 inches of your head for close-ups.
- Over-editing. Filters that smooth skin also smooth wave texture. If you must edit, only adjust brightness and contrast. Leave sharpness alone.
- Bad audio choices. On TikTok, audio matters for reach. Using a trending sound boosts visibility. Using random music limits your audience.
- Touching your head after removing the durag. I see this constantly. The guy pulls off the durag and immediately runs his hand over his waves. Every touch disrupts the fresh compression lines.
Wave Checks by Wave Type
Not all wave checks are created equal because not all wave patterns are the same. How you approach your wave check depends on whether you are rocking 360s, 180 waves, or working on one specific section.
360 Wave Check
The standard. Your wave pattern extends from the crown in every direction: front, back, both sides. A 360 wave check should showcase the full circumference. The overhead angle is essential, and a slow rotation video is the best way to show that the pattern has no weak spots. Any forks or breaks on the sides or back will be visible, so make sure your brushing routine covers every section.
180 Wave Check
180 waves cover the top and front of the head, with the sides and back cut shorter (usually faded). A 180 wave check focuses on the front angle and the crown. The overhead shot is still effective, but you also want a straight-on front view showing how the waves frame your face. Since 180 waves do not extend around the sides, do not try to show off areas that are faded or pattern-free.
Side Wave Check
Some wavers have their strongest pattern on the sides. A dedicated side wave check uses a profile angle with the camera slightly above, capturing the wave connections from temple to nape. Side waves are notoriously difficult to train because the hair growth direction on the sides often fights the brushing pattern. Strong side waves in a wave check signal serious dedication.

Crown/Spinner Check
If you are at spinner level, the crown shot is everything. Have someone position the camera directly above your head while you look straight down. The spiral pattern radiating from the crown should be visible and tight. Spinners under good overhead lighting are the most dramatic wave check images in the entire culture.
Common Wave Check Mistakes (and How to Fix Them)
Even experienced wavers make these errors. Here is what kills a wave check and what to do about it.
| Mistake | Why It Hurts Your Wave Check | Fix |
|---|---|---|
| Bad lighting | Waves look flat and undefined | Find overhead directional lighting or golden hour sunlight |
| Touching hair after durag removal | Disrupts fresh compression lines | Hands off for at least 30 seconds after removal |
| Skipping the wolf | Waves are shallow because hair was cut too often | Wolf for a minimum of four weeks, ideally six to eight |
| Too much product | Buildup makes hair look greasy, not wavy | Use a dime-sized amount and distribute evenly |
| Wrong camera angle | Pattern is not visible or appears distorted | Use overhead for 360, front angle for 180 |
| Dirty durag | Lint and residue transfer to the wave pattern | Wash your durag weekly; rotate between two |
| No compression before check | Waves are puffy and undefined | Wear your durag for at least 30 minutes before the check |
| Using flash | Washes out all wave texture and shadows | Rely on ambient lighting; turn flash off |
Maintaining Wave-Check-Ready Waves Daily
The best wave check is one you can do any time, not just after a fresh cut. Here is the daily routine that keeps your waves presentation-ready every day of the week.
Morning Routine (10 Minutes)
- Remove durag carefully (front to back, one motion).
- Inspect pattern in the mirror. Note any flat spots.
- Apply a small amount of pomade to flat areas only.
- Brush for five to seven minutes, starting from the crown and working outward in all directions.
- Put durag back on for at least 15 minutes while you finish getting ready.
Evening Routine (15 Minutes)
- Apply pomade (dime-sized amount, distributed from crown outward).
- Brush for 10 to 15 minutes. This is your most important session. The compression that follows locks in the work overnight.
- Put on your durag immediately after brushing. Keep it on until morning.
Weekly Maintenance
- Wash once per week with a sulfate-free wave shampoo. Regular shampoo strips the natural oils your waves need. Wash day should include a full brush session after washing, then immediate durag compression.
- Moisturize your scalp with a light oil or moisturizer if you notice dryness. Dry scalp leads to itching, and scratching disrupts your wave pattern.
- Clean your brush by removing trapped hair and wiping the bristles with a damp cloth. Dirty brushes distribute buildup instead of training waves.
- Wash your durag at least once a week. Product residue and natural oils accumulate on the fabric and transfer back to your hair as lint and grime.
Frequently Asked Questions
What is a wave check?
A wave check is the act of showing off your 360 wave pattern by tilting your head under good lighting so the wave ripples are clearly visible. It started in barbershop culture where a fresh cut naturally leads to inspecting and admiring wave patterns. Wave checks have become a major part of social media culture, with dedicated accounts and hashtags where wavers post photos and videos of their progress.
How do I get the best lighting for a wave check?
Warm, directional overhead lighting produces the best wave check results. Position yourself directly under a single light source so the light hits the top of your head at a slight angle. This creates shadows between each wave ridge, making the ripples look deeper and more defined. Avoid flat fluorescent lighting, which washes out the pattern. Natural sunlight at a low angle also works well.
What angles work best for a wave check photo?
The overhead angle is the most popular and effective for wave check photos. Hold your camera directly above your head, tilt your chin down slightly, and shoot downward. For side wave definition, use a 45-degree angle from the front. For crown shots, have someone shoot from directly above. Avoid straight-on face shots because they flatten the wave pattern visually.
How long does it take to get wave-check-ready waves?
Most consistent brushers see a wave check worthy pattern within six to eight weeks of daily brushing, durag compression, and proper wolfing. The timeline depends on hair texture, brushing frequency, and product routine. Those with tighter 4C coils may take slightly longer to see surface definition but typically develop deeper, more dramatic waves once the pattern sets.
What is a spinner wave pattern?
Spinner waves are the highest level of 360 wave development. The wave pattern is so deep and well-defined that the ripples appear to spin outward from the crown like a spiral. Achieving spinner status typically takes six months to a year of consistent brushing, wolfing, and compression. Spinners are considered the gold standard of wave check culture. (We recommend this OCEAN VIEW DEEP WAVES POMADE, Gold.)
Can I do a wave check with 180 waves?
Yes. While 360 waves cover the entire head, 180 wave checks focus on the top and front of the head. The technique is the same. Tilt your head under good lighting, angle the camera above, and show the pattern. Many wavers start with 180 waves and progress to 360 as their brushing pattern extends around the sides and back.
What wave check rating system do people use?
The most common wave check rating uses a 1 to 10 scale. Scores of 1 to 3 indicate forkiness or barely visible pattern. A 4 to 6 means waves are connecting but not yet fully defined. A 7 to 8 signals strong, consistent waves with good depth. A 9 to 10 represents elite, spinner-level waves with perfect symmetry and deep ripples. Ratings are informal and vary by community, but the criteria focus on depth, definition, symmetry, and connection of the wave pattern. (We recommend this OCEAN VIEW DEEP WAVES POMADE –.)
The Bottom Line
A wave check is the intersection of discipline, culture, and presentation. It is the moment where weeks or months of brushing, wolfing, and durag compression become visible proof that the work paid off. Whether you are doing it in a barbershop mirror or in front of a million-view TikTok audience, the principles are the same.
Here is your recap:
- A wave check is showing your wave pattern under good lighting. Overhead directional light with warm color temperature gives the best results.
- Use the overhead camera angle for 360 waves, the front angle for 180 waves, and a direct crown shot for spinners.
- Prepare by brushing the night before, sleeping in your durag, and not touching your hair after removal.
- Wave check ratings evaluate depth, definition, symmetry, connection, and coverage on a 1 to 10 scale.
- The wave journey progresses through five stages: forkiness, connecting, defined, deep 360s, and spinners. Know where you are and work toward the next level.
What to do next: If your waves are not wave-check ready yet, go back to the fundamentals. Read the complete how to get 360 waves guide and build the daily routine that will get you there. If you are already rocking defined waves, work on your presentation skills with the lighting and angle techniques in this guide. Either way, keep brushing.
Your waves are only as good as your last brush session. Stay consistent.
Further reading: For research-backed grooming advice, see Healthline Men’s Health.
Explore more tips at CulturedGrooming.com.
Further reading: For research-backed grooming advice, see Healthline Men’s Health.